Table of Contents
Asset Manager - Quick Start
 Updated
by Niamh Ferns
Updated
by Niamh Ferns
Overview
The Asset Manager provides a centralised platform for you to manage, view, and update your organisation's asset inventory. You can track your devices, licenses, warranties, and more. You can also link all of these together to get a more comprehensive understanding of how your assets are being used and where.
Admin Features Overview
The Admin App lets you manage and update the models and asset classes you'll be using when adding assets to your registry.
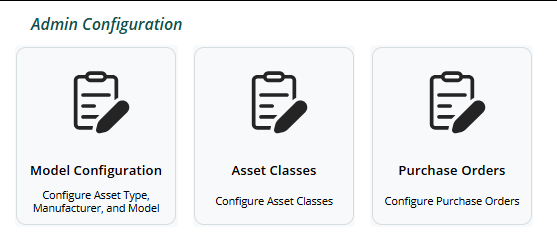
In the Admin App, you'll have access to 3 options from the dashboard:
- Model Configuration: This will take you to a section where you can manage your models, asset types, and manufacturers. Models themselves are a combination of an asset type and a manufacturer, and are given a unique name and a picture to distinguish them.
- Asset Classes: This takes you to a section where you can configure domains, warranties, subscriptions, and network device information that can be assigned to an asset when it's created.
- Purchase Orders: This will take you to a section where you can create purchase orders. These can also be attached to assets when they're created.
We'll now go take a look at each of these.
Model Configuration
When configuring models, you'll need an asset type and a manufacturer to label that model with. For example, you may have Lenovo and Laptop as a manufacturer and asset type, respectively. You can then create a specific laptop model from Lenovo using these two things:

Once you've created a model, you can then create assets based on this model.
Asset Classes
Asset classes can be assigned to an asset on creation and provide information about things that are related to that asset or further details about the asset. As part of this, you can define:
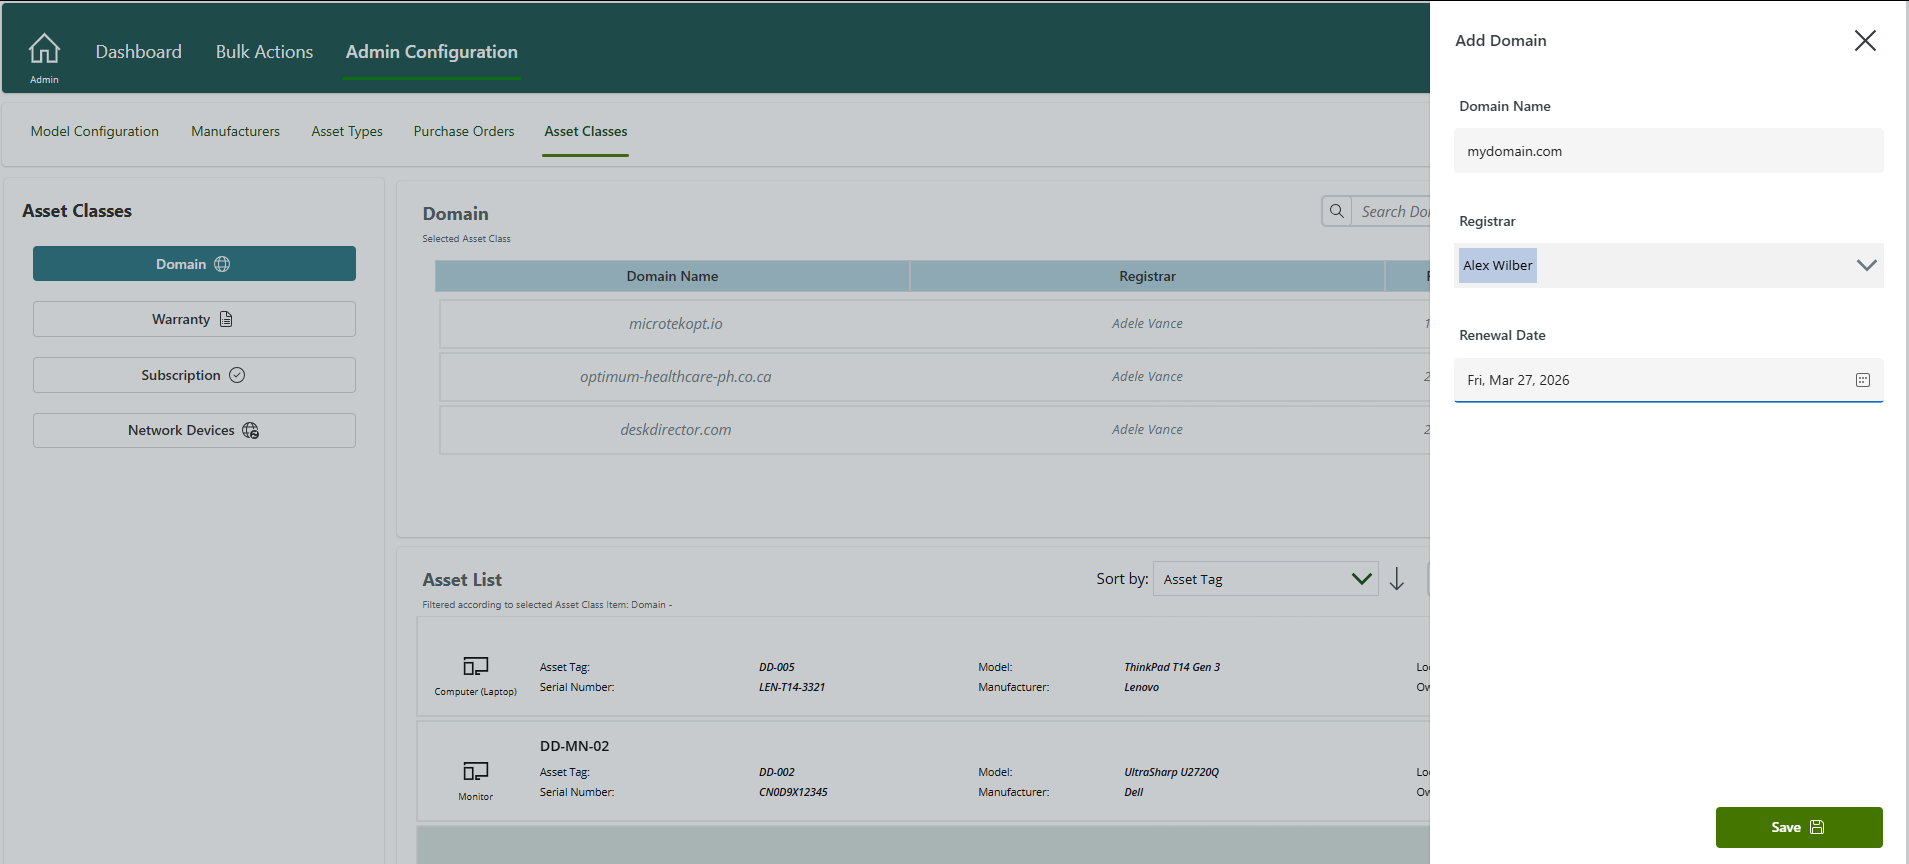
- Domains: You can create domains that have a registrar and a renewal date. These are typically attached to things like network devices:
- Warranties: You can keep track of the warranties attached to your various physical assets. Each warranty can have an expiry date, a description, and a name:

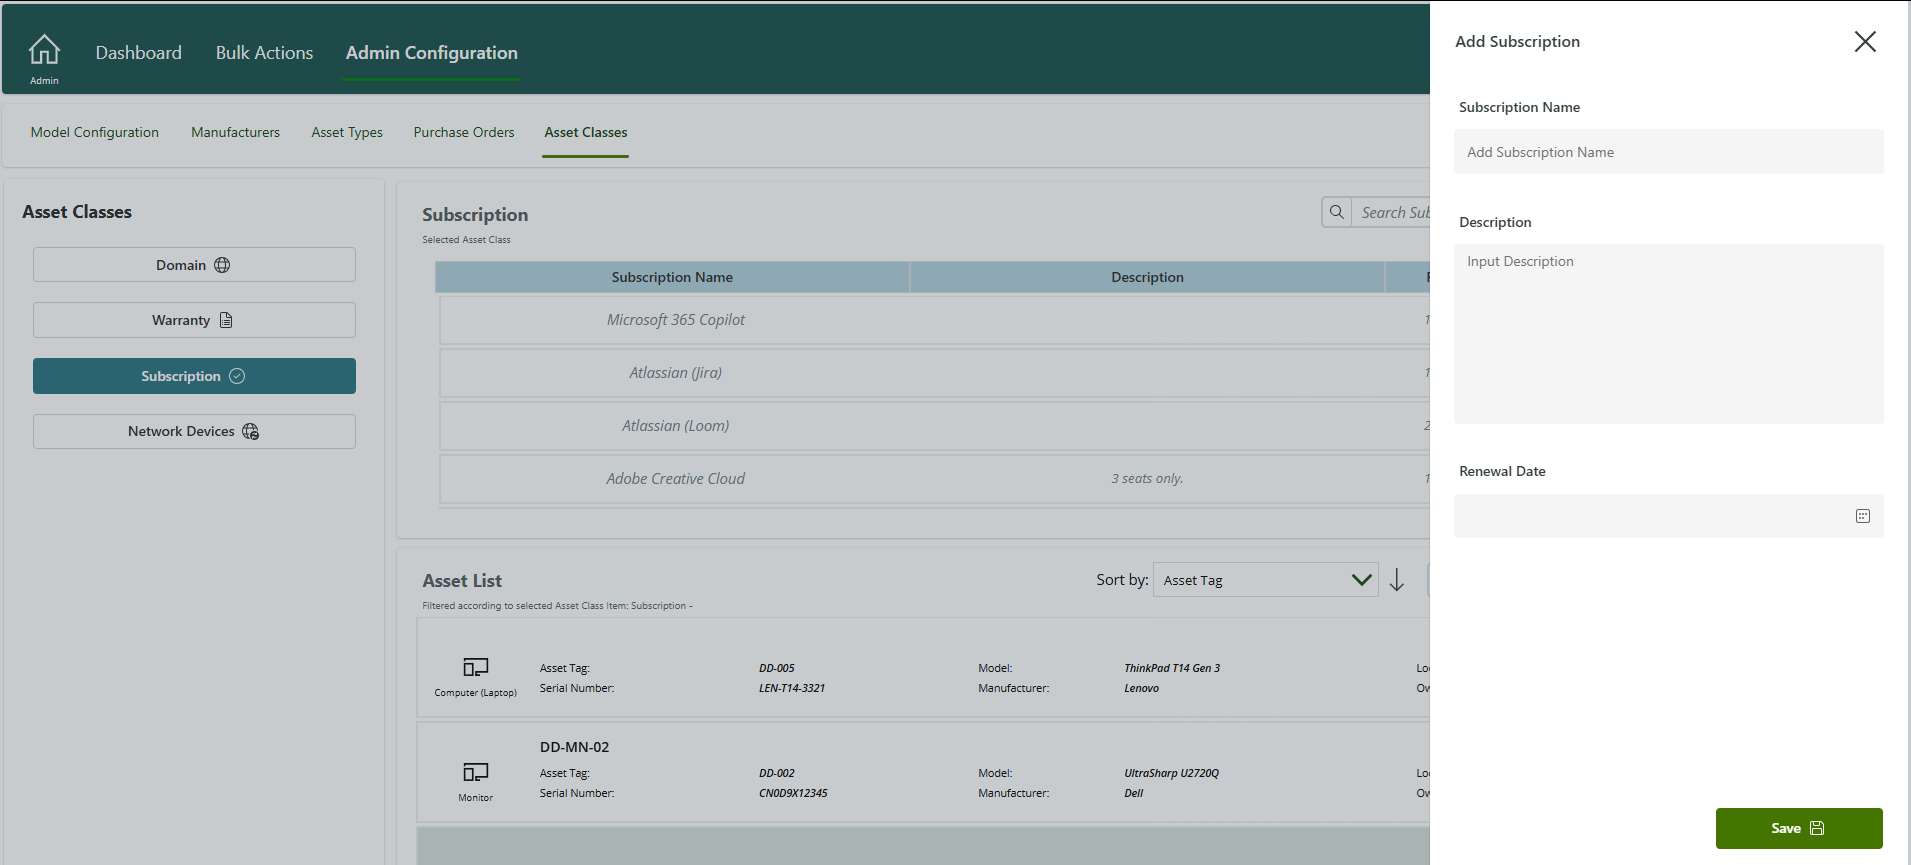
- Subscriptions: You can keep track of your subscriptions and attach them to your assets. Each subscription can have a renewal date, a description, and a name:
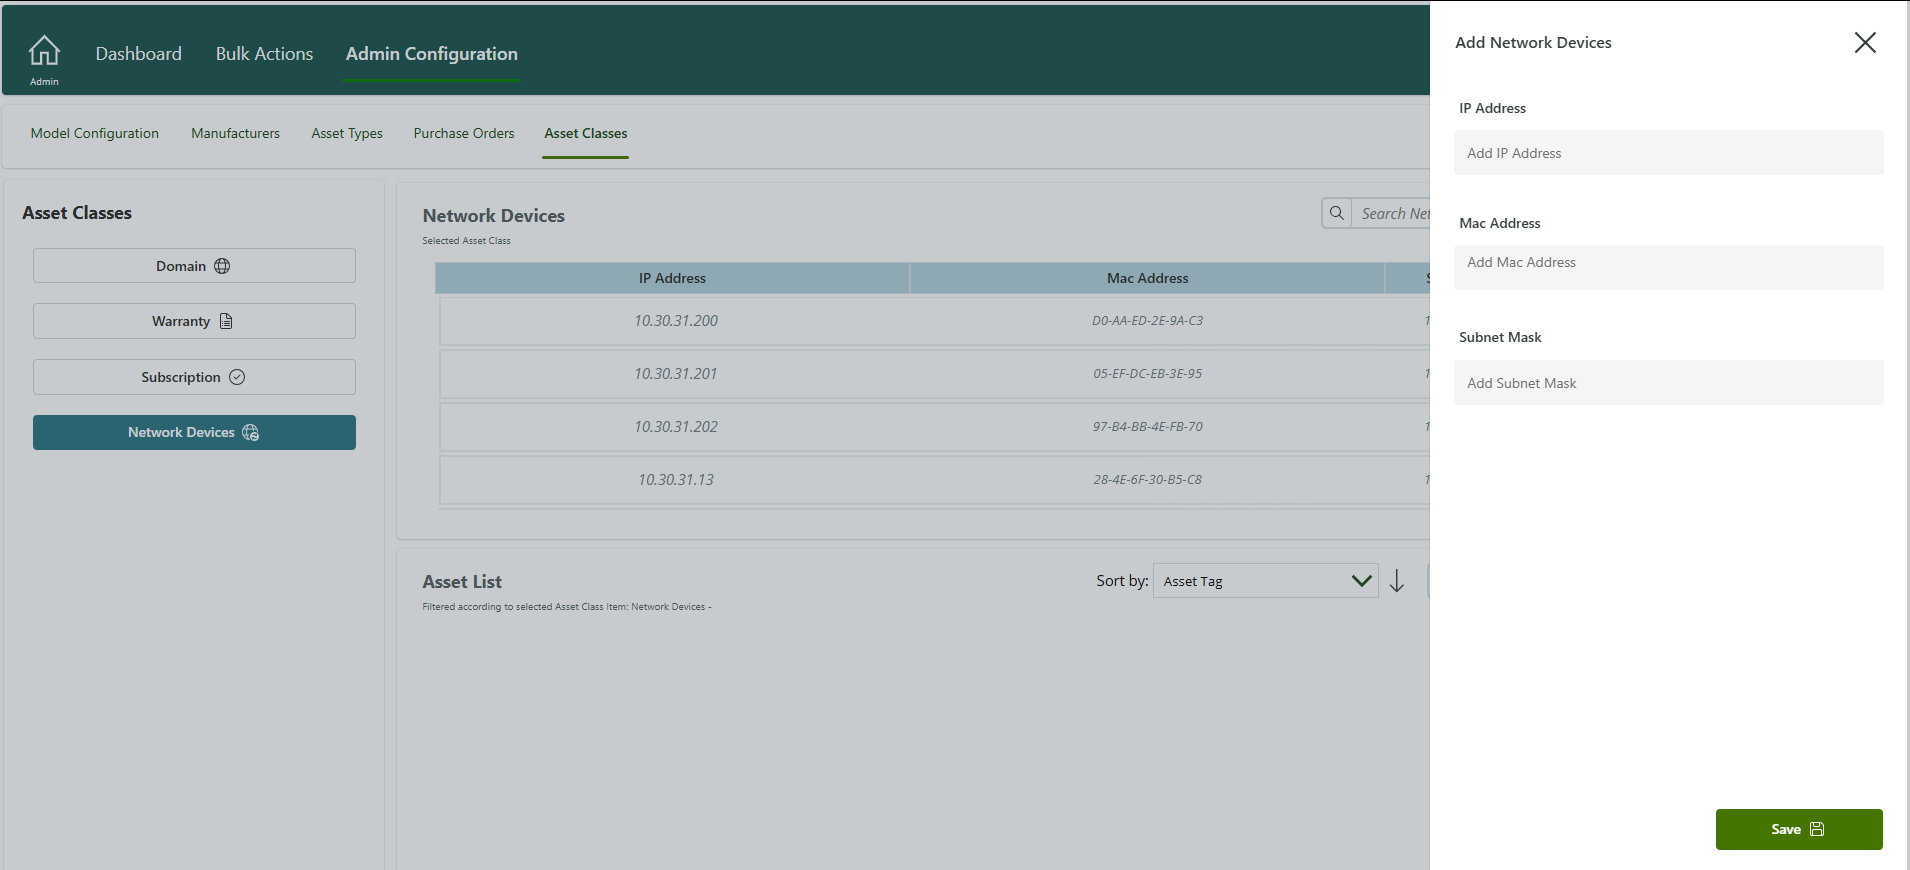
- Network Devices: You can keep track of your network devices by associating them with an IP, MAC, and subnet:
Purchase Orders
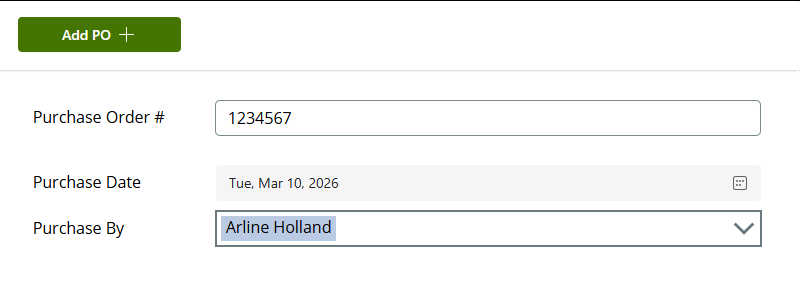
Purchase orders provide a useful way for you to keep track of the assets coming into your organisation. Purchase orders consist of a date, a number and a person who placed the order:
You can attach these to assets when they're created, and they can be edited after creation if needed.
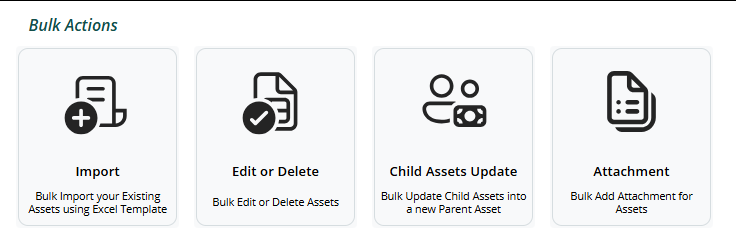
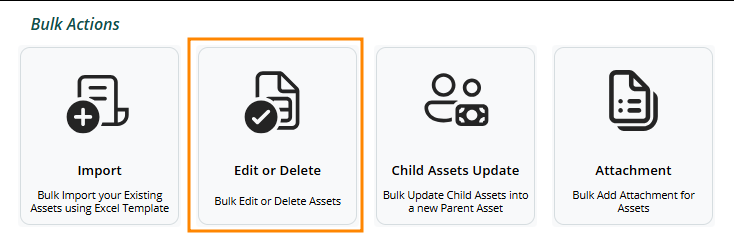
Bulk Actions
The Bulk Actions feature allows you to bulk import assets, bulk edit or delete existing assets, make bulk changes to assets' hierarchy (i.e. which assets are children of which other assets), and make bulk attachment changes.
We'll take a look at each of these below.
Bulk Importer
The bulk importer provides a templated spreadsheet that you can use to bulk add assets with a single action. You can find an example of this spreadsheet below:
Required | Name | Content | Restrictions |
* Yes | Asset Tag | The asset tag that will be added to an individual asset. | A new entry will be added with this asset tag regardless of whether one exists, but this will be used as a potential duplicate detection metric. |
* Yes | Status | The status of the asset being added. | Must align with the existing statuses in the Asset Manager:
|
* Yes | Serial Number | The model of the asset being added. | A new entry will be added with this serial number regardless of whether one exists, but this will be used as a potential duplicate detection metric. |
* Yes | Model Name | The model name for an asset being added. | If the model does not already exist in your asset manager, it will create a new model for you based on the Manufacturer and Asset Type you specify. |
* Yes | Manufacturer | The manufacturer for an asset being added. | If the manufacturer does not already exist, it will be automatically created for you. |
* Yes | Asset Type | The asset type for an asset being added. | If the asset type does not already exist, it will be automatically created for you. |
No | Color | The color for an asset being added. | If the color does not already exist, it will be automatically created for you. |
No | Parent Asset | This is the parent asset that will be assigned to this asset on creation. | This should be the asset tag of the parent asset. |
* Yes | Is Parent Asset | Specifies whether this asset can be linked to as a parent. | Answer must be in the format "yes" or "no". |
No | Warranty Name | Specify the warranty name that will be attached to this asset on creation. | If a warranty with the same name, description, and expiry date exists, that one will be used. Otherwise, a new one will be created. |
No | Warranty Description | Specify a description that will be used for the attached warranty. | If a warranty with the same name, description, and expiry date exists, that one will be used. Otherwise, a new one will be created. |
No | Warranty Expiry Date | Specify the expiry date for the attached warranty on asset creation. | If a warranty with the same name, description, and expiry date exists, that one will be used. Otherwise, a new one will be created. |
No | Domain Name | Specify the domain name that will be used for the attached domain. | If a domain with the same name, registrar, and renewal exists, that one will be used. Otherwise, a new one will be created. |
No | Domain Registrar | Specify a registrar that will be used for the attached domain. | If a domain with the same name, registrar, and renewal exists, that one will be used. Otherwise, a new one will be created. |
No | Domain Renewal Date | Specify a renewal date that will be used for the attached domain. | If a domain with the same name, registrar, and renewal exists, that one will be used. Otherwise, a new one will be created. |
No | Subscription Name | Specify a subscription name that will be used for the attached subscription. | If a subscription with the same name, description, and renewal exists, that one will be used. Otherwise, a new one will be created. |
No | Subscription Description | Specify a description that will be used for the attached subscription. | If a subscription with the same name, description, and renewal exists, that one will be used. Otherwise, a new one will be created. |
No | Subscription Renewal Date | Specify a renewal date that will be used for the attached subscription. | If a subscription with the same name, description, and renewal exists, that one will be used. Otherwise, a new one will be created. |
No | Location | Specify a location that will be used for the asset on creation. | If the location doesn't already exist, a new one will be added to your locations list. |
No | Purchase Order Num | Specify the number of the purchase order that will be attached to an asset on creation. | If a purchase order exists with the same number, that one will be used. Otherwise, a new one will be created. |
No | Owner | Specify the owner of the asset that is being created. | Must match exactly with the name of a user already in your Microsoft 365 tenant. |
No | Owner Mail | Specify the email of the owner of the asset that is being created | Must match exactly with the email of a user already in your Microsoft 365 tenant. |
Bulk Import Instructions
To perform a bulk import, you can do the following:
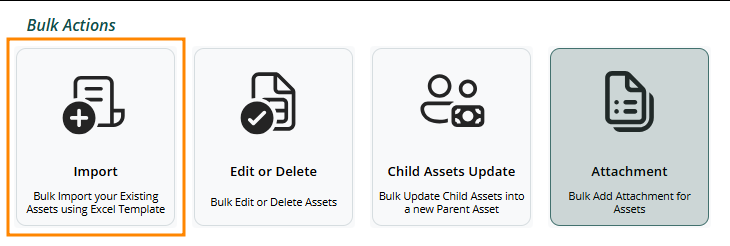
- Open the Asset Manager Admin App and head to the bulk import page:
- Select Load Asset Template:
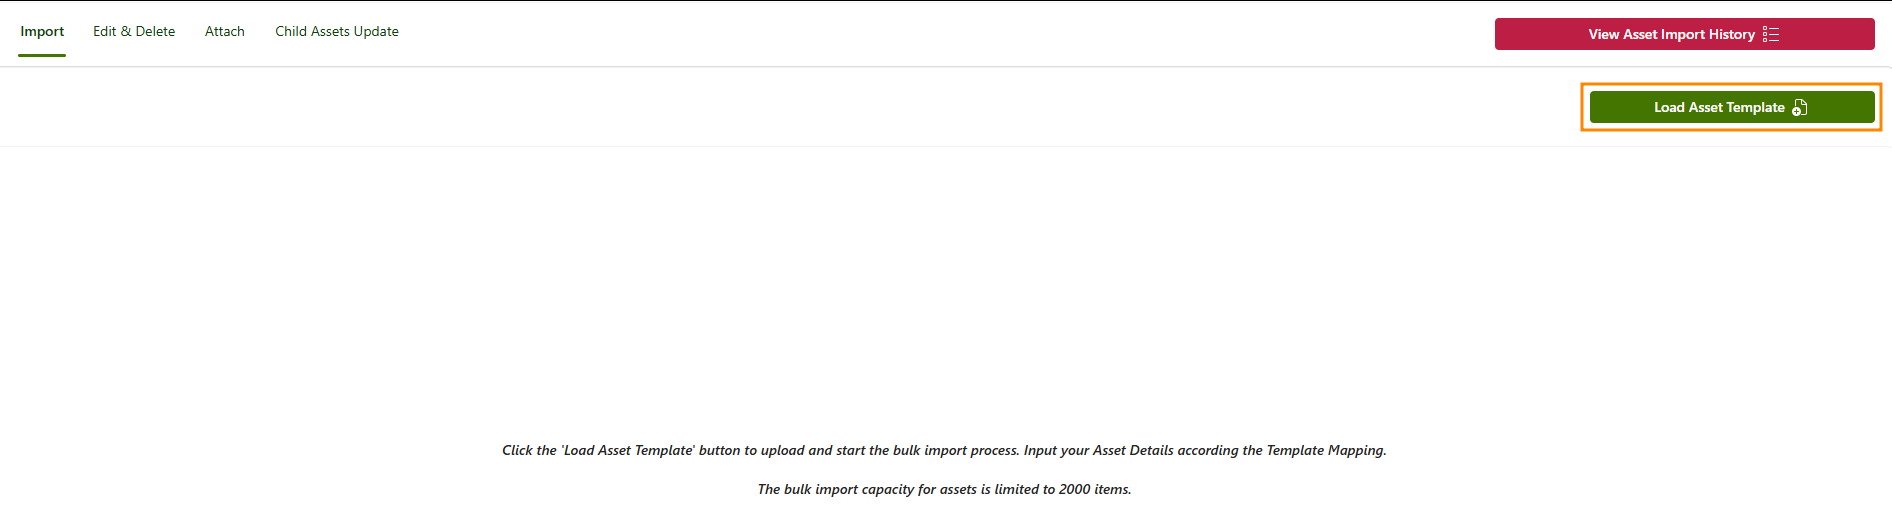
- After a while, you'll be redirected to an Excel document where you can fill in rows for each asset that you want added. Be sure to fill out all required fields, as if you miss these, the import will fail.You'll want to make sure that you have allowed pop-ups and redirects for https://app.spowerapps.com, or the redirect will fail. If this does happen, you can select Restart Load Asset Template to try again after you've allowed pop-ups and redirects.
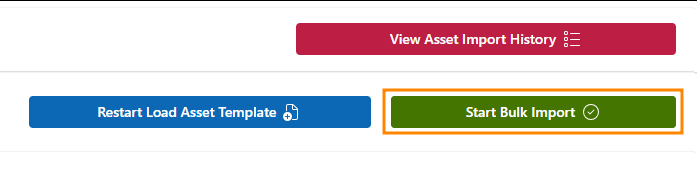
- Once you've finished filling in your information, click back to the Asset Manager tab and select Start Bulk Import:
- The Asset Manager will perform the bulk import, and after it has finished, you'll be presented with a screen telling you how many were successfully imported, and it will give you a chance (if needed) to review any duplicates:
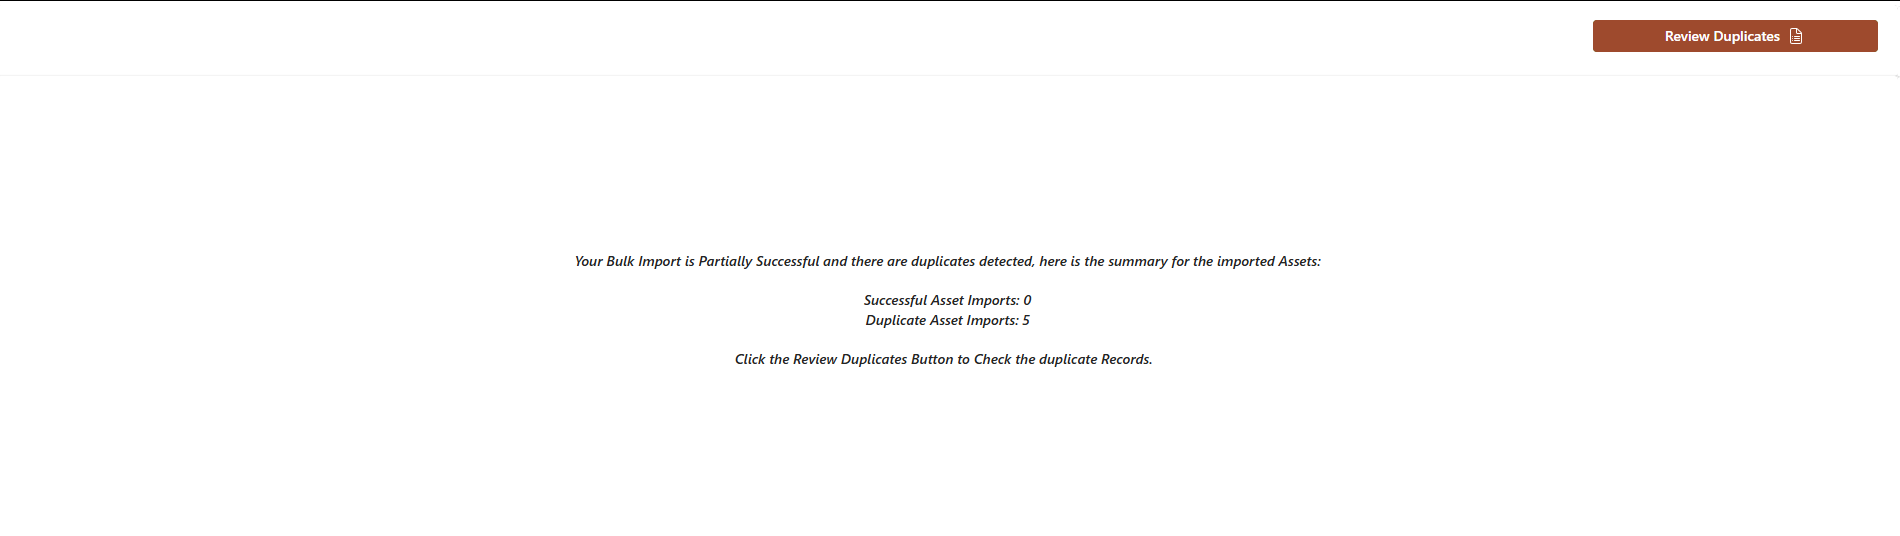
Duplicate Detection
The bulk importer will automatically try to detect duplicates for you, and after an import, will allow you to update or delete them. Duplicate detection works based on a device's asset tag and serial number. If you have two devices with the same serial number but different asset tags, the duplicate detector will not be able to flag these as duplicates:

Bulk Edit or Delete
In addition to bulk importing, you have the ability to bulk edit or delete existing assets. To do this:
- Open the Asset Manager Admin App and head to the Edit or Delete tab:
- On the right side of the Asset list, check all the assets that you want to make changes to:

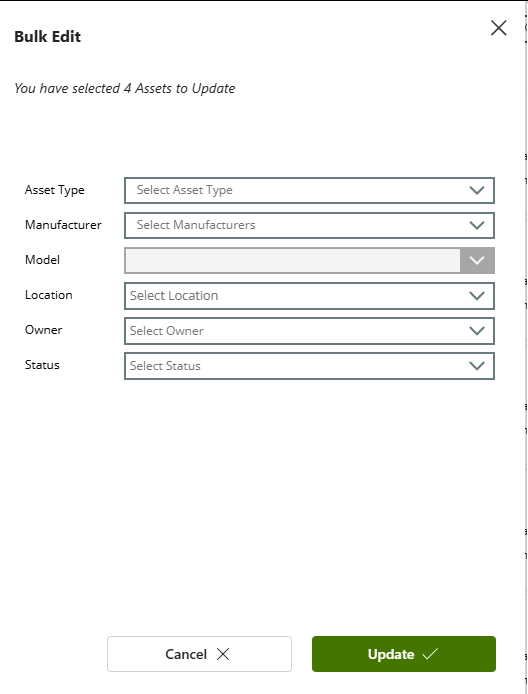
- Select either Bulk Edit or Bulk Delete (depending on your goal)
- If editing, you can then select the details you want to update and then select Update:
Bulk Child Asset Update
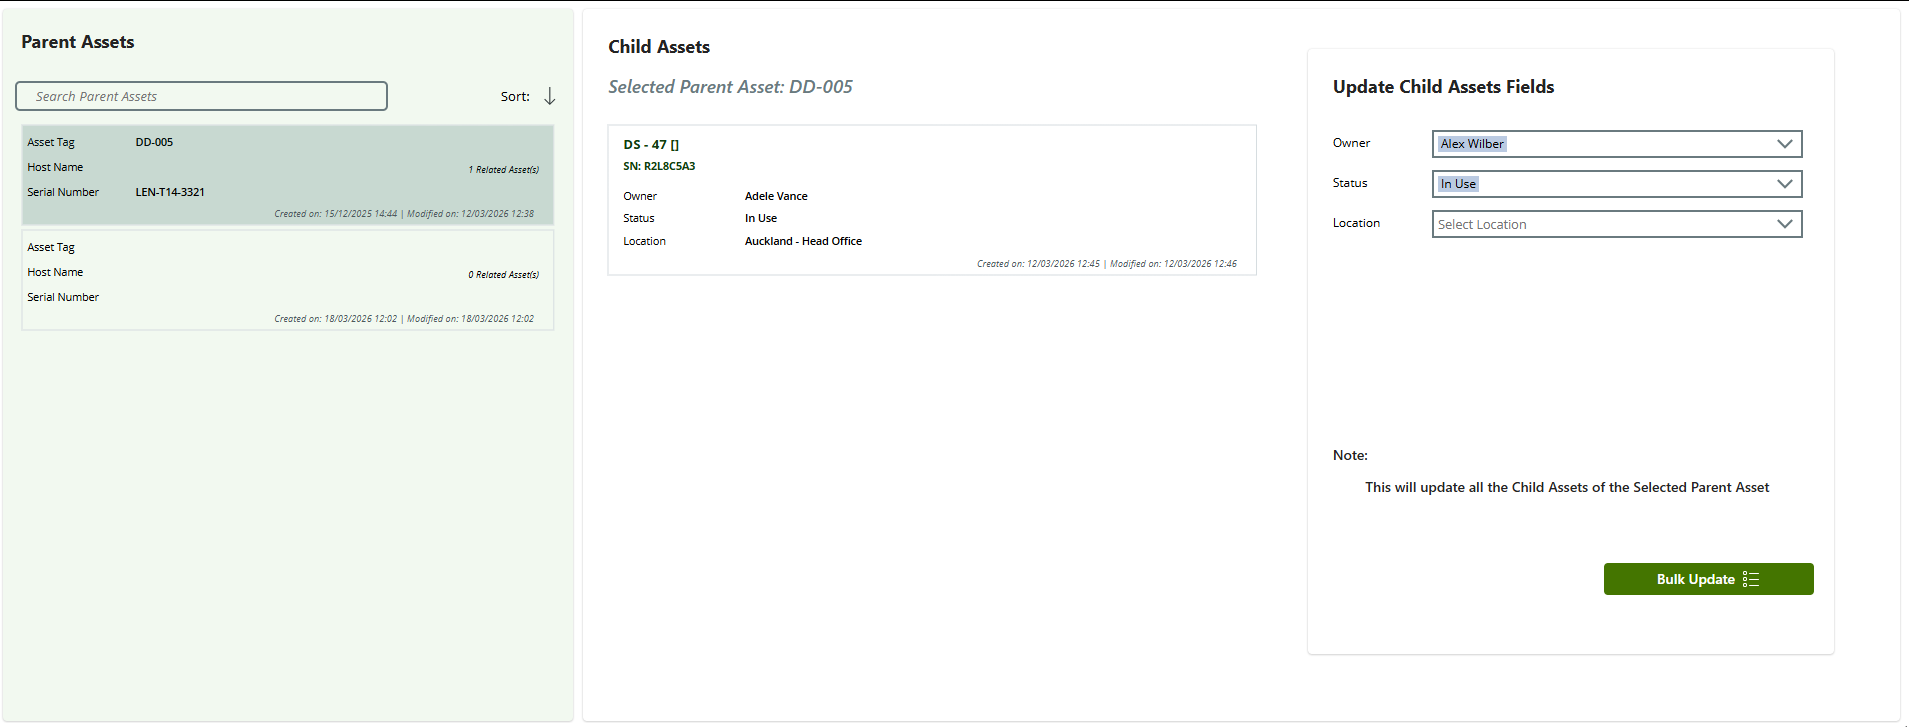
In addition to the standard bulk edits you can make to your assets, you can make edits to multiple child assets at a time. This is useful when sets of items change ownership, location, or status. To do this:
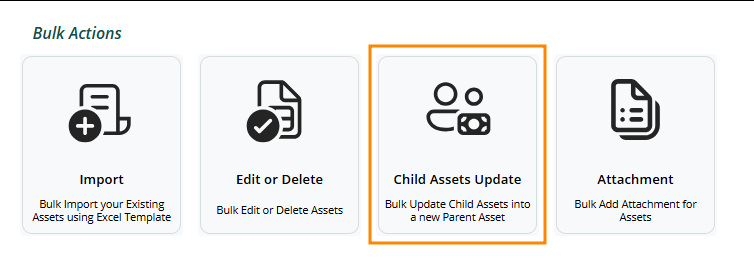
- Open the Asset Manager Admin App and select Child Assets to Update:
- Select a parent asset on the left side:
- On the right side, select which fields you'd like to update and then select Bulk Update:
Bulk Attachment
If needed, you can bulk add attachments to your existing assets as well. To do this:
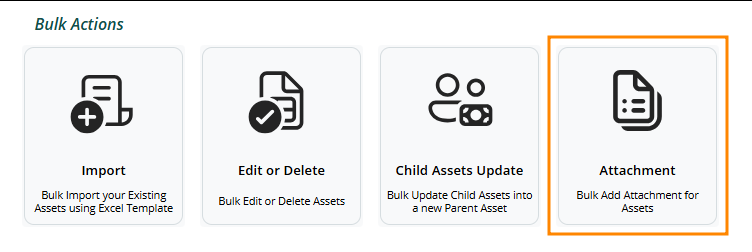
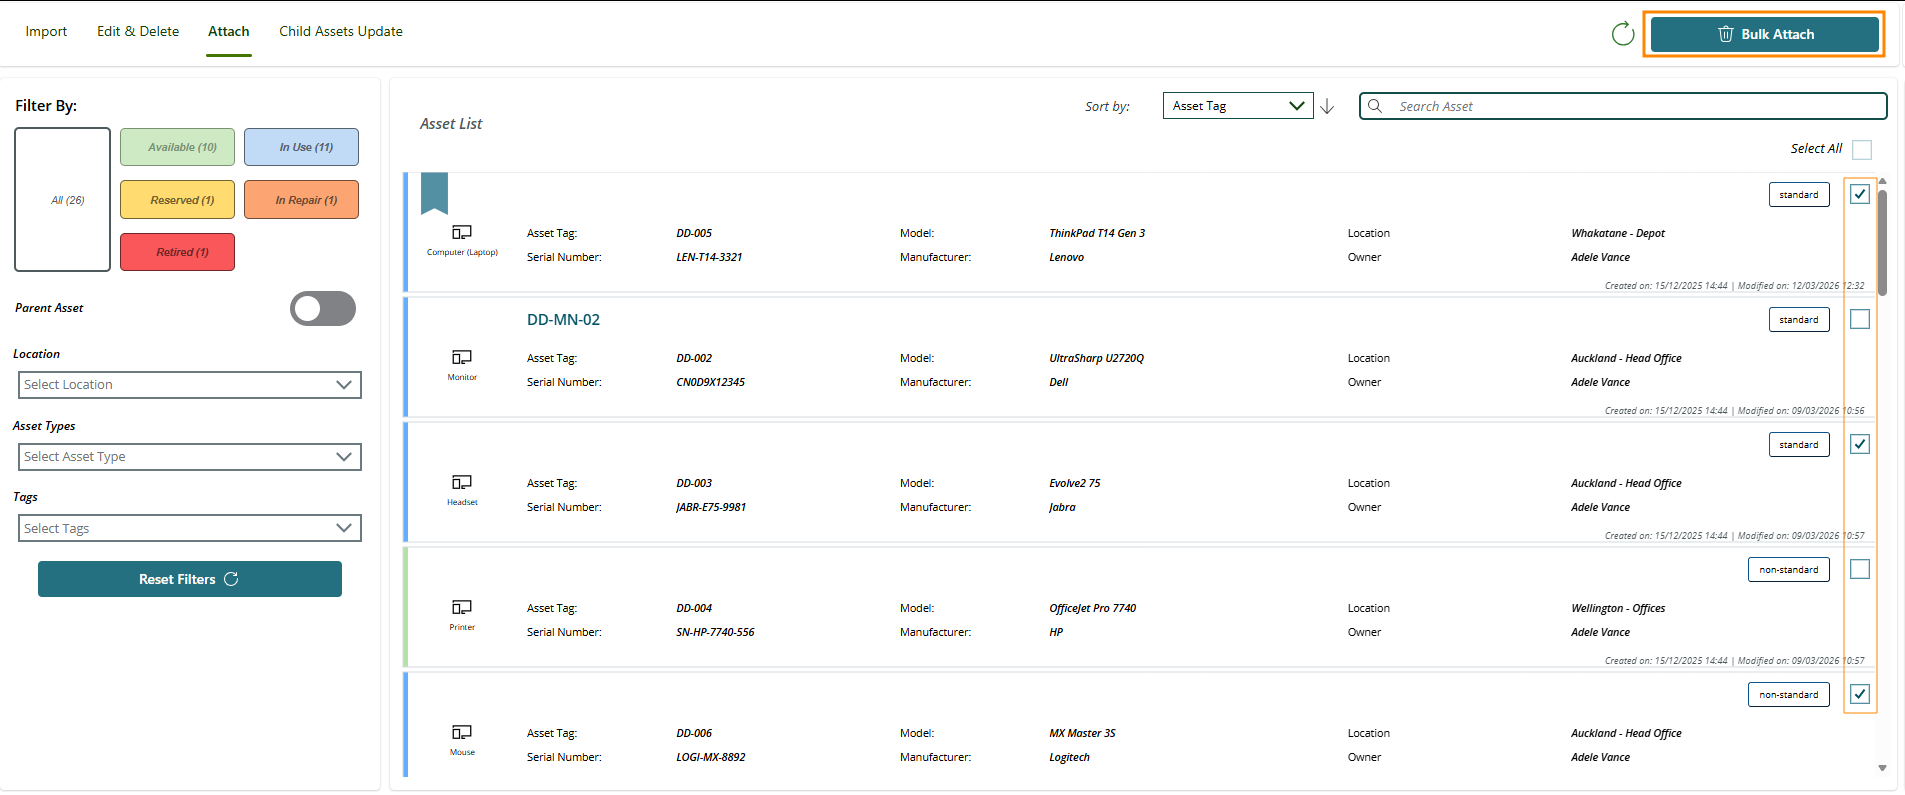
- Open the Asset Manager Admin App and select Attachment:
- On the right side of the Asset List, select all the items that you want to add attachments to, and then click Bulk Attach:
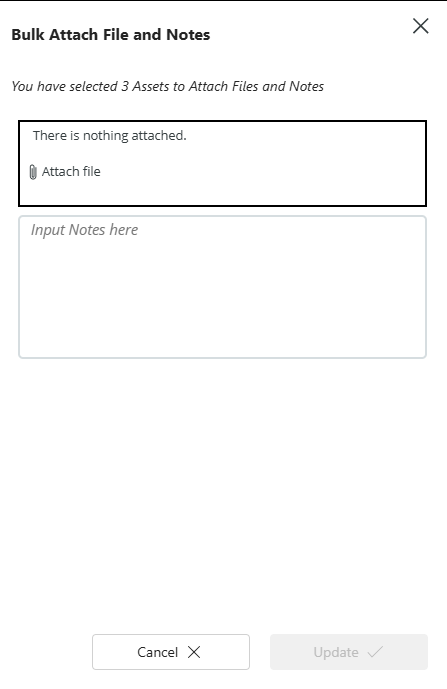
- Add a note for your attachment and then attach any files that you want added and select Update:
Registering & Viewing Assets
Both the user and admin apps give you the ability to register new assets and view your existing assets once they've been added. You can filter for specific assets if needed, and see the relations for your assets.
Viewing Assets
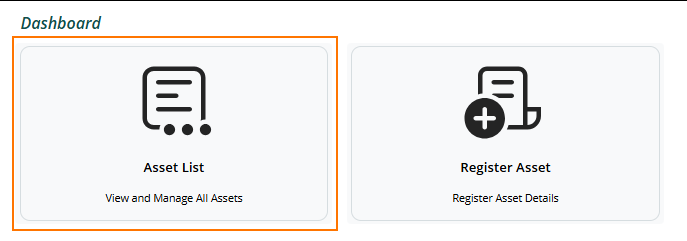
- To get started, open either the User or Admin app and then select Asset List:
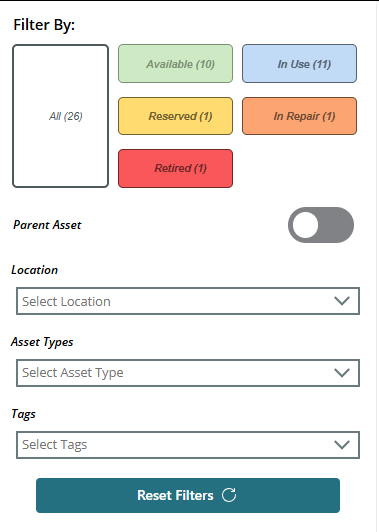
- Optionally, on the left side of the screen, filter for the assets you want to review:
- Optionally, on the right side of the screen, search for the specific asset you want to review:

- Select the asset itself, and you'll be presented with the asset details:
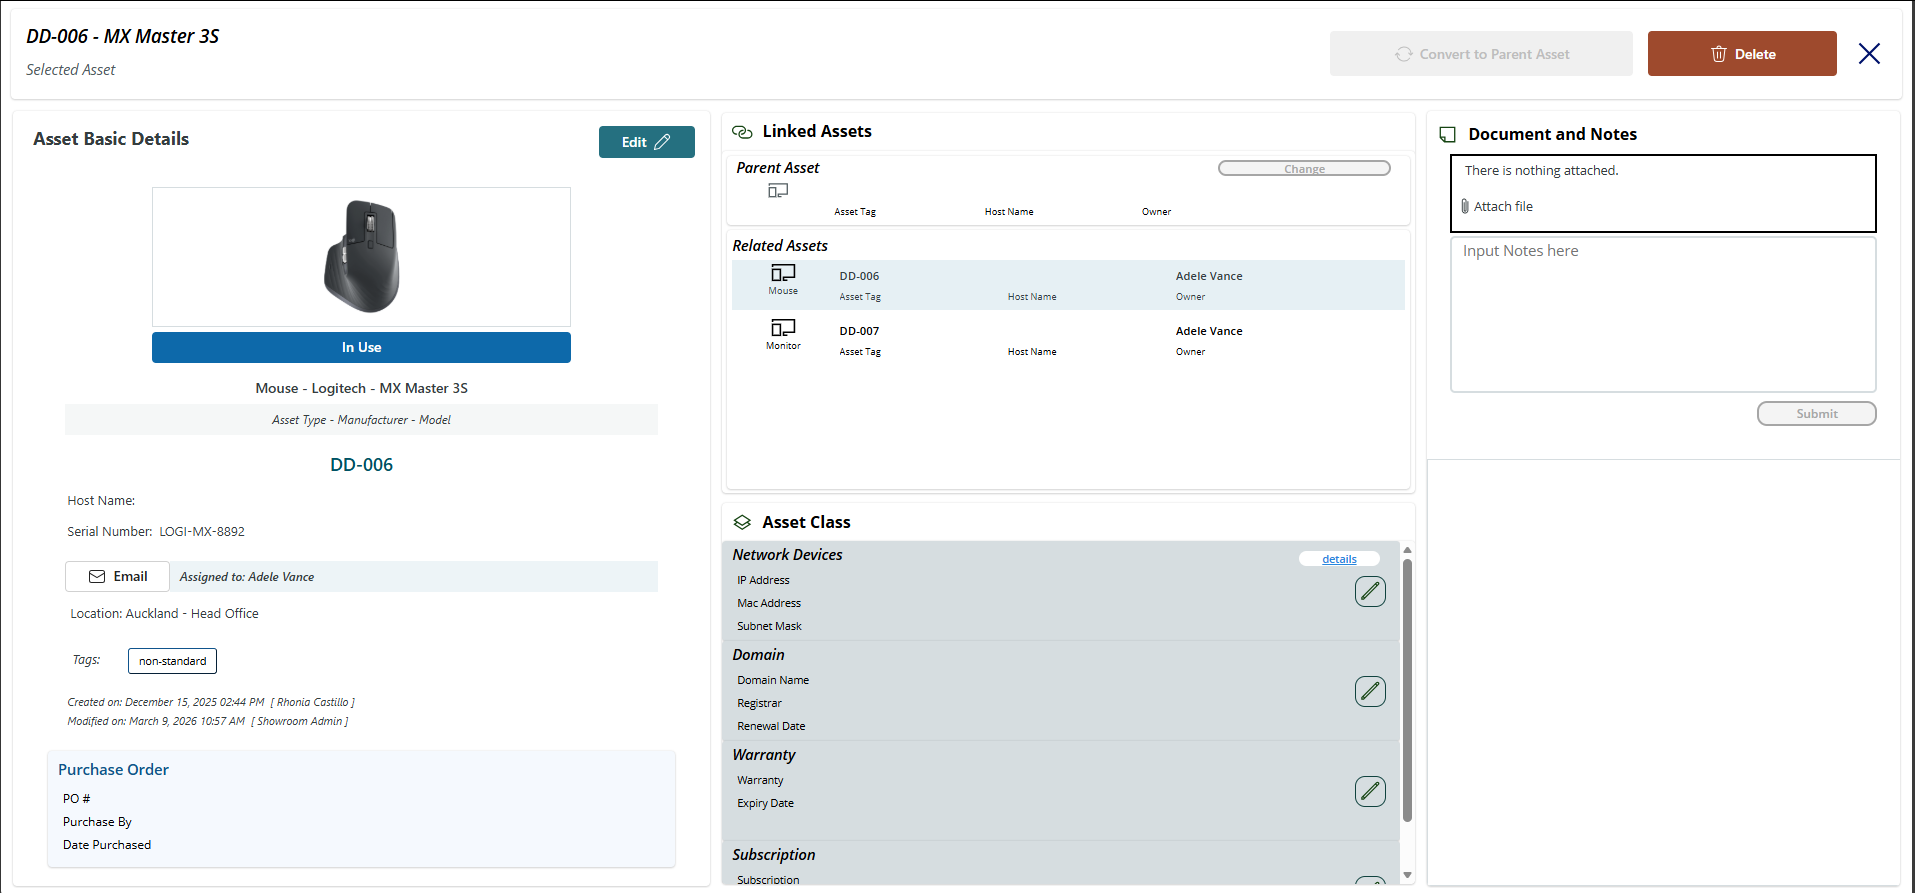
From the asset screen, you can edit an asset to change its details. You can also delete the asset if it is no longer in use.
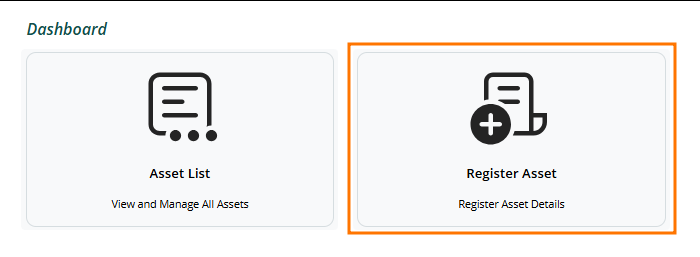
Register an Asset
- To register a new asset, from either the Admin or User app, select Register Asset:
- On the Basic Asset Details tab, fill out any info for your new asset and add a picture if desired.The model list will present models to you based on the Asset Type and Manufacturer you select.
- On the Link Assets tab, select whether this is a parent asset and optionally link it to another asset if needed.
- On the Purchase Orders tab, optionally select a Purchase Order that relates to the new asset.
- On the Asset Classes tab, assign out any asset classes that may relate to the new asset.
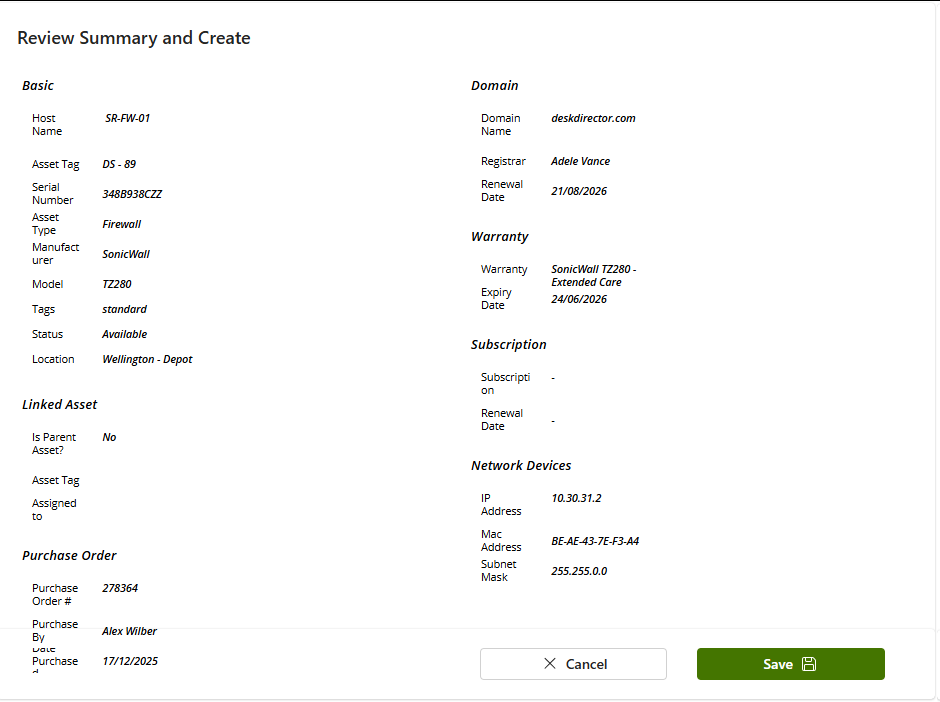
- Once you're happy with your asset, you can review it on the right side of the screen and select Save: