Table of Contents
HR Leavers Solution
 Updated
by Niamh Ferns
Updated
by Niamh Ferns
HR Leavers Solution Demonstration
The HR Leavers PowerPlay solution provides a clean and easy way for you to automate your user onboarding and save time for your service agents.
Below, you'll find a demonstration of the HR Leavers Solution in action:
What does it do?
With the HR Leavers solution, HR or managers for your customers can submit offboarding requests as they normally would for users on a scheduled day.
After the ticket has been submitted, the HR Leavers Solution will take over and ensure that on that day, the user's account is automatically offboarded and access is revoked.
Deployment
In this section, we'll cover how to go through the deployment process for the HR Leavers Solution.
For the deployment to work, you will need to deploy the solution library, then deploy either the ALM or self-service solution.
Solution Library Deployment
In the following video, we show an example deployment from the Solution Library:
- Open your Admin Portal and head to
Integrations>Solution Library. - Select the Managed Solutions tab and open the HR Leavers solution.
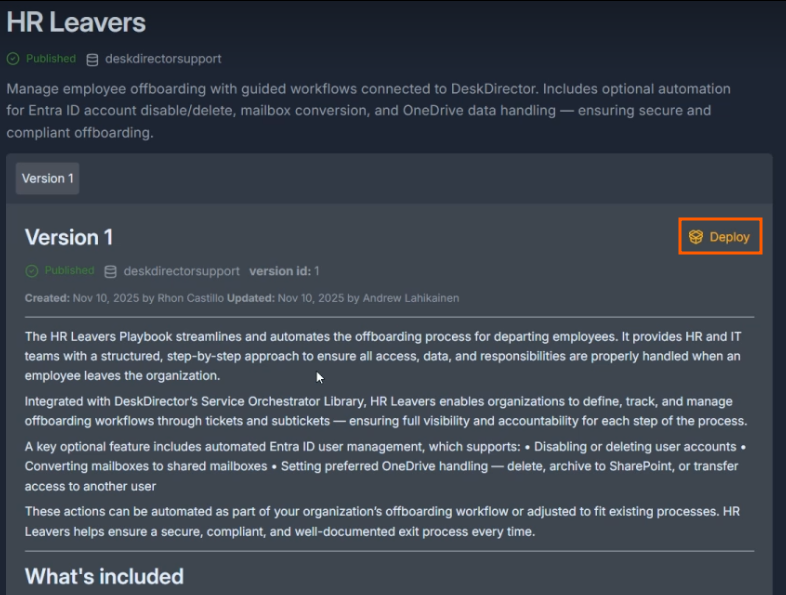
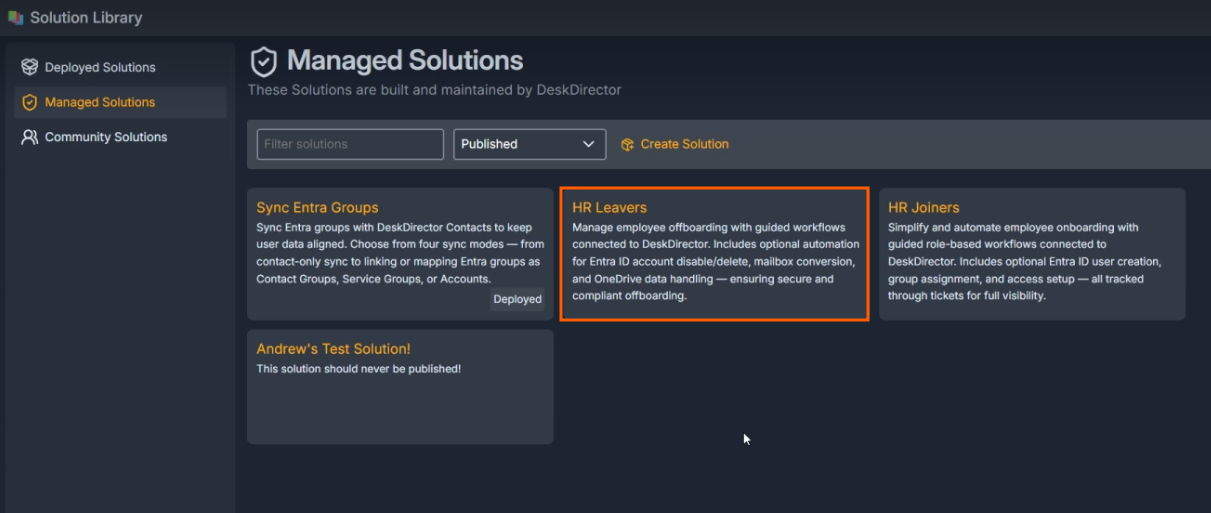 On this page, you can also see a version history as well as a list of features that will be deployed.
 - Select the latest version available, and then click Deploy
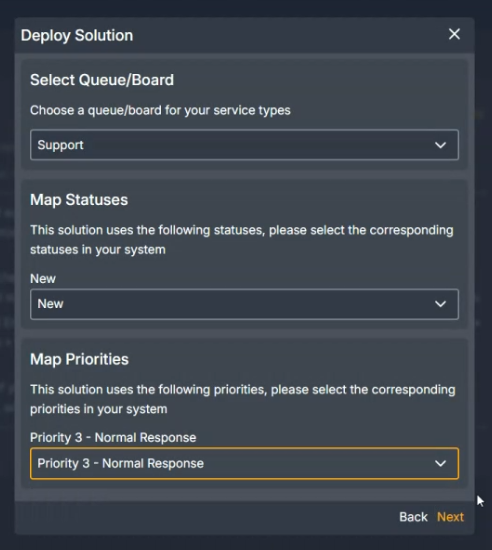
- Follow the on-screen prompts to select a Queue/Board, Status, and Priority:
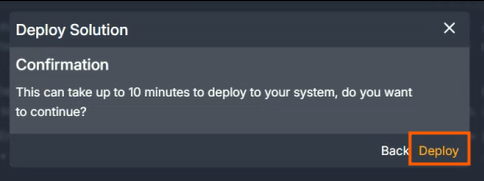
- Confirm by selecting Deploy. (This step can take some time to complete. Please do not close out of this page.)
- Confirm under
Advanced>EventsandEmail Delivery>Custom Template>Flow templateto make sure your assets have deployed correctly: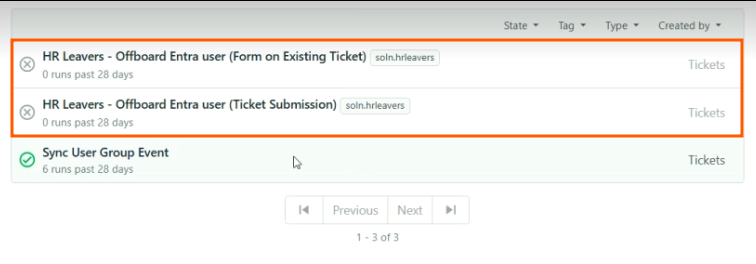 You should see two events and an email template created by the HR Leavers deployment.
Solution Marketplace Deployment
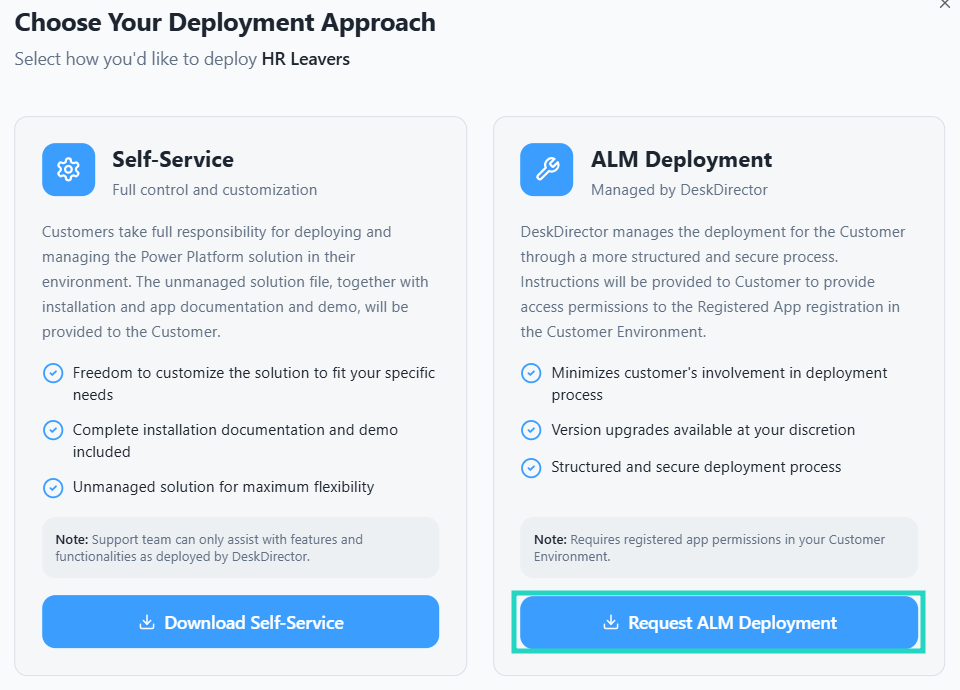
- Head to the PowerPlay Marketplace and select Download Solution for the HR Leavers solution:

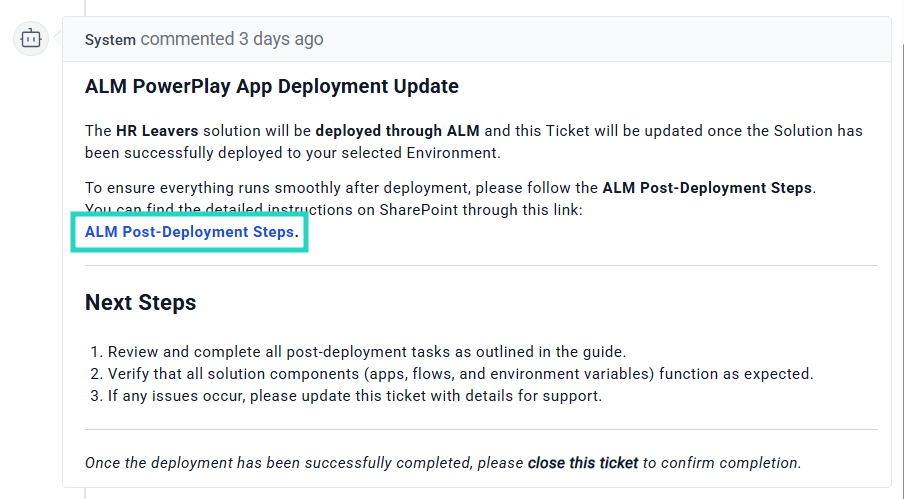
- Select Request ALM Deployment:
- Navigate to your open tickets on the DD4DD Support Portal, and you should see a ticket with a name similar to
PowerPlay App Deployment Request: HR Leavers: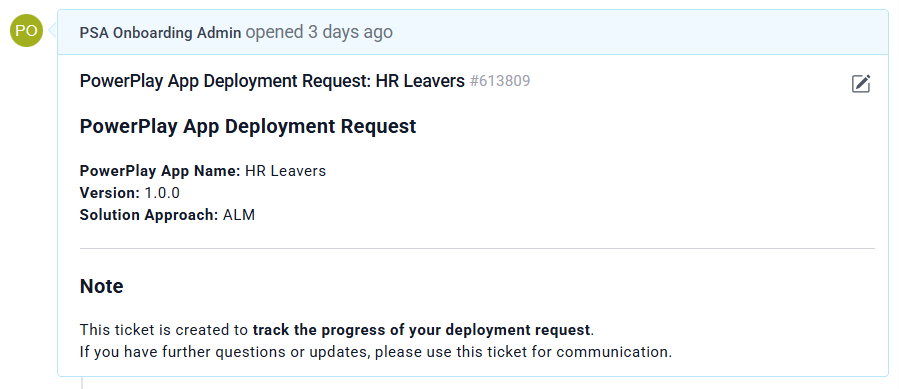
- If you have multiple CustOrg registrations, an additional form
[PowerPlay] Select CustOrg Environmentmay be required
- If you have multiple CustOrg registrations, an additional form
- After this deployment has completed, you should see a confirmation that it has started the deployment for you.
- Once the deployment is finished, you will see a confirmation that your deployment was successful.
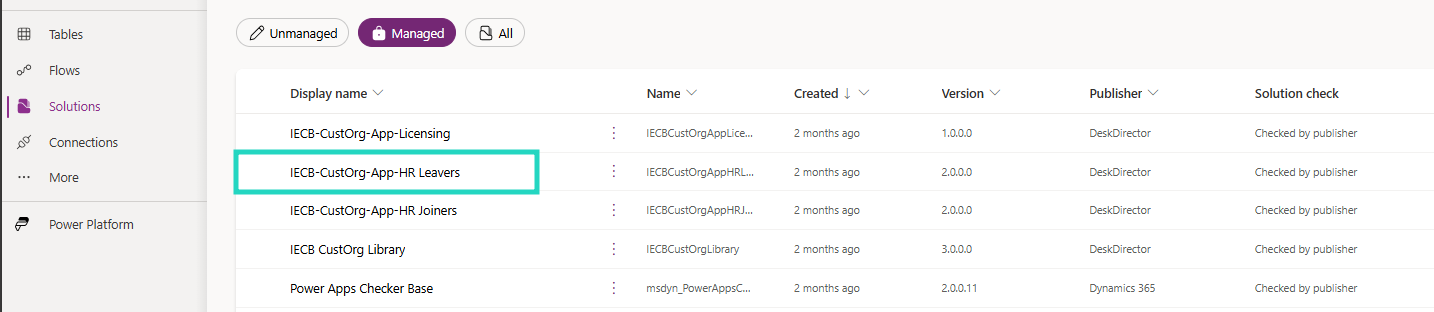
- To confirm, open Power Apps and navigate to the Solutions tab. Under managed, you should see a successful deployment for HR Leavers:
Post Deployment
SharePoint Site Creation
- Navigate to your Active Sites in SharePoint under the customer's tenant
- Click Create and Select a Team site, then use the standard template and fill out the Site's information:
- Name:
HR Leavers - Group email address:
HRLeavers - Group owner: Admin for your customer's tenant
- Privacy settings:
Private - only members can access this site
- Name:
- Add any members that should have access and create the site
- Note down the URL of the site, as this will be required for our setup. Expected format as:
https://abc123.sharepoint.com/sites/HRLeavers
CustOrg Connection References, Environment Variables & Cloud Flows
In the following video, we walk through the post-deployment configuration of the Connection References, Environment Variables, Cloud Flow enablement, and Enumerating Command Offers:
- Under your CustOrg environment, navigate to the Default Solution and open the Connection references tab in the Objects panel
- Update the IECB CustOrg HR Leavers - HTTP with Microsoft Entra ID connection reference to use the connection you configured in your post-deployment steps.
- This solution requires the following Microsoft Graph delegated permissions (scopes) to be granted to the connection. Granting permissions is covered in our Pre-Deployment Checks:
Directory.ReadWrite.AllFiles.ReadWrite.AllGroupMember.ReadWrite.AllRoleManagement.ReadWrite.DirectorySites.ReadWrite.AllUser.EnableDisableAccount.AllUser.ReadWrite.All
- Optionally, if you're using Azure Automation for the conversion of shared mailboxes, also grant the following Microsoft Graph application permissions:
Application.Read.AllAppRoleAssignment.ReadWrite.All
- This solution requires the following Microsoft Graph delegated permissions (scopes) to be granted to the connection. Granting permissions is covered in our Pre-Deployment Checks:
- Now, under the Environment variables tab in the Objects panel, update the following variables:
- IECB HR Leavers - Azure Automation Enabled: If you are using the Shared Mailbox part of this solution, you can select yes for this; otherwise, leave this as no.
- IECB HR Leavers - Azure Automation Webhook: If you are using the Shared Mailbox part of this solution, you can put your webhook here; otherwise, leave this empty.
- IECB HR Leavers - SharePoint Site: This will be the URL for your HR Leavers SharePoint site.
- Navigate back to your CustOrg's Managed Solutions and open the IECB-CustOrg-App-HR Leavers solution
- Under Cloud flows in the Objects panel:
- Enable all child flows.These will be named as
[DDCommand] name (child). - Once the child flows are enabled, enable the remaining parent flows
- Enable all child flows.
- Navigate back to your CustOrg's Managed Solutions and open the IECB CustOrg Library solution and run the [Scheduled] Enumerate Command Offers flow
ServOrg Connections & Connection References
- Under your ServOrg environment, navigate to the Default Solution and open the Connection references tab in the Objects panel
- Update the IECB HR Leavers - DeskDirector connection reference to use the connection you configured in your post-deployment steps.
- Update the IECB HR Leavers - Office 365 reference to use the connection you configured in your post-deployment steps.
ServOrg Environment Variables
- Under your ServOrg environment, navigate to the Default Solution and open the Environment variables tab in the Objects panel
- There is a set of environment variables that you now need to set:
- IECB HR Leavers - Approval Required:
Set this to on if you want your HR Leavers forms to request approval from your client's approvers before being actioned - IECB HR Leavers - Board ID:
Set this to the ID for the Queue or Board that you want your offboarding request tickets to land on - IECB HR Leavers - Email Template ID:
As part of the Solution Library deployment in your DeskDirector Admin Portal, an email template will have been created for you. You can find this in your Admin Portal underEmail Delivery>Custom Template>Flow template. Select the HR Leavers - Email to CustOrg template and copy the ID from the URL bar:
- IECB HR Leavers - Event ID - Ticket Submission and the IECB HR Leavers - Event ID - Form on Existing Ticket:
Similar to the previous environment variable, you can find these IDs in the URLs for each HR Leavers event in your Admin Portal underAdvanced>Events:
- IECB HR Leavers - Status IDs:
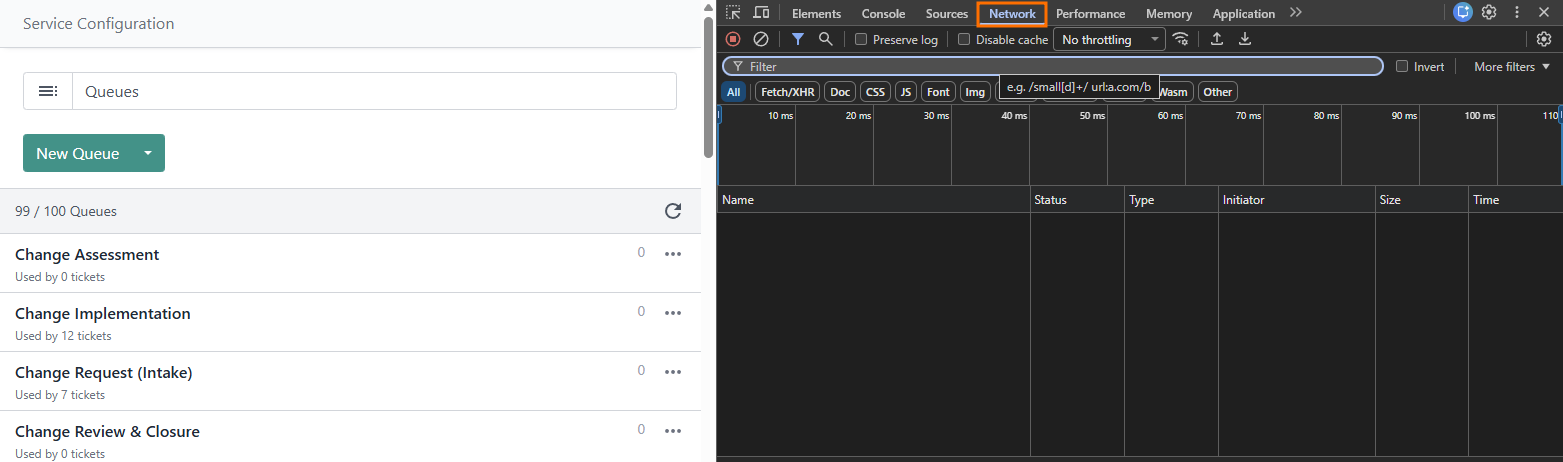
You'll have to set 3 environment variables for your Closed, Completed, and In Progress status IDs. To find these:- Head to your Admin Portal and open the
System>Service Configuration - Press F12 to open the web development tools and select the Network tab. (You can resize if needed to make things easier to see.)
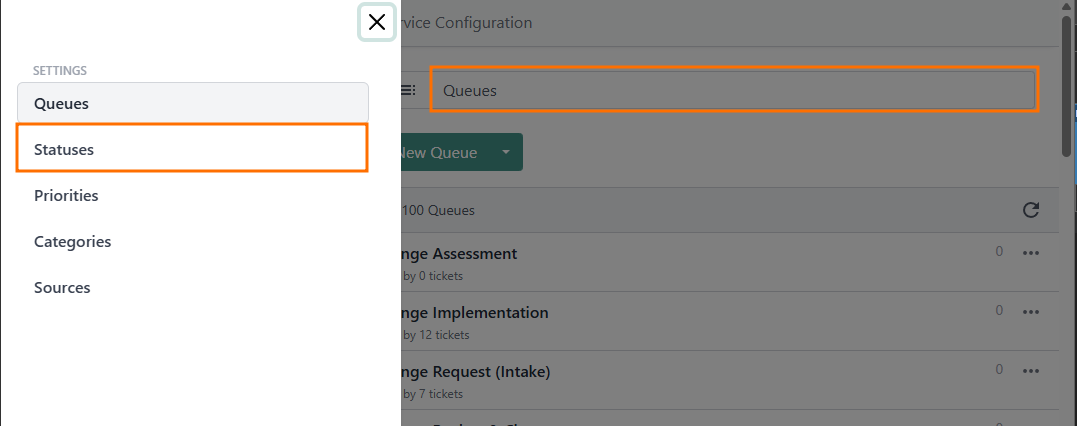
- In your Admin Portal now, select the Statuses tab:
- You should see an entry now in your Network tab for
statuses?state=active. Select this and then on the response tab, press Ctrl + F: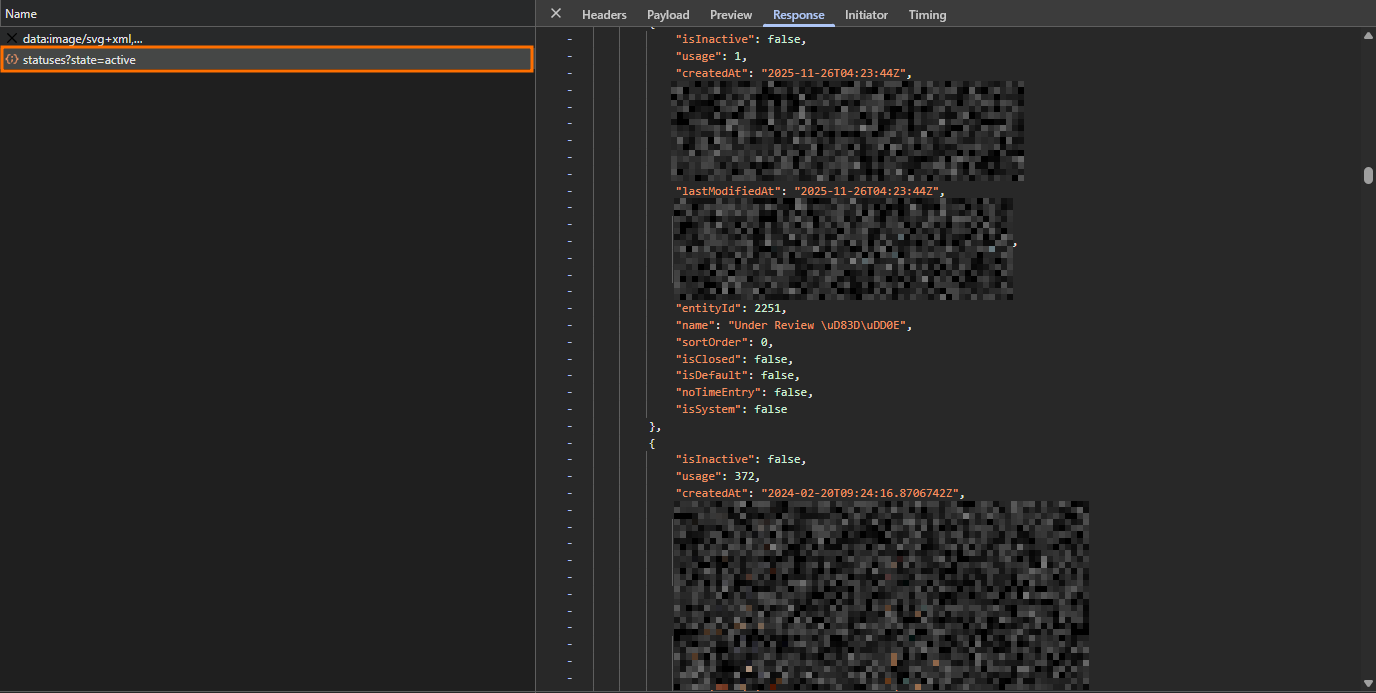
- Search for
"name": "<YOUR STATUS NAME HERE>"(including any quotation marks) and then copy the entityId number for each of your status environment variables in PowerApps.
- Head to your Admin Portal and open the
- IECB HR Leavers - Member ID:
This will be the member ID of your Master Administrator in DeskDirector.
- IECB HR Leavers - Approval Required:
ServOrg Cloud Flows
- Navigate to your ServOrg's Managed Solutions and open the IECB-ServOrg-App-HR Leavers Solution, then open the Cloud flows tab in the Objects panel
- Enable the [HttpReq] HR Leavers - Process Entra account offboarding request flow and all child flows. (Note: if you have already fully deployed the HR Leavers solution for at least one other client, you may skip this step.)These will be named as
[HttpReq] name (child). - Enable the [HttpReq] Update Entra Users Dynamic List flow. (Note: if you have already fully deployed the HR Leavers solution for at least one other client, you may skip this step.)
- Enable any remaining un-enabled flows. (Note: if you have already fully deployed the HR Leavers solution for at least one other client, you may skip this step.)
- Run the [1-Manual] Update IECB HR Leavers CustOrg table flow
- The
IECB HR Leavers CustOrgstable will be updated as an output of the above step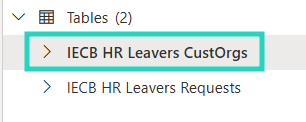
- Within the table, update the
HR Leavers Installedflag from FALSE to TRUE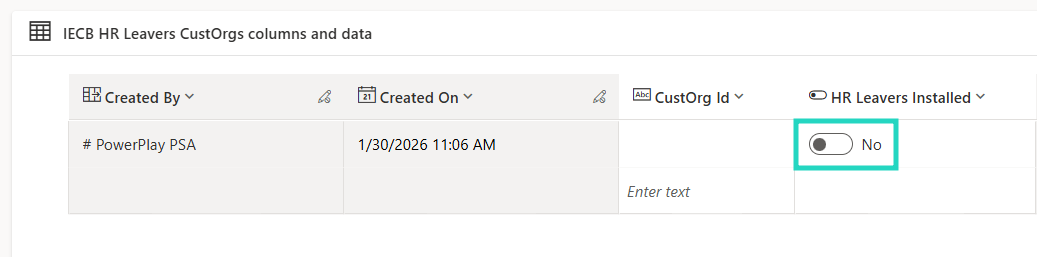
Initial Solution Testing
With the steps above complete, we are ready to perform the initial testing of our solution.
Security Roles & App Sharing
- Navigate to your Power Platform Admin Center and open your ServOrg environment, then open the Users menu.
- For each account you want to grant access to for the HR Leavers app:
- Search for the account
- For the relevant account in the list, click
⁝ (More Options)>Manage security roles - Apply the HR Leavers Users security role
- Click Save
Service Orchestrator
- From the Apps tab in your Objects panel under the IECB-ServOrg-App-HR Leavers Solution back in Power Apps, select
⁝ (More Options)>Detailsfor the HR Leavers App, and copy the Web link for the app - Navigate back to your Managed Solutions in your ServOrg and open the Service-Orchestrator-Library, then play the Service Orchestrator App
- In the Service Orchestrator (once it loads, select Configuration Details and paste your HR Joiners web link under the HR Leavers playbook
- Navigate back to your IECB-ServOrg-App-HR Leavers Solution and play the HR Leavers App.
Shared Mailbox Conversion
As an optional configuration, the HR Leavers solution can be extended to include the conversion of mailboxes to shared mailboxes using an Azure Automation account and Azure Automation runbooks.
Configuration
Downloading Mailbox Conversion Script
From the DeskDirector Support portal, as part of requesting an ALM deployment of the HR Leavers solution, a ConvertMailboxToShared.ps1 script is available to download from the ALM Post-Deployment Steps SharePoint link:
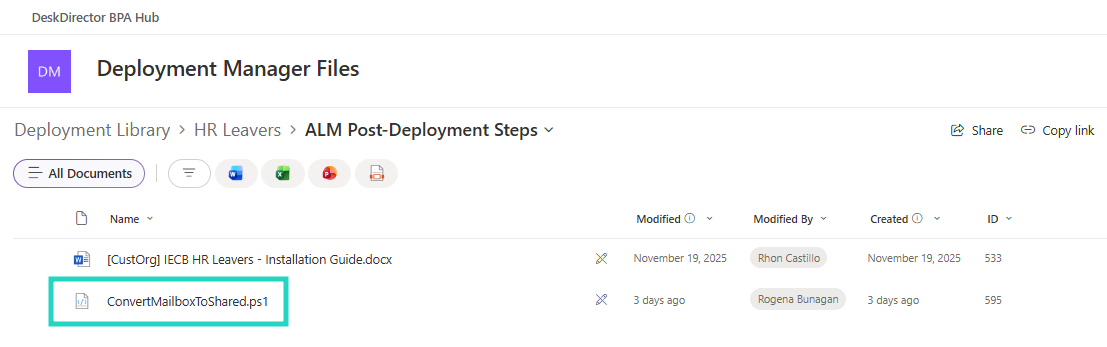
The content of this script will be copied/imported as a Runbook.
Create an Azure Automation account
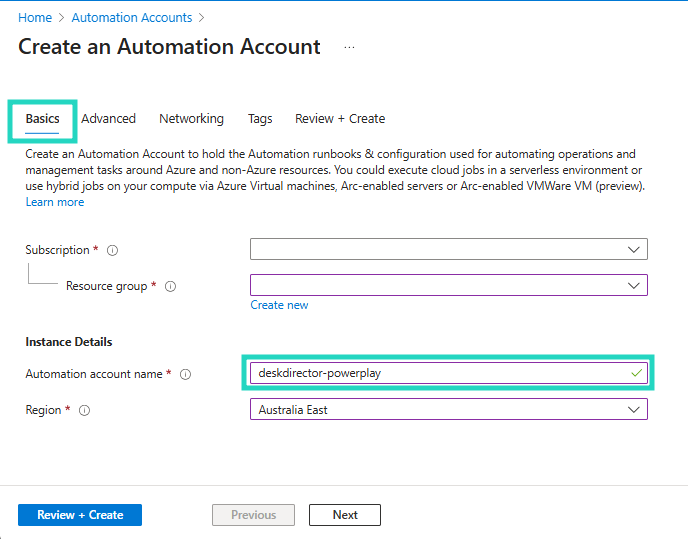
Within our CustOrg tenancy, create an Azure Automation account:
- From the Basics tab, complete the relevant fields for Subscription, Resource Group, Automation Account Name, and Region. In our example, the automation account is named
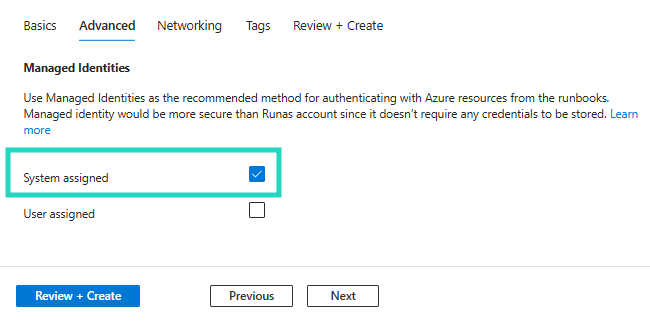
deskdirector-powerplay - From the Advanced tab, ensure
System assignedis enabled for Managed Identities - Select Review + Create, followed by Create to finish provisioning the account
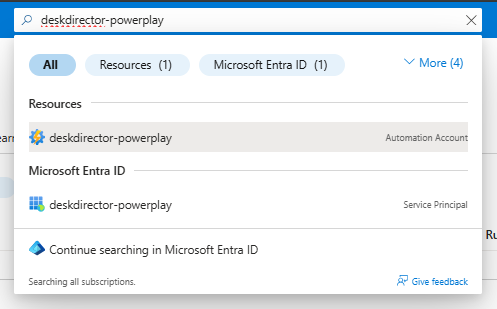
- Once provisioned, if I search for the name of the resource in Azure, I would expect an Automation Account and Service Principal to be available:
Shared Resources: Modules
The following 3 modules are required for the Powershell script provided to function as an Azure runbook:
- PackageManagement
- PowerShellGet
- ExchangeOnlineManagement
To get started:
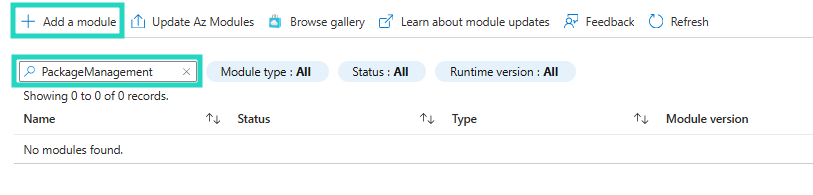
- From our Automation Account, load into Shared Resources > Modules

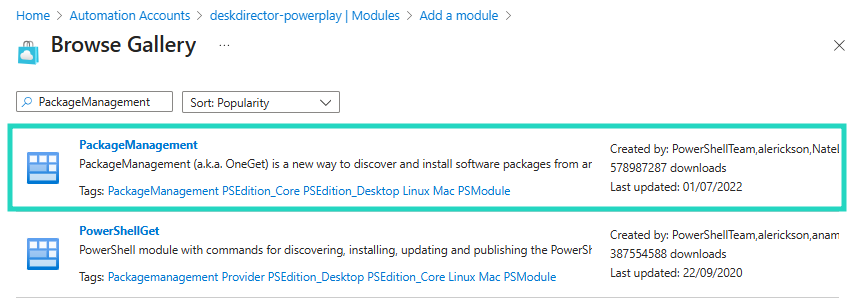
- Search for each of the required packages, if you're unable to locate the module, proceed with Add a module
- From the Add a module menu, select Browse from gallery followed by click here to browse from gallery
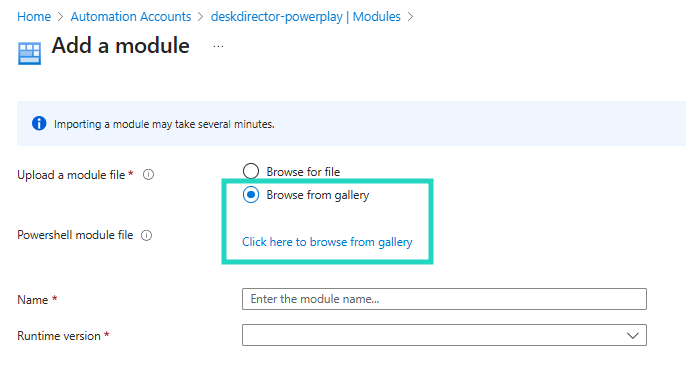
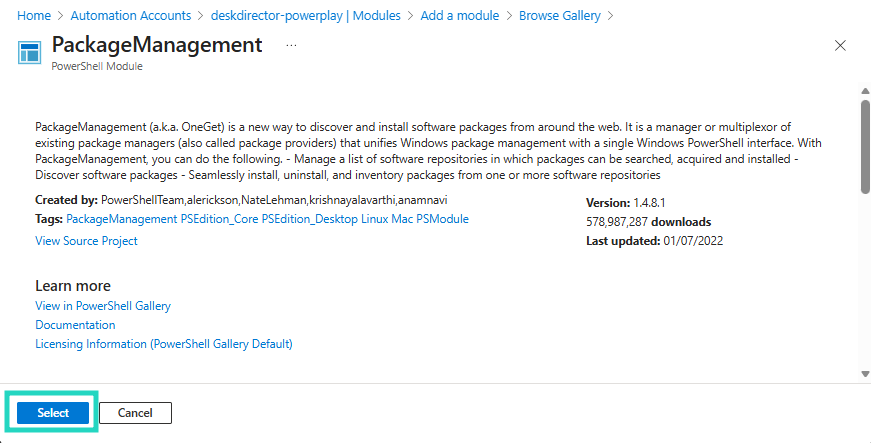
- Search and select the required package, followed by Select
- Set our Runtime Version to
5.1, followed by Import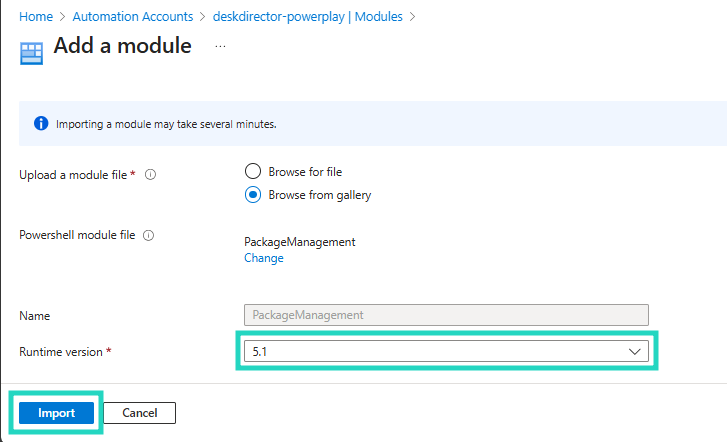
- Repeat this process until the PackageManagement, PowerShellGet and ExchangeOnlineManagement packages are installed and searchable
Import ConvertMailboxToShared as a Runbook
Starting from our Azure Automation account:
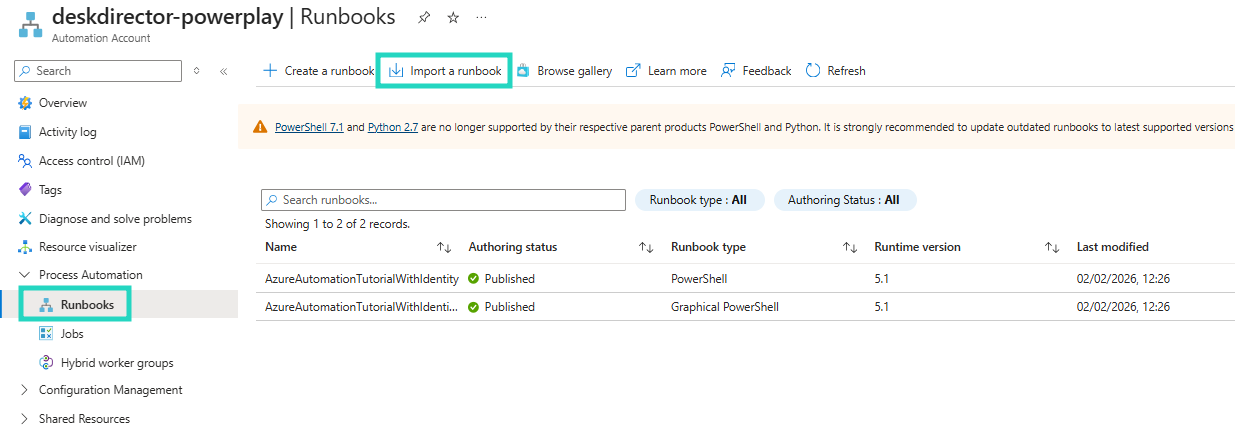
- From the Process Automation heading select Runbooks, followed by Import a runbook
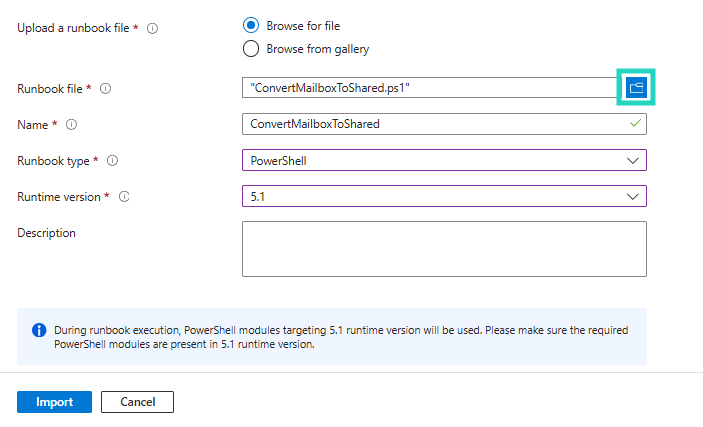
- With Browse for file enabled, browse and select the
ConvertMailboxToShared.ps1script provided with the solution- Runbook type: Powershell
- Runtime version: 5.1
- Select Import to complete this part of the process
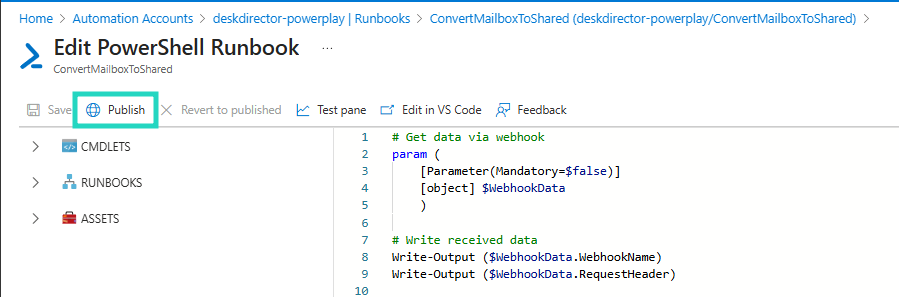
- The runbook will import in a New status, select Publish to make the script live
Runbook Webhook
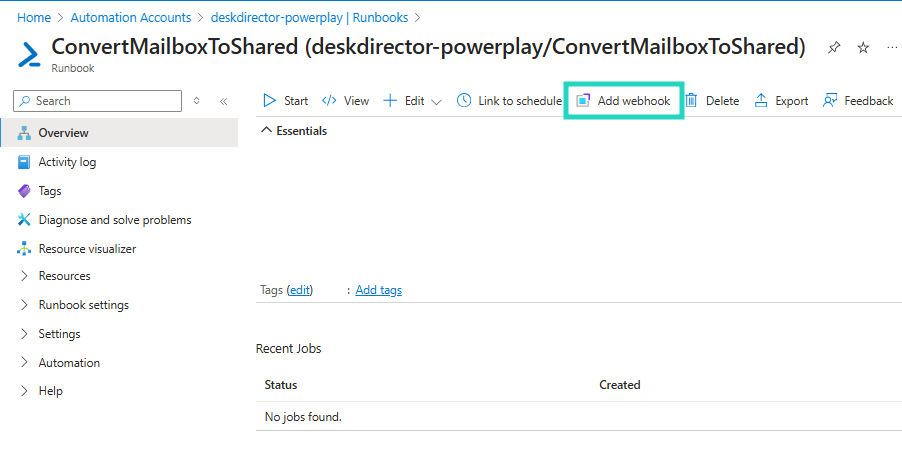
From our recently imported runbook:
- Select Add webhook from the top menu
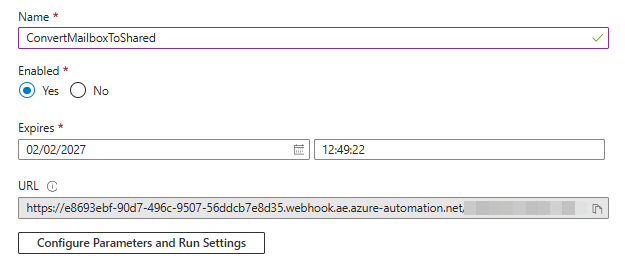
- Enter a Name for your webhook
- Copy the generated URL to a secure location, you will not be able to view this again
- Select Configure Parameters and Run Settings
- No changes are required on this next page, select Update
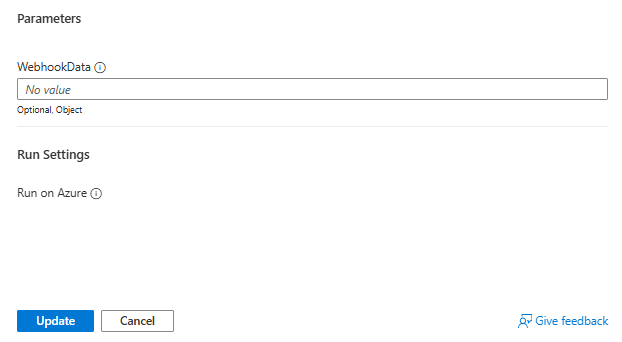
- Once redirected back to the original creation page, select Create to proceed
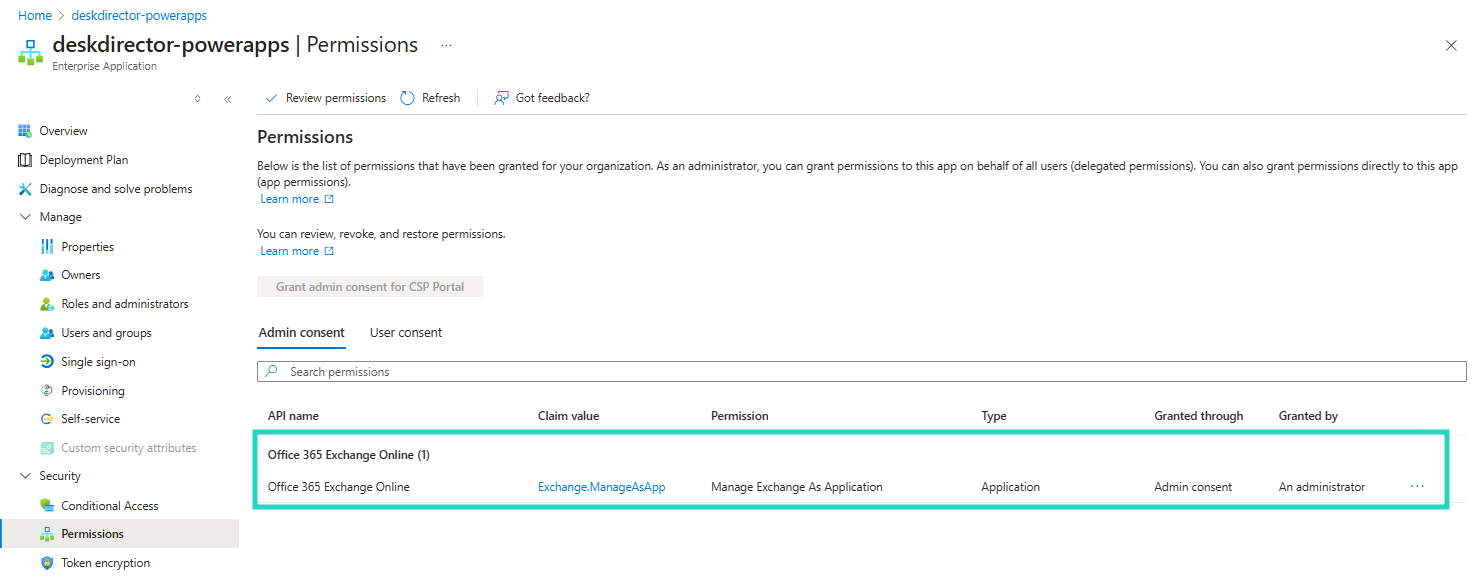
Assign Exchange.ManageAsApp using PowerShell
Similar to our approach during the initial Provisioning & Deployment steps, we will utilise the Microsoft Graph PowerShell SDK to grant the Manage Exchange As Application permissions required for this automation:
We will perform this by:
- Connecting to Microsoft Graph using
Connect-MgGraph -Scopes "Application.Read.All","AppRoleAssignment.ReadWrite.All", this should prompt you for Interactive sign-in - Defining the
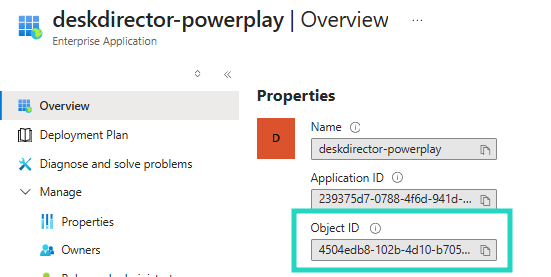
objectIdof our automation account's Service Principal: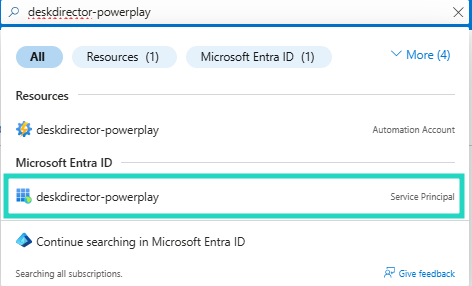
- Using the
AppIdforOffice 365 Exchange Online, a pre-defined value of00000002-0000-0ff1-ce00-000000000000, which we can validate by running the followingGet-MgServicePrincipalcommandGet-MgServicePrincipal -Filter "DisplayName eq 'Office 365 Exchange Online'"
DisplayName Id AppId SignInAudience ServicePrincipalType
----------- -- ----- -------------- --------------------
Office 365 Exchange Online aa4366e8-bc1d-4519-9c92-6b616c0d34a5 00000002-0000-0ff1-ce00-000000000000 AzureADMultipleOrgs Application
- Using the
Idof the Manage Exchange as Application permission scope, a pre-defined value ofdc50a0fb-09a3-484d-be87-e023b12c6440, which we can validate by storing our Office 365 Exchange Online service principal as a variable and returning theAppRolevalue forExchange.ManageAsApp$exo = Get-MgServicePrincipal -Filter "DisplayName eq 'Office 365 Exchange Online'"
$exo.AppRoles | Where-Object Value -eq "Exchange.ManageAsApp" | Format-List *
AllowedMemberTypes : {Application}
Description : Allows the app to manage the organization's Exchange environment without any user interaction. This includes mailboxes, groups, and other configuration objects. To enable management actions, an admin
must assign the appropriate roles directly to the app.
DisplayName : Manage Exchange As Application
Id : dc50a0fb-09a3-484d-be87-e023b12c6440
IsEnabled : True
Origin : Application
Value : Exchange.ManageAsApp
AdditionalProperties : {}
- Creating a new app role assignment:
New-MgServicePrincipalAppRoleAssignment `
  -ServicePrincipalId $spId `
  -PrincipalId $spId `
  -ResourceId $exo.Id `
  -AppRoleId $manageAsAppRoleId
Example Script:
# 1) Connect to Graph with permission to assign app roles
Connect-MgGraph -Scopes "Application.Read.All","AppRoleAssignment.ReadWrite.All"

# 2) Your managed identity Service Principal objectId
$spId = "REPLACE WITH SERVICE PRINCIPAL OBJECTID"

# 3) Get the Exchange Online resource service principal
$exo = Get-MgServicePrincipal -Filter "appId eq '00000002-0000-0ff1-ce00-000000000000'"

# 4) Exchange.ManageAsApp app role id
$manageAsAppRoleId = "dc50a0fb-09a3-484d-be87-e023b12c6440"

# 5) Create the app role assignment
New-MgServicePrincipalAppRoleAssignment `
  -ServicePrincipalId $spId `
  -PrincipalId $spId `
  -ResourceId $exo.Id `
  -AppRoleId $manageAsAppRoleId
Assign Exchange Administrator Role
Next we will assign the Exchange Administrator role to the Service Principal for our Automation Account:
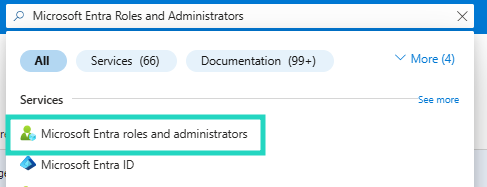
- Search and select the Microsoft Entra Roles and Administrators service
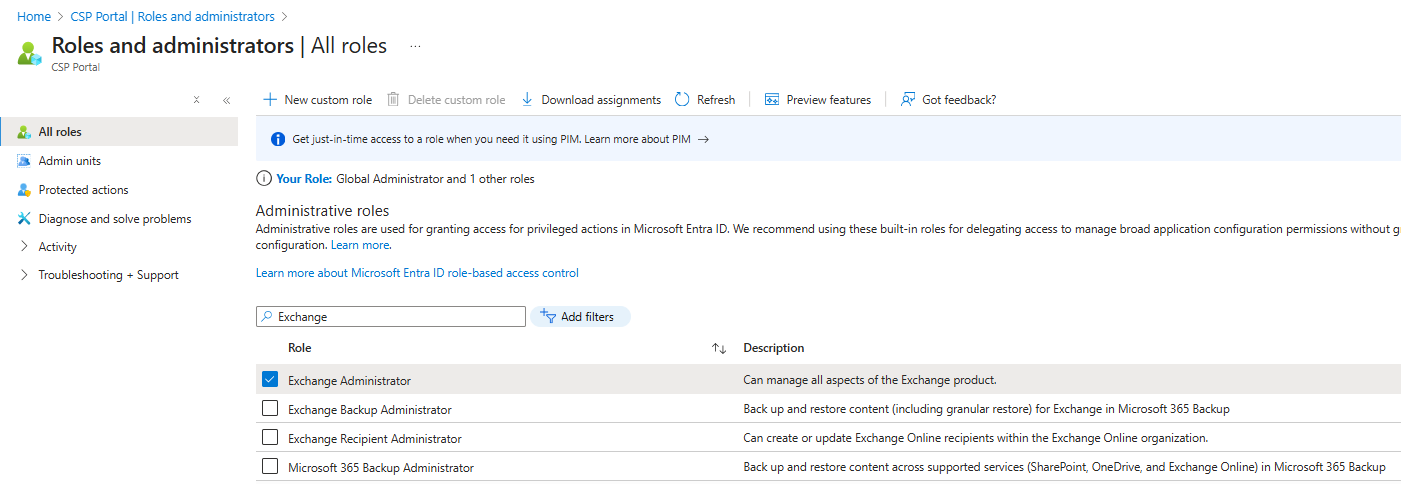
- Search and select the Exchange Administrator from the available list of roles
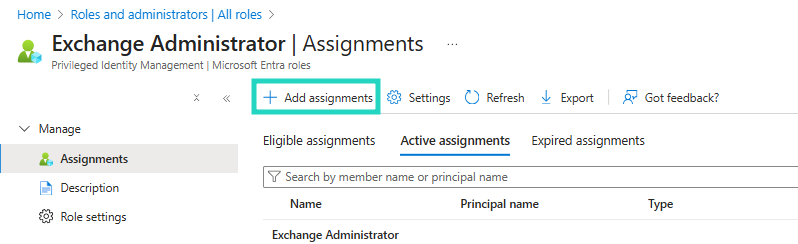
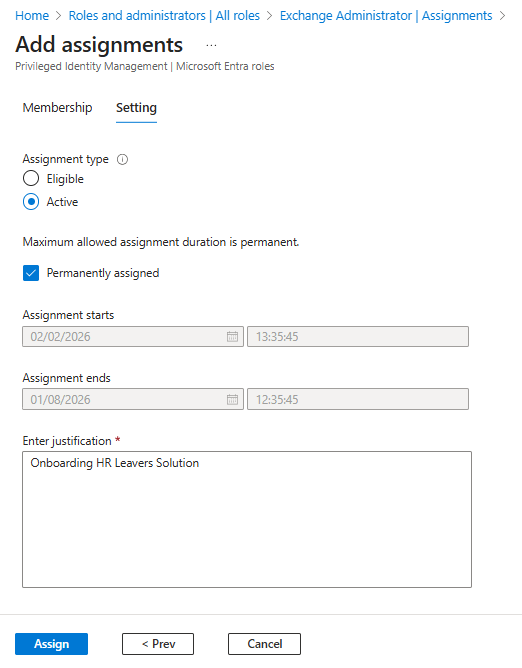
- From the Active Assignments tab, select Add Assignments
- From Select Member(s), search and select the service principal of the previously created automation account. In our example, this is
deskdirector-powerplay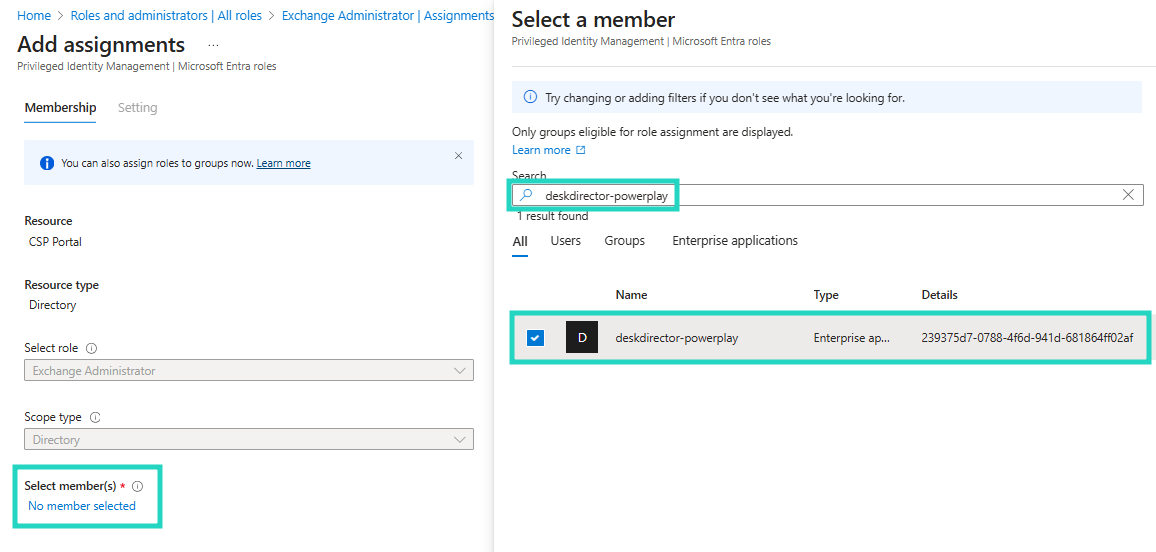
- Assignment Type: Active
- Permanently Assigned: Yes
- Enter a supporting justification, followed by Assign
Environment Variables
As part of configuring our Environment Variables in the Post Deployment instructions, we left the following 2 environment variables in their default state:
IECB HR Leavers - Azure Automation EnabledIECB HR Leavers - Azure Automation Webhook
To configure these variables:
- Within Power Apps, in our CustOrg environment select Solutions > Default Solution

- Select Environment variables from the available menus
- IECB HR Leavers - Azure Automation Webhook: Update the Current Value of the variable to the URL generated in the Runbook Webhook step
- IECB HR Leavers - Azure Automation Enabled: Update the Current Value of the variable to
Yes
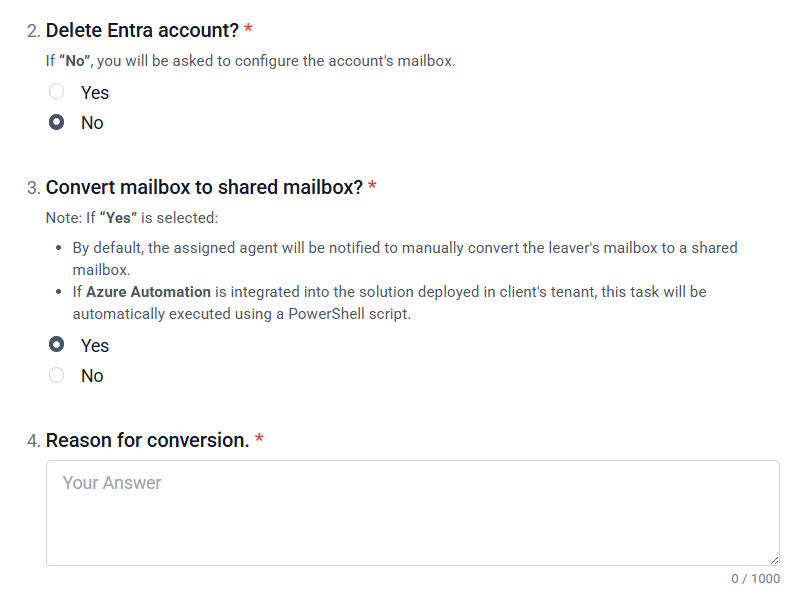
Final Notes
With the above steps complete, when the form question Convert mailbox to shared mailbox? is set to yes, an additional child flow will trigger within Power Platform:
- IECB Triggers the following command:
[DDCommand] Offboard an Entra account [DDCommand] Convert Mailbox to Shared (child)triggers as a child flow of[DDCommand] Offboard an Entra account[DDCommand] Convert Mailbox to Shared (child)performs a POST to theAzure Runbook Webhook