Table of Contents
- Asset Management Demonstration
- Deployment
- Post-deployment
- Connection References
- SharePoint Site Creation
- Environment Variables
- Cloud Flows
- Sharing the App
- Frequently Asked Questions
- General Overview & Product Introduction
- Navigation & User Interface
- Model Configuration
- Asset Classes (Domains, Warranties, Subscriptions, Network Devices)
- Purchase Orders
- Registering & Managing Assets
- Bulk Actions
- Installation & Deployment (Self-Service)
- Connection References & Environment Variables
- Security, Roles & Access Control
Asset Manager Solution
 Updated
by Niamh Ferns
Updated
by Niamh Ferns
- Asset Management Demonstration
- Deployment
- Post-deployment
- Connection References
- SharePoint Site Creation
- Environment Variables
- Cloud Flows
- Sharing the App
- Frequently Asked Questions
- General Overview & Product Introduction
- Navigation & User Interface
- Model Configuration
- Asset Classes (Domains, Warranties, Subscriptions, Network Devices)
- Purchase Orders
- Registering & Managing Assets
- Bulk Actions
- Installation & Deployment (Self-Service)
- Connection References & Environment Variables
- Security, Roles & Access Control
Asset Management Demonstration
The Asset Management PowerPlay solution provides an out-of-the-box solution for asset management and tracking for your organisation.
Below, you'll find a demonstration of the Asset Manager Solution in action:
What does it do?
With the Asset Management Solution, you can easily track your:
- Hardware
- Licenses
- Warranties
- Network Locations & Domains
- Hardware Assignments
- Product Orders & Asset Purchases
Deployment
In this section, we'll cover how to go through the deployment process for the Asset Management Solution.
For the deployment to work, you will need to deploy the solution library, then deploy either the ALM or self-service solution.
Solution Library Deployment
Integrations > Solution Library first before deploying via the DeskDirector Support Portal.- Open the DeskDirector support portal and submit a new ticket request under
Solution Library>Deploy a Service Solution - Select the Asset Management solution and a version from the dynamic lists, then add your Subdomain and an access token for your instance
- Select Submit
- You should now have a ticket where you can track the deployment status of your Asset Management solution. Review here for updates and continue once your deployment to your DeskDirector instance has finished.It is a good idea at this stage to check that the reported forms, service types, etc, have all been created in your instance as well before continuing.
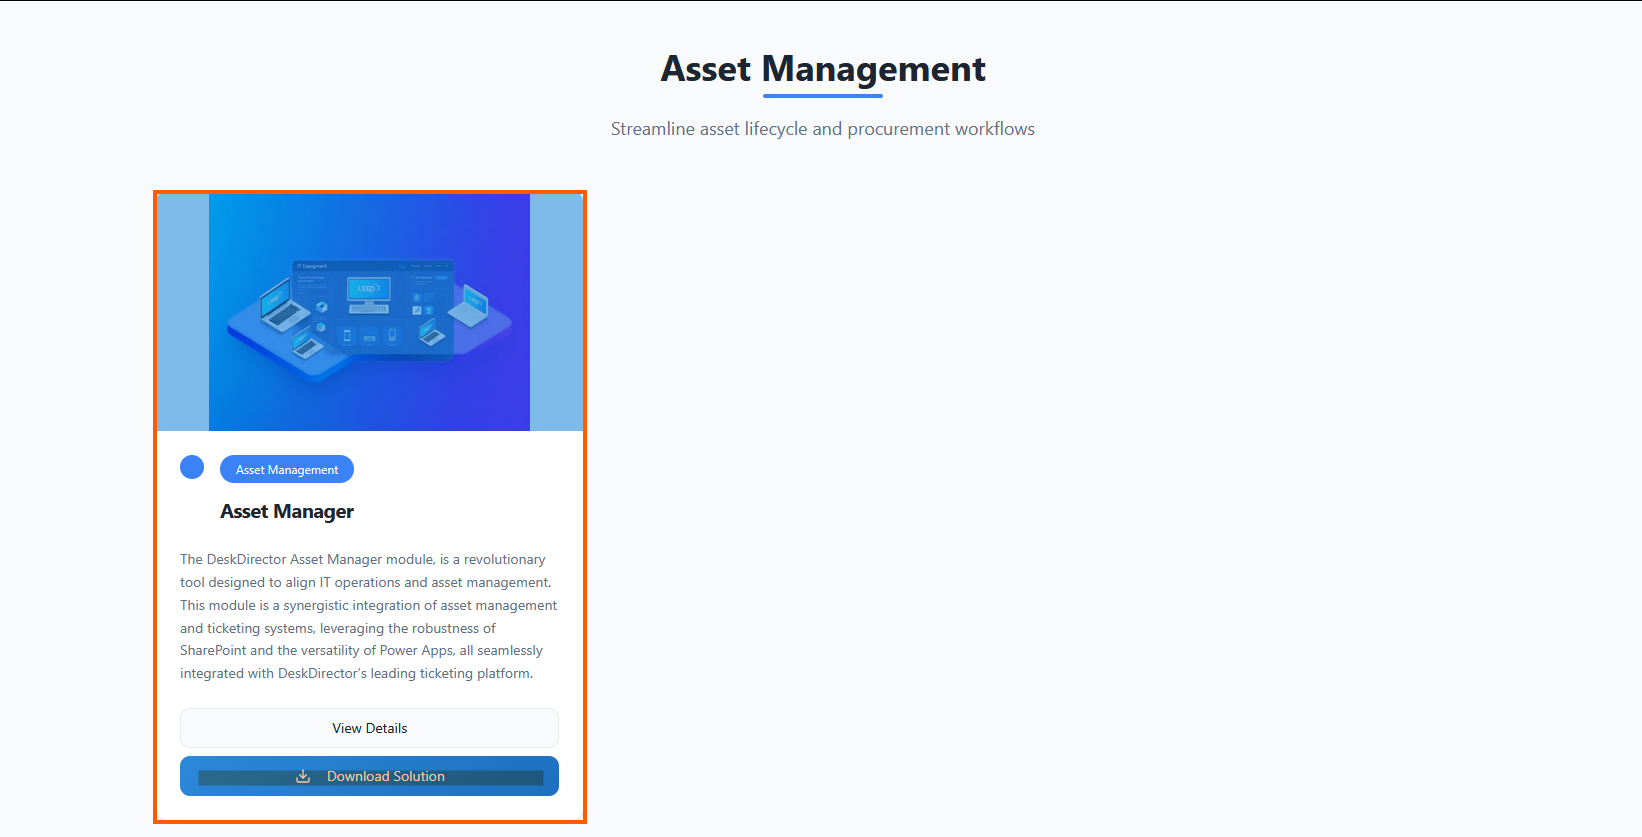
Solution Marketplace Deployment
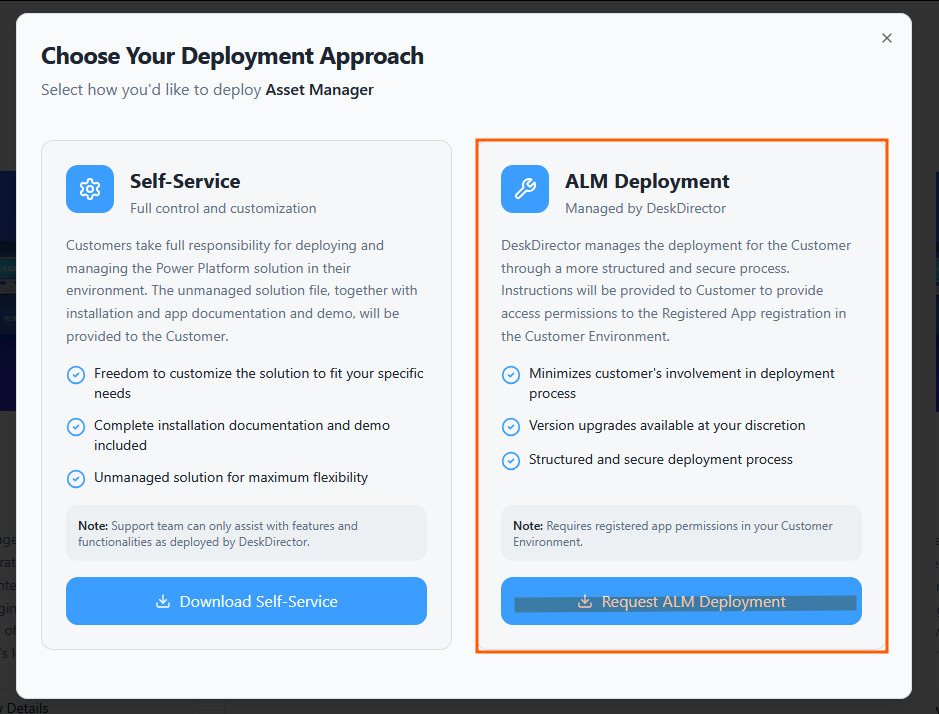
- Head to the PowerPlay Marketplace and select Download Solution for the Asset Manager solution:
- Select Request ALM Deployment:
- Navigate to your open tickets on the DD4DD Support Portal, and you should see a ticket with a name similar to
PowerPlay App Deployment Request: Asset Manager: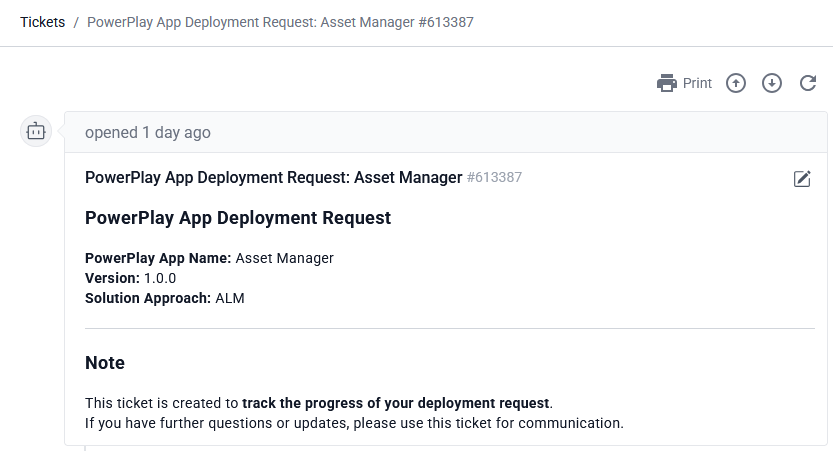
- Open the ticket and scroll down to the automated system comment. You should see that it has started the deployment for you:
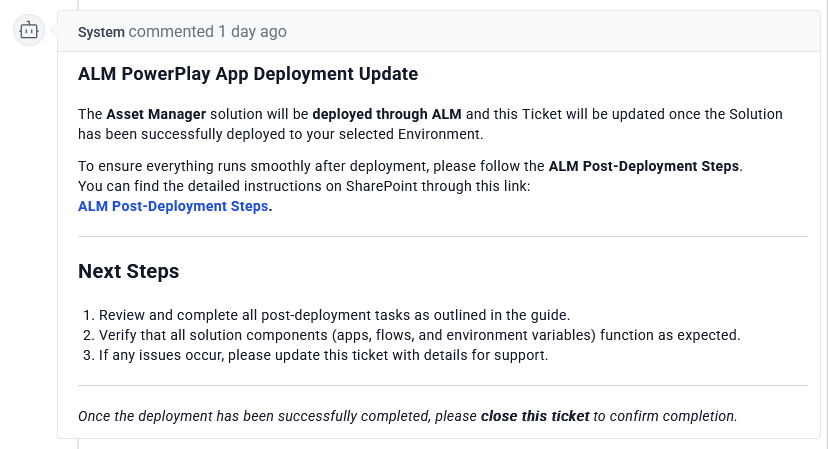
- Once the deployment is finished, you will see that a successful deployment has been reported on your ticket
- To confirm, open Power Apps and navigate to the Solutions tab. Under managed, you should see a successful deployment for Asset Manager:

Post-deployment
Connection References
- Under your ServOrg environment, navigate to the Asset Management Managed Solution and open the Connection references tab in the Objects panel
- Search for
Assetand then update the following connection references:These will all reference the connections you configured in your ServOrg post-deployment. For those who don't have an existing connection reference from the ServOrg post-deployment, you can create new ones using your service account.- Asset Manager - Microsoft Dataverse
- Asset Manager - Microsoft Teams
- Asset Manager - SharePoint
- Asset Manager - Excel Online (Business)
SharePoint Site Creation
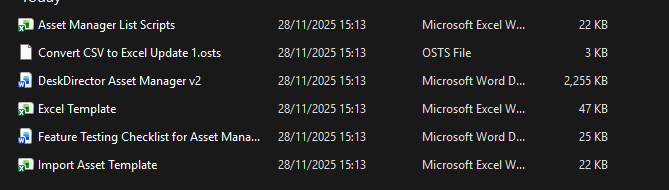
- On the ticket, you will have been provided with documentation on how to conduct the post-deployment as well as a series of documents. Download these to somewhere on your machine that they can be easily accessed, then continue to the next steps.
- Navigate to your Active Sites in SharePoint under your tenant
- Click Create and Select a Team site, then use the standard template and fill out the Site's information:
- Name:
Asset Management - Group email address:
AssetManagement - Group owner: Admin for your tenant
- Privacy settings:
Private - only members can access this site
- Name:
- Add any members that should have access, and create the site as well as your service account
- In your SharePoint site's Documents tab, import all the documents you downloaded earlier
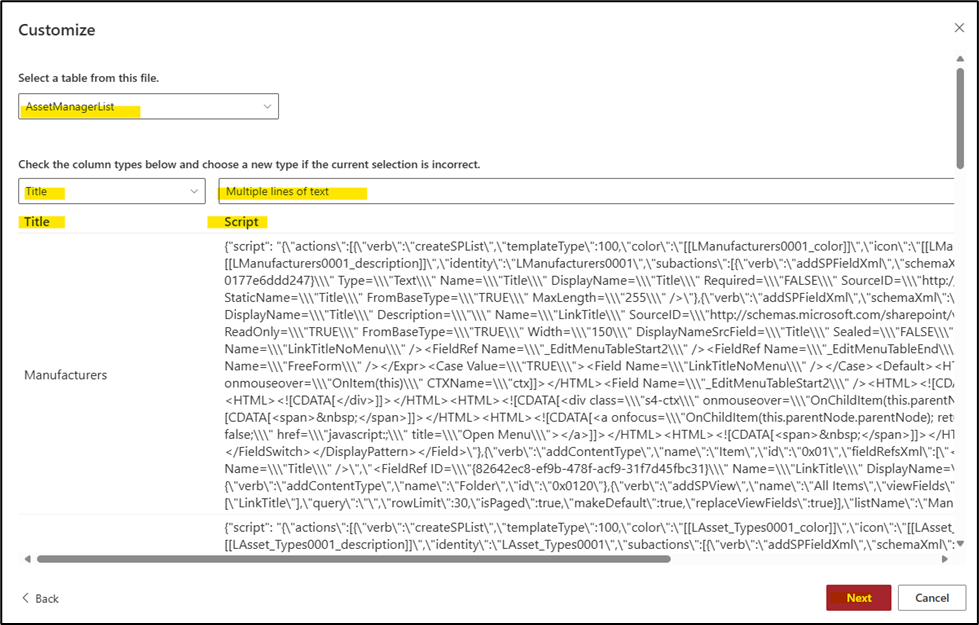
- Within your SharePoint site, create a new List and select Excel under the Import from section, and then select the Asset Manager List Scripts.xlsx document
- Ensure that you have the Title and Script columns available, then click next:
- After importing this, you should see various lists populate your SharePoint site. You will need to make some changes to these:
- Under the Assets list, set the default value for the Archive column to
Active - Under the Assets list, add an additional column source for the ParentAsset column, and set it to Parent Asset Tag ID
- Under the Asset Manager Default Values list, create two rows with the titles
Company LabelandAsset Tag Prefix Value. (See the video above if you are unsure what these refer to.)
- Under the Assets list, set the default value for the Archive column to
With this done, you can now move on to setting up your connection references and environment variables.
Environment Variables
When you set your environment variables, please instead add a custom value and do not edit the default.
- Navigate back to your ServOrg's Default Solution and open the Environment variables tab in the Object panel, and then set the following variables:
- Asset Manager - SharePoint Site
- Asset Manager - Asset Manager List Scripts
- Under the Cloud flows tab, enable and then run the Asset Manager - Create SharePoint Lists flow.You will be warned that environment variables will be invalidated. Agree to this, then continue.
- Now, again under the Environment variables tab in the Objects panel, update the following variables:If you are unsure what these variables should be set to, please reference the video above.
- Asset Manager - Admin Email
- Asset Manager - Asset Bulk Import Records
- Asset Manager - Asset Manager Default Values
- Asset Manager - Asset Notes and Documents
- Asset Manager - Asset Types
- Asset Manager - Types
- Asset Manager - Documents
- Asset Manager - Domain
- Asset Manager - Location
- Asset Manager - Manufacturers
- Asset Manager - Models
- Asset Manager - Network Device
- Asset Manager - Parent Asset
- Asset Manager - Purchase Orders
- Asset Manager - Subscription
- Asset Manager - Tags
- Asset Manager - Warranty
Cloud Flows
We are now going to go through and enable the required flows for the Asset Management solution.
- Back in your ServOrg's Default Solution, under the Cloud flows tab in the Objects panel, enable and then run the Asset Manager - Save SP Document Library ID as Environment Variable flowThis will populate the final environment variable that we didn't set in the last section!
- Once that has been successful, navigate to your Asset Manager Managed Solution in your ServOrg and then enable the following flows in order:
- Asset Manager - Bulk Import Existing Assets Using Excel Template V2
- Asset Manager - Create Asset Import Template
- Asset Manager - Create CSV Report
- Asset Manager - Get Filtered Counts of Asset List (HTTP)
- Asset Manager - Get Total Count of Asset List (HTTP)
Sharing the App
- Log in to the Power Platform Admin Center and load it into your ServOrg environment, and open the Users modal
- For each account you want to add this role to:
- Search for the account
- For the relevant account in the list, click
⁝ (More Options)>Manage security roles - Apply the relevant Admin or User role depending on which access level the user should have in the app.
- Click Save
- Navigate back to your Managed Solutions in your ServOrg and open the Asset Management Solution, then open the Apps tab in the object Panel. From here, you can share the Asset Management app with the users who will need access
- Under the Details tab, copy the app's weblink and then play the Asset Management app
Frequently Asked Questions
General Overview & Product Introduction
- Q1: What is the PowerPlay Asset Manager?
A: The PowerPlay Asset Manager is a centralized inventory management solution that allows organisations to manage, view, and update their entire asset inventory. It is built on SharePoint and Power Apps, seamlessly integrated with DeskDirector's ticketing platform. You can track devices, licenses, warranties, subscriptions, network devices, purchase orders, and more — and link all of these together for a comprehensive understanding of how assets are used and where.
[Source: DeskDirector Asset Manager v2 – Product Overview Document | Section: DeskDirector Asset Manager / Asset Manager Solution Overview]
- Q2: What technologies does the Asset Manager run on?
A: The Asset Manager leverages Microsoft SharePoint for data storage, Microsoft Power Apps for the application layer, Power Automate Flows for automation, and integrates with DeskDirector's ticketing platform. It also requires Microsoft 365 and a Power Apps Premium License for the service account running the solution.
[Source: DeskDirector Asset Manager v2 – Product Overview Document | Section: DeskDirector Asset Manager (Introduction)]
- Q3: What types of assets can I track?
A: You can track a wide range of assets including physical devices (laptops, desktops, peripherals), network devices, software licenses, subscriptions, warranties, and domains. The system supports any asset type you define, and you can associate domains, warranties, subscriptions, and network device information with individual assets.
[Source: Asset Manager – Quick Start Guide (help.powerplay.tech) | Section: Overview & Asset Classes sections]
- Q4: Is there a difference between the Admin App and the User App?
A: Yes. The Asset Manager is split into two separate applications. The Admin App provides full control over asset management, including configuration settings, bulk actions, model management, and administrative tasks. The General User App is a simplified, restricted experience where end-users can register and view their own assets, leave notes, and attach documents — but cannot access bulk actions or admin configuration.
[Source: DeskDirector Asset Manager v2 – Product Overview Document | Section: Asset Manager Solution Overview – Admin App / User App]
- Q5: Why was the Asset Manager split into two apps?
A: The restructuring into Admin and User Apps was done to enhance security, usability, and role-specific functionality. It prevents general users from accessing sensitive configuration options while giving administrators complete flexibility.
[Source: DeskDirector Asset Manager v2 – Product Overview Document | Section: DeskDirector Asset Manager (Introduction)]
- Q6: What can general users do in the User App?
A: General users can: browse all assets in a read-only format, access a personalised list of assets assigned to them, register new assets under their own ownership, leave notes on any asset, and attach supporting files to assets. They cannot edit other users' assets, delete existing attachments, access bulk actions, or modify admin configuration settings.
[Source: DeskDirector Asset Manager v2 – Product Overview Document | Section: User App – User Capabilities & Restrictions for General Users]
- Q7: What can admins do that regular users cannot?
A: Admins can view, edit, and delete all assets in the system; link and update parent-child asset relationships; perform bulk import, edit, delete, and attachment operations; create and manage asset types, models, and manufacturers (including merging duplicates); configure asset classes (domains, warranties, subscriptions, network devices); create and manage purchase orders; and manage user ownership across assets.
[Source: DeskDirector Asset Manager v2 – Product Overview Document | Section: Admin App – Admin Capabilities]
- Q8: Does the Asset Manager integrate with ticketing or help desk systems?
A: Yes. The Asset Manager is designed as a synergistic integration of asset management and ticketing systems, and integrates seamlessly with DeskDirector's leading ticketing platform. This allows IT teams to manage assets in the context of their support and service operations.
[Source: DeskDirector Asset Manager v2 – Product Overview Document | Section: DeskDirector Asset Manager (Introduction)]
Navigation & User Interface
- Q1: What does the Admin Landing Page look like?
A: The Admin Landing Page contains three primary sections: Dashboard (access to asset list and asset registration), Bulk Actions (bulk import, edit, delete, child updates, and attachments), and Admin Configuration (model configuration, asset classes, and purchase orders).
[Source: DeskDirector Asset Manager v2 – Product Overview Document | Section: Application Features – Admin Landing Page]
- Q2: What does the General User Landing Page contain?
A: The General User Landing Page is a simplified version of the Admin interface and only includes the Dashboard section, which shows the asset list and allows registering new assets.
[Source: DeskDirector Asset Manager v2 – Product Overview Document | Section: General User Landing Page]
- Q3: What menu options are available in the Admin App?
A: The Admin App menu includes: Dashboard (overview of all asset-related activities, recent changes, and reports), Contacts (manage asset owners and associated contacts), Asset Management (full control over asset inventory), Procurement (manage asset requests, purchase orders, and approval workflows), and Configuration (admin-only access to create and manage asset types, models, and manufacturers).
[Source: DeskDirector Asset Manager v2 – Product Overview Document | Section: Navigation and UI – Admin App Menu]
- Q4: What menu options are available in the General User App?
A: The General User App menu includes: Dashboard (personalised overview of assigned assets), My Assets (list of assets owned by the user), All Assets (read-only view of all assets in the system), Register Asset (add new assets), and Notes & Documents (view and leave notes on assets).
[Source: DeskDirector Asset Manager v2 – Product Overview Document | Section: Navigation and UI – General User App Menu]
- Q5: How are asset statuses visually displayed in the Asset List?
A: Asset statuses are colour-coded on the left side of each Asset List item: Green = Available, Blue = In Use, Yellow = Reserved, Orange = In Repair, and Red = Retired. Additionally, a bookmark icon is used to indicate whether an asset is a Parent Asset, helping users quickly recognise the hierarchical structure.
[Source: DeskDirector Asset Manager v2 – Product Overview Document | Section: Asset List – Visual Indicators]
- Q6: How can I filter and sort the Asset List?
A: You can filter by asset status (Available, In Use, Reserved, In Repair, Retired), toggle to show only Parent Assets, and use dropdown filters for Location, Asset Type, and Tags. Sorting is available by Asset Tag, Serial Number, Model, Manufacturer, Purchase Order, and Domain — in ascending or descending order. You can search for specific assets using Asset Tag, Serial Number, or Model.
[Source: DeskDirector Asset Manager v2 – Product Overview Document | Section: Asset List – Filtering and Sorting / Filter Section]
- Q7: Can general users filter assets the same way admins can?
A: No. Admins can filter by status, type, owner, and other attributes across all assets in the system. General users can only filter their own assets.
[Source: DeskDirector Asset Manager v2 – Product Overview Document | Section: Asset List – Filtering and Sorting]
Model Configuration
- Q1: What is Model Configuration?
A: Model Configuration is where administrators set up and manage the models used when registering assets. A model is a combination of an Asset Type (e.g., Laptop) and a Manufacturer (e.g., Lenovo), given a unique name and a picture to distinguish it.
[Source: Asset Manager – Quick Start Guide (help.powerplay.tech) | Section: Admin Features Overview – Model Configuration]
- Q2: How do I create a new asset model?
A: You need an Asset Type and a Manufacturer already defined in the system. Then you can create a model by combining them — for example, 'Lenovo' + 'Laptop' = a specific Lenovo laptop model. Once a model exists, it can be selected when registering individual assets.
[Source: Asset Manager – Quick Start Guide (help.powerplay.tech) | Section: Model Configuration]
- Q3: Can admins merge duplicate manufacturers or asset types?
A: Yes. The Admin Configuration section includes the ability to merge Manufacturers and merge Asset Types. This is useful for consolidating duplicates that may have been created during bulk imports or by different users.
[Source: DeskDirector Asset Manager v2 – Product Overview Document | Section: Admin Configuration – Model Configuration (Merge Manufacturers / Merge Asset Types)]
- Q4: Do I need to create models before registering assets individually?
A: Yes, individual asset registration requires a pre-existing model. However, when using the Bulk Importer, new models, manufacturers, and asset types are automatically created if they do not already exist.
[Source: Asset Manager – Quick Start Guide (help.powerplay.tech) | Section: Model Configuration & Bulk Importer]
- Q5: Can I add a picture to a model?
A: Yes. When creating a model, you can add a picture to visually distinguish it from others. This helps staff quickly identify the correct model when registering new assets.
[Source: Asset Manager – Quick Start Guide (help.powerplay.tech) | Section: Model Configuration]
Asset Classes (Domains, Warranties, Subscriptions, Network Devices)
- Q1: What are Asset Classes?
A: Asset Classes are additional categories of information that can be assigned to an asset when it is created. They provide supplementary details or associations for assets. The four types of asset classes are: Domains, Warranties, Subscriptions, and Network Devices.
[Source: Asset Manager – Quick Start Guide (help.powerplay.tech) | Section: Admin Features Overview – Asset Classes]
- Q2: What information does a Domain asset class hold?
A: A Domain entry stores a registrar name and a renewal date. Domains are typically attached to network devices and help you track when domain registrations are due for renewal.
[Source: Asset Manager – Quick Start Guide (help.powerplay.tech) | Section: Asset Classes – Domains]
- Q3: How do Warranties work in the Asset Manager?
A: Each warranty record includes a name, a description, and an expiry date. Warranties are linked to physical assets at the time of registration, allowing you to monitor upcoming warranty expirations across your inventory.
[Source: Asset Manager – Quick Start Guide (help.powerplay.tech) | Section: Asset Classes – Warranties]
- Q4: Can I track software or service subscriptions?
A: Yes. The Subscriptions asset class lets you record a subscription name, description, and renewal date, and associate it with a specific asset. This is useful for managing software licenses or cloud service subscriptions tied to particular devices or users.
[Source: Asset Manager – Quick Start Guide (help.powerplay.tech) | Section: Asset Classes – Subscriptions]
- Q5: What network device details can I store per asset?
A: The Network Devices asset class allows you to record the IP address, MAC address, and subnet for each network device, linked directly to the asset record.
[Source: Asset Manager – Quick Start Guide (help.powerplay.tech) | Section: Asset Classes – Network Devices]
- Q6: Can a single asset have multiple asset classes assigned to it?
A: Yes. When registering an asset, the Asset Classes tab lets you assign any combination of domains, warranties, subscriptions, and network device details to the same asset, giving you a complete picture in one record.
[Source: Asset Manager – Quick Start Guide (help.powerplay.tech) | Section: Register an Asset – Asset Classes tab]
- Q7: Can I edit an asset class assignment after an asset has been created?
A: Yes. From the Asset Details Page, users can click the edit button for a specific Asset Class and select a new specification from a dropdown. This applies to Domain, Warranty, and Subscription asset classes.
[Source: DeskDirector Asset Manager v2 – Product Overview Document | Section: Asset Details Page – Asset Class (Edit specification)]
- Q8: Can I see all assets that share the same asset class?
A: Yes. From the Asset Details Page, clicking the Details button on an Asset Class navigates to that class and its specifications, showing a full list of all assets that belong to that same class and specification.
[Source: DeskDirector Asset Manager v2 – Product Overview Document | Section: Asset Details Page – Asset Class Details]
Purchase Orders
- Q1: What are Purchase Orders used for?
A: Purchase Orders allow you to track procurement records for assets coming into your organisation. Each purchase order includes a date, a unique order number, and the person who placed the order. They can be attached to individual assets at registration.
[Source: Asset Manager – Quick Start Guide (help.powerplay.tech) | Section: Admin Features Overview – Purchase Orders]
- Q2: How do I create a Purchase Order?
A: Purchase Orders are created from the Purchase Orders section in the Admin App's Admin Configuration area. Once created, they can be selected and linked to an asset during asset registration from the Purchase Orders tab.
[Source: Asset Manager – Quick Start Guide (help.powerplay.tech) | Section: Purchase Orders]
- Q3: Can I edit a Purchase Order after it has been created?
A: Yes. Purchase Orders can be edited after creation if any details need to be corrected or updated.
[Source: Asset Manager – Quick Start Guide (help.powerplay.tech) | Section: Purchase Orders]
- Q4: Can the same Purchase Order be linked to multiple assets?
A: Yes. A single purchase order can be associated with multiple assets — for example, when a batch of devices is procured in one order, each device can individually reference that same purchase order number.
[Source: Asset Manager – Quick Start Guide (help.powerplay.tech) | Section: Purchase Orders & Bulk Importer]
- Q5: Can I attach a Purchase Order during a bulk import?
A: Yes. The Bulk Import template includes a Purchase Order Num field. If a purchase order with the matching number already exists in the system, it will be reused. If not, a new one will be created automatically.
[Source: Asset Manager – Quick Start Guide (help.powerplay.tech) | Section: Bulk Importer – Purchase Order Num field]
Registering & Managing Assets
- Q1: How do I register a new asset?
A: From either the Admin or User App, select 'Register Asset'. You will be guided through four tabs: (1) Basic Asset Details — asset tag, serial number, model, manufacturer, colour, owner, status, and type; (2) Link Assets — set parent/child relationships; (3) Purchase Orders — optionally link a purchase order; (4) Asset Classes — assign domains, warranties, subscriptions, or network device details. A Summary section lets you review everything before selecting Save.
[Source: Asset Manager – Quick Start Guide (help.powerplay.tech) | Section: Registering & Viewing Assets – Register an Asset]
- Q2: What is the difference between how admins and users register assets?
A: Admins can register any asset and assign ownership to any user, and can define asset types, models, and manufacturers on the fly. General users can only register assets under their own ownership and cannot assign assets to other users. User registration is also limited to predefined configurations (asset types, manufacturers, purchase orders, and asset classes) set up by admins.
[Source: DeskDirector Asset Manager v2 – Product Overview Document | Section: Registering an Asset – Admin Users / General Users]
- Q3: How do parent-child asset relationships work?
A: When registering an asset on the Link Assets tab, you can designate it as a Parent Asset or link it to an existing parent. When an asset is registered as a parent, its owner is assigned and subsequent child assets linked to it will inherit the same owner. From the Asset Details Page, you can view all child assets under a parent, or see the parent and related sibling assets for a child asset. Admins can add or remove linked assets at any time.
[Source: DeskDirector Asset Manager v2 – Product Overview Document | Section: Asset Registration Form – Link Asset / Asset Details Page – Linked Assets]
- Q4: Can I view the full details of an asset after it has been registered?
A: Yes. Selecting any asset from the Asset List opens its Asset Details Page, which shows all basic details, linked assets (parent/child), asset classes, purchase order information, and any attached notes and documents.
[Source: Asset Manager – Quick Start Guide (help.powerplay.tech) | Section: Viewing Assets]
- Q5: Can I edit or delete an asset after registering it?
A: Admins can edit and delete any asset from the Asset Details Page. General users can only edit assets assigned to them and cannot delete assets. General users can leave notes and attach files to any asset, but cannot remove existing attachments.
[Source: DeskDirector Asset Manager v2 – Product Overview Document | Section: Asset Details Page – Admin View / General User View]
- Q6: How does the model selection work when registering an asset?
A: The model dropdown is filtered based on the Asset Type and Manufacturer you select. Only models matching that combination are shown, making it easier to find the correct model.
[Source: Asset Manager – Quick Start Guide (help.powerplay.tech) | Section: Register an Asset – Basic Asset Details tab]
- Q7: Can I assign an owner to an asset?
A: Yes. During registration, admins can assign an owner to any asset. The owner must exactly match the name of a user already in your Microsoft 365 tenant. During bulk import, the Owner Mail field (matching the user's M365 email exactly) is also available.
[Source: Asset Manager – Quick Start Guide (help.powerplay.tech) | Section: Bulk Importer – Owner / Owner Mail fields]
- Q8: Can I add notes and documents to an asset?
A: Yes. Both admins and general users can add notes and attach files to assets. Admins can also edit, delete, and manage all notes and documents. Users can view all attachments on a note by clicking 'View Attachments', which shows a preview window with the option to download files.
[Source: DeskDirector Asset Manager v2 – Product Overview Document | Section: Asset Details Page – Asset Documents and Notes]
- Q9: What asset statuses are available?
A: The Asset Manager supports five statuses: Available, In Use, Reserved, In Repair, and Retired. These must be used exactly as listed — particularly during bulk imports, where any other value will cause the row to fail.
[Source: DeskDirector Asset Manager v2 – Product Overview Document | Section: Asset List – Color-Coded Status / Bulk Importer table]
Bulk Actions
- Q1: What bulk actions are available?
A: The Asset Manager supports four types of bulk actions, all accessible from the Admin App only: Bulk Import (add many assets at once using an Excel template), Bulk Edit or Delete (update or remove multiple existing assets), Bulk Child Asset Update (apply changes to multiple child assets under a parent), and Bulk Attachment (add file attachments to multiple assets simultaneously).
[Source: Asset Manager – Quick Start Guide (help.powerplay.tech) | Section: Bulk Actions]
- Q2: How does the Bulk Importer work?
A: Click 'Load Asset Template' in the Admin App to open a templated Excel spreadsheet. Fill in a row for each asset, then click 'Start Bulk Import'. The system processes all entries, automatically creates any missing manufacturers, asset types, models, colours, or locations, and reports how many were successfully imported. Any duplicates detected are presented for review — you can update or delete them.
[Source: Asset Manager – Quick Start Guide (help.powerplay.tech) & Source: DeskDirector Asset Manager v2 – Product Overview Document | Section: Bulk Importer / Bulk Import Process]
- Q3: What fields are required in the Bulk Import template?
A: The required fields are: Asset Tag, Status, Serial Number, Model Name, Manufacturer, Asset Type, and Is Parent Asset (value must be 'yes' or 'no'). All other fields — including Colour, Parent Asset, Warranty details, Domain details, Subscription details, Location, Purchase Order Num, Owner, and Owner Mail — are optional.
[Source: Asset Manager – Quick Start Guide (help.powerplay.tech) | Section: Bulk Importer – template table]
- Q4: What happens to missing manufacturers, asset types, or models during a bulk import?
A: If a Manufacturer, Asset Type, or Model Name does not already exist in the system, it is automatically created during the bulk import. The same applies to Colours and Locations. For Warranties, Domains, Subscriptions, and Purchase Orders, the importer will reuse an existing record if one matches on the key fields, or create a new one if no match is found.
[Source: Asset Manager – Quick Start Guide (help.powerplay.tech) | Section: Bulk Importer – table (Restrictions column)]
- Q5: How does duplicate detection work during a bulk import?
A: Duplicate detection uses the Asset Tag and Serial Number as the matching criteria. It checks for duplicates both within the records being imported in the same batch and against assets already in your inventory. After the import completes, you can review detected duplicates and choose to update (e.g., correct the asset tag or serial number) or delete them. Note: two devices with the same serial number but different asset tags will not be flagged.
[Source: Asset Manager – Quick Start Guide (help.powerplay.tech) | Section: Bulk Importer – Duplicate Detection]
- Q6: What browser setting do I need for the Bulk Import Excel template to open?
A: You must allow pop-ups and redirects for https://app.spowerapps.com in your browser. If the redirect fails, select 'Restart Load Asset Template' in the app after enabling pop-ups and try again.
[Source: Asset Manager – Quick Start Guide (help.powerplay.tech) | Section: Bulk Import Instructions – Step 3]
- Q7: How do I bulk edit or delete existing assets?
A: From the Admin App, go to the Bulk Actions section and select the Edit or Delete tab. Check the assets you want to change on the right side of the asset list, then select either Bulk Edit or Bulk Delete. For bulk edits, you can update fields including: Asset Type, Manufacturer, Model, Location, Owner, and Status.
[Source: Asset Manager – Quick Start Guide (help.powerplay.tech) & Source: DeskDirector Asset Manager v2 – Product Overview Document | Section: Bulk Edit or Delete]
- Q8: What is a Bulk Child Asset Update and when would I use it?
A: A Bulk Child Asset Update lets you apply changes — specifically Owner, Status, and Location — to multiple child assets that all share the same parent asset. This is useful when a group of devices changes hands, moves to a new office, or changes status simultaneously.
[Source: Asset Manager – Quick Start Guide (help.powerplay.tech) & Source: DeskDirector Asset Manager v2 – Product Overview Document | Section: Bulk Child Asset Update / Child Assets Update]
- Q9: How do I add file attachments to multiple assets at once?
A: From the Admin App, navigate to Bulk Actions and select Attachment. Select the assets you want to attach files to using the checkboxes, click 'Bulk Attach', add a note for the attachment, upload the files, and select Update. The files will be added to all selected assets.
[Source: Asset Manager – Quick Start Guide (help.powerplay.tech) | Section: Bulk Attachment]
- Q10: Can general users access Bulk Actions?
A: No. Bulk Actions are restricted to the Admin App and are not accessible by general users.
[Source: DeskDirector Asset Manager v2 – Product Overview Document | Section: Restrictions for General Users]
Installation & Deployment (Self-Service)
- Q1: What are the prerequisites for deploying Asset Manager myself?
A: You need: access to the Power Apps portal (make.powerapps.com), a Service Account with Power Platform Administrator Rights and a Power Apps Premium License, access to your SharePoint Admin Center, and the deployment files provided in the notification link from PowerPlay.
[Source: Asset Manager Self-Service Installation Guide | Section: Overview & Create Connection References – Step 1]
- Q2: What is the first step in the self-service installation?
A: The first step is to create Connection References. Log in to make.powerapps.com using the Service Account, select the correct environment where Asset Manager is deployed, go to the Connections tab, and create the required connection references under the logged-in Service Account.
[Source: Asset Manager Self-Service Installation Guide | Section: Create Connection References]
- Q3: Do I need to create a dedicated SharePoint site for Asset Manager?
A: Yes. You must create a dedicated SharePoint site for the Asset Manager. Within that site, you then create a list from the Excel file named 'Asset Manager List' (selecting the Title and Script columns), and upload the deployment files to the site's document library.
[Source: Asset Manager Self-Service Installation Guide | Section: Create SharePoint Site and Lists]
- Q4: How are the SharePoint lists created?
A: After creating the SharePoint site and the initial list from the Excel file, you turn on and run the Power Automate Flow named 'Asset Manager – Create SharePoint Lists'. This flow automatically creates all the necessary lists needed by the Asset Manager solution.
[Source: Asset Manager Self-Service Installation Guide | Section: Create SharePoint Site and Lists – Step 4]
- Q5: What environment variables need to be configured?
A: Sixteen environment variables must be updated in the Default Solution, in the following order: (1) SharePoint Site, (2) Asset Manager List Scripts, (3) Asset Notes and Documents, (4) Asset Types, (5) Assets, (6) Documents, (7) Domain, (8) Location, (9) Manufacturers, (10) Models, (11) Network Device, (12) Parent Asset, (13) Purchase Order, (14) Subscription, (15) Warranty, and (16) Asset Bulk Import Records. Each maps to a corresponding SharePoint list you created.
[Source: Asset Manager Self-Service Installation Guide | Section: Update the Environment Variables – Update Environment Variables table]
- Q6: What flows must be turned on and in what order?
A: After configuring environment variables, first run the flow 'Asset Manager – Save SP Document Library ID as Env Variable' to set the Document Library ID. Then turn on the following flows in order: (1) Asset Manager – Bulk Import Existing Assets using Excel Template v2, (2) Asset Manager – Create Asset Import Template, (3) Asset Manager – Create CSV Report, (4) Asset Manager – Get Filtered Counts of Asset List (HTTP), (5) Asset Manager – Get Total Count of Asset List (HTTP).
[Source: Asset Manager Self-Service Installation Guide | Section: Configure and Turn on Flows]
- Q7: How do I share the Asset Manager apps with users after installation?
A: Create separate and dedicated Security Groups for Asset Manager Admins and for general Users. Then share the Admin App with the Admins security group and the User App with the Users security group, using the 'Share' option from the app's more options menu.
[Source: Asset Manager Self-Service Installation Guide | Section: Share the Asset Manager App]
- Q8: Is there an ALM (automated/managed) deployment option separate from self-service?
A: Yes. In addition to the self-service installation guide, there is a separate ALM (Application Lifecycle Management) deployment path. After a successful ALM deployment, you receive a notification via your Solution Deployment Request Ticket and then perform post-deployment steps: updating connection references, creating the SharePoint site and lists, uploading deployment files, updating environment variables, and turning on the required flows.
[Source: Asset Manager ALM Post Deployment Steps | Section: Asset Manager ALM Post Deployment Steps – Overview]
- Q9: What is the difference between the self-service installation and the ALM deployment?
A: In the self-service installation, you deploy the solution and configure everything yourself from scratch. In the ALM deployment, the solution package is deployed for you (managed by PowerPlay), and you only need to perform the post-deployment configuration steps — connection references, SharePoint setup, environment variables, and flows — after receiving a completion notification.
[Source: Asset Manager ALM Post Deployment Steps & Source: Asset Manager Self-Service Installation Guide | Section: Overview sections of both guides]
- Q10: What account should I use to set up the Asset Manager?
A: You must use a dedicated Service Account that has Power Platform Administrator Rights and a Power Apps Premium License. This service account must also be the Owner of the SharePoint site created for Asset Manager, as ownership is required when selecting the SharePoint site from the environment variable dropdown.
[Source: Asset Manager Self-Service Installation Guide | Section: Create Connection References – Step 1 / Update Environment Variables – Note for Variable 1]
Connection References & Environment Variables
- Q1: What are Connection References and why do they matter?
A: Connection References are configurations in Power Apps that link the Asset Manager solution to the underlying services it depends on (such as SharePoint). Each connection reference must be created and assigned to the Service Account in the correct deployment environment. Without properly configured connection references, the Asset Manager flows and apps will not function.
[Source: Asset Manager ALM Post Deployment Steps | Section: Update Solution's Connection References]
- Q2: Where do I access and update Connection References?
A: Log in to make.powerapps.com with the Service Account, navigate to the Solutions tab, open the Default Solution, then select the Connection References tab on the right. Filter by 'Asset' to locate the relevant references, and create or update each one under the logged-in Service Account.
[Source: Asset Manager ALM Post Deployment Steps | Section: Update Solution's Connection References – Steps 1–4]
- Q3: Where do I access Environment Variables?
A: In the Power Apps portal, navigate to the Default Solution, go to the right-hand tab, and select Environment Variables. Use the filter to set Display Name to 'Asset Manager –' to locate only the Asset Manager variables.
[Source: Asset Manager Self-Service Installation Guide & Source: Asset Manager ALM Post Deployment Steps | Section: Update the Environment Variables – Access Environment Variables]
- Q4: What happens if I update the environment variables in the wrong order?
A: The environment variables must be updated in the sequence shown in the table (Variables 1–16 for self-service, Variables 1–15 for ALM). Variable 1 (SharePoint Site) and Variable 2 (Asset Manager List Scripts) are prerequisites for the list creation flow to run properly, so they must be set first before the other variables can be populated.
[Source: Asset Manager Self-Service Installation Guide | Section: Update Environment Variables – table notes]
Security, Roles & Access Control
- Q1: How is access to the two apps controlled?
A: Access is managed through dedicated Microsoft Security Groups — one for Asset Manager Admins and one for general Users. The Admin App is shared with the Admins group and the User App with the Users group. This ensures each group only sees the features appropriate to their role.
[Source: Asset Manager Self-Service Installation Guide | Section: Share the Asset Manager App]
- Q2: Can a general user delete an asset?
A: No. General users cannot delete assets. They can only edit assets assigned to them and can add notes or attachments. The ability to delete assets is restricted to administrators.
[Source: DeskDirector Asset Manager v2 – Product Overview Document | Section: Asset Details Page – General User View]
- Q3: Can a general user remove attachments from an asset?
A: No. General users can upload new attachments but cannot delete existing ones. Admins have full rights to manage, edit, and delete documents related to assets.
[Source: DeskDirector Asset Manager v2 – Product Overview Document | Section: Notes and Attachments – General Users / Admins]
- Q4: Can general users edit or manage parent-child asset relationships?
A: No. Linking, modifying, and removing parent-child asset relationships is an admin-only capability. General users can view linked assets but cannot make any modifications to those relationships.
[Source: DeskDirector Asset Manager v2 – Product Overview Document | Section: Linked Assets Management]
- Q5: Does the Asset Manager work with Microsoft 365 user accounts?
A: Yes. Owner assignment during asset registration and bulk import must match the name and email of users already in your Microsoft 365 tenant. The entire solution is built on top of Microsoft's Power Platform and SharePoint infrastructure.
[Source: Asset Manager – Quick Start Guide (help.powerplay.tech) | Section: Bulk Importer – Owner / Owner Mail fields]