The HR Leavers solution provides you with an automated process and dashboard for handling your user offboarding requests. In this article, we'll take you through the various sections of the UI to get you up and running.
After deployment, you'll have access to two things:
A service type in your DeskDirector instance that can be used to raise offboarding requests
A dashboard created in PowerApps where you can view your offboarding requests and interact with them
Usage Overview
Raising Offboarding Requests
To get started with the HR Leavers solution, you'll want to raise an offboarding request. To do this:
Open the client portal as a user requesting an offboarding
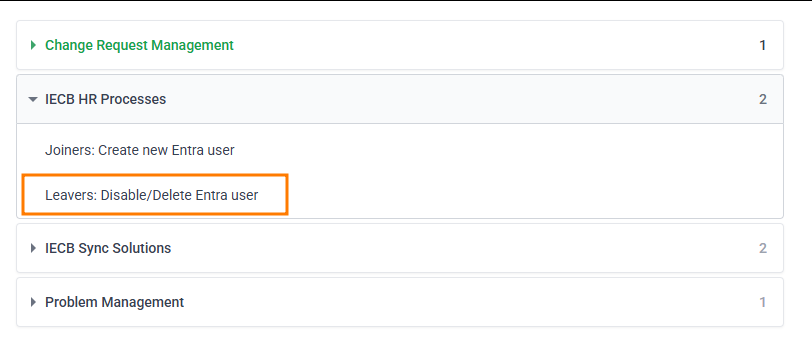
Select the Leavers: Disable/Delete Entra User service type:
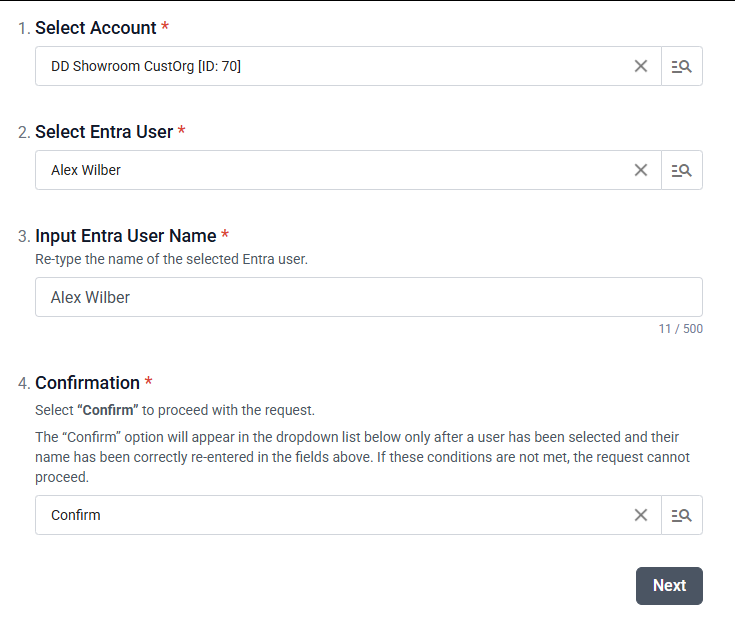
Select the account you are actioning an offboarding for, select the user in Entra, and then retype their name and confirm that you want to proceed:
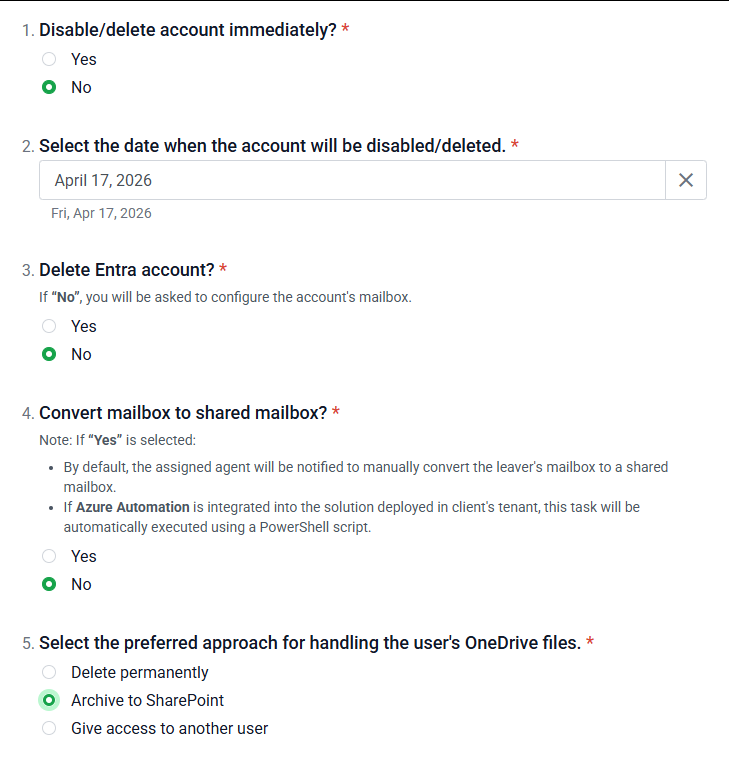
Fill out the form indicating how you want the offboarding to be actioned:Here you can select what you want to happen with the user's email and files, as well as schedule when their account deletion will happen.
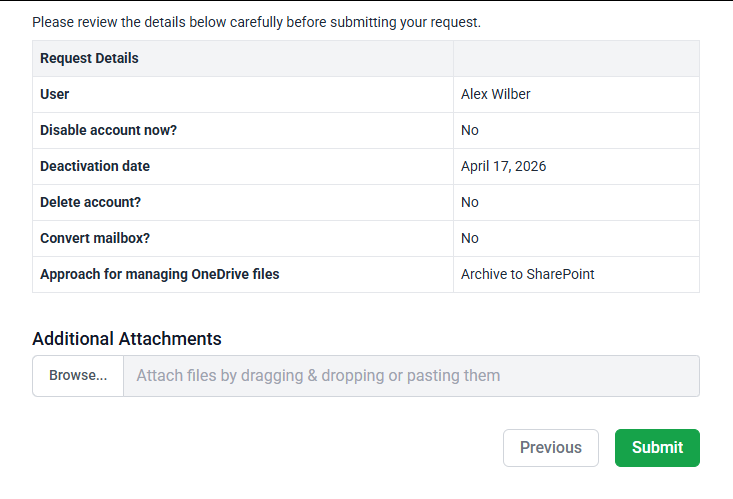
Review and submit your request:
This service type can be renamed and moved if desired.
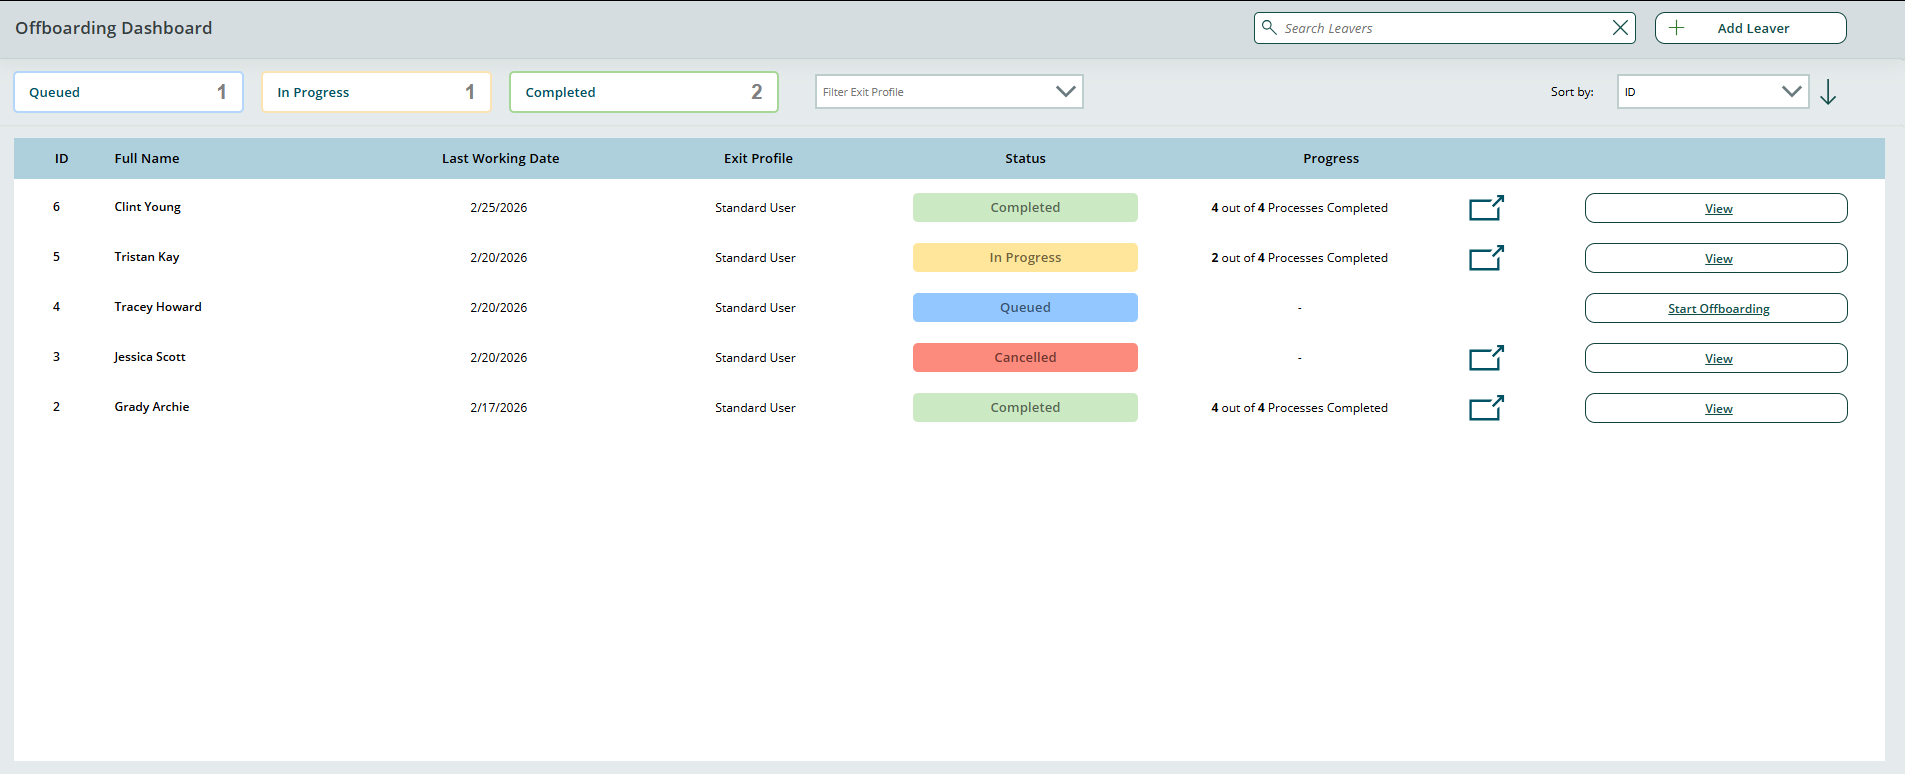
Offboarding Dashboard
The offboarding dashboard provides you with an overview of your existing offboarding requests:
Here you can:
See a list of the users who are being offboarded
See the status and progress for each offboarding
View the details or start an offboarding
View a detailed breakdown of the progress for each offboarding.
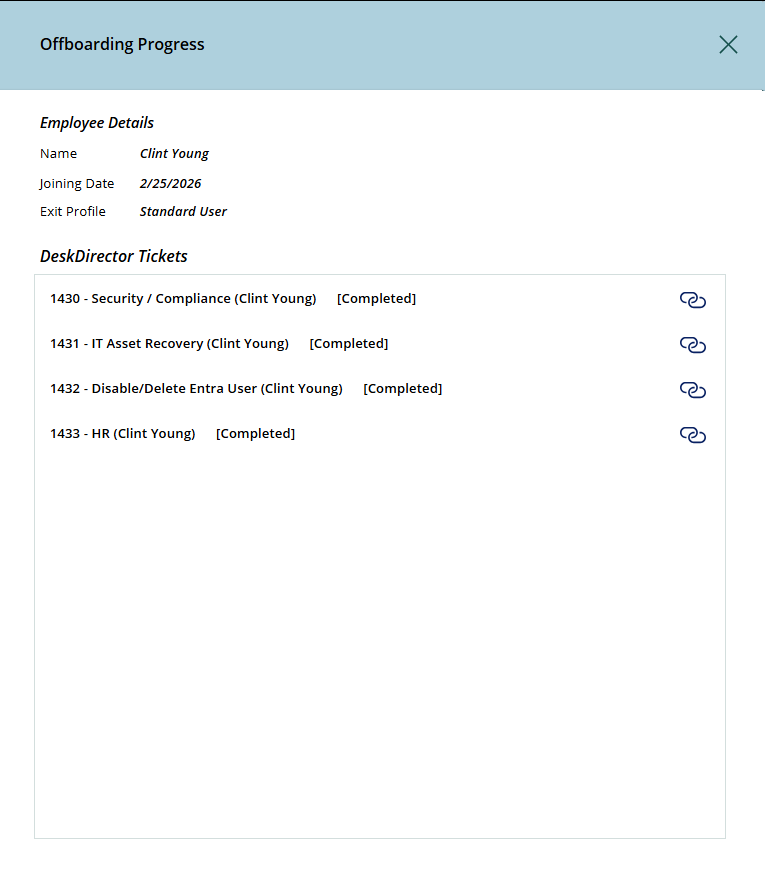
Offboarding Progress View
The offboarding progress view can be accessed by selecting the pop-out icon next to the progress for each offboarding entry. Within the offboarding progress pop-out, you'll see the details for the employee being offboarded and view or access the fan-out tickets created as part of their offboarding.
In the above example, we can see that 4 tickets have been created that pertain to the user's HR details, Entra user, IT asset recovery, and security compliance. Below, we'll show you how to change what tickets get created for this.
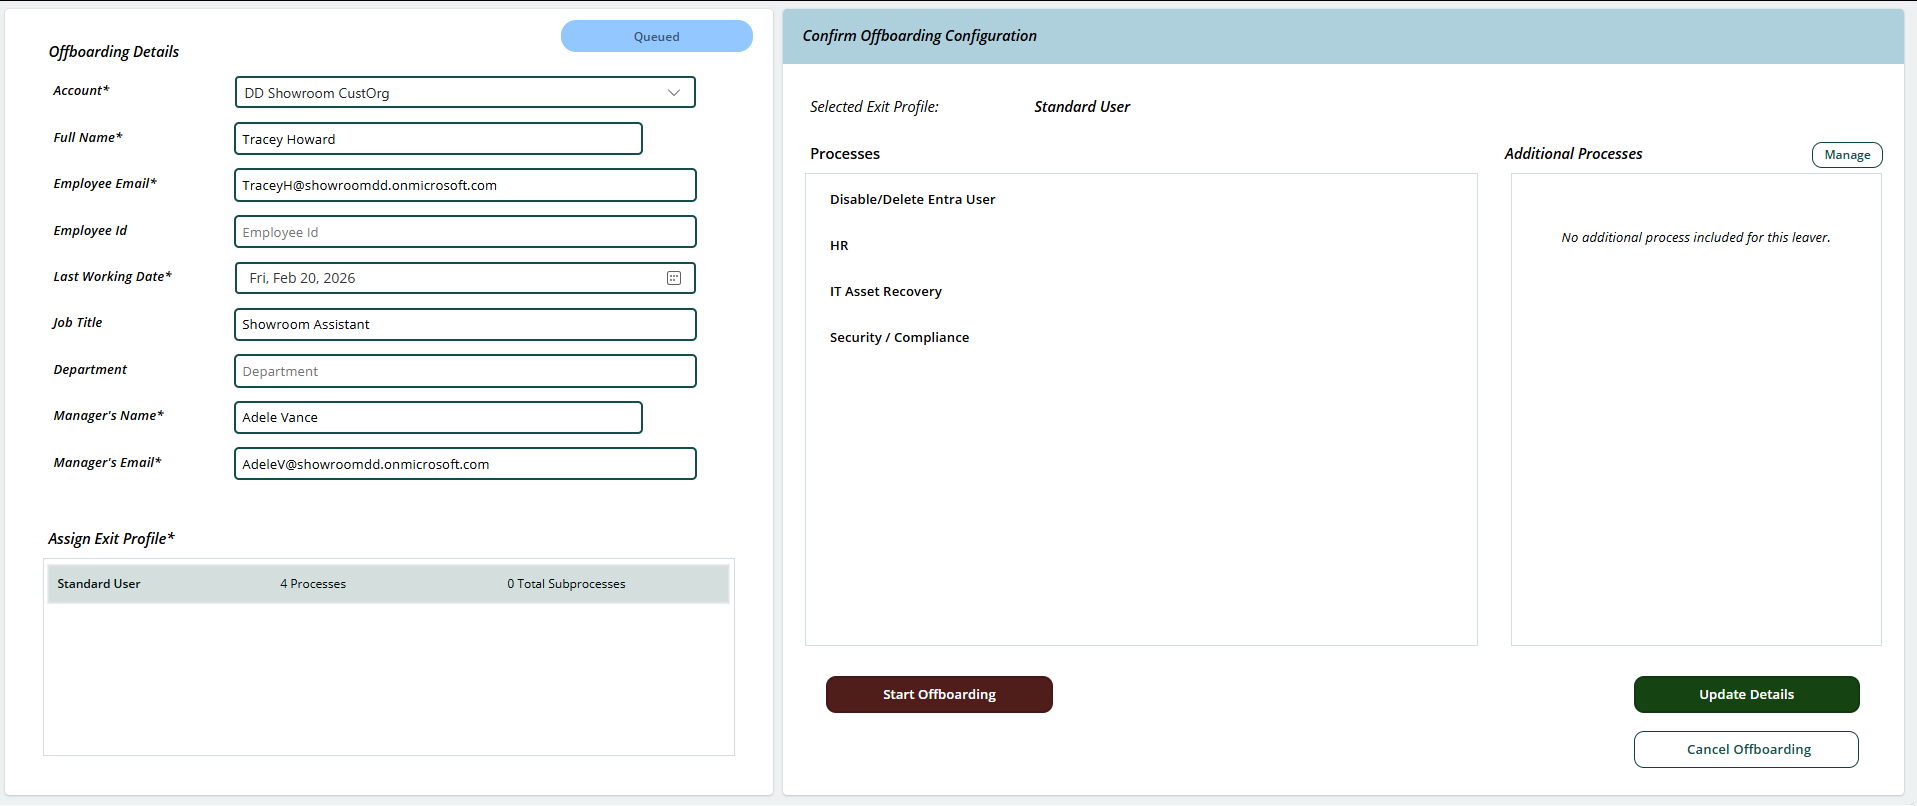
Offboarding Details View
The offboarding details view allows you to start and stop offboardings, as well as view the current details for an offboarding that is already in progress.
Within the offboarding details view, you'll be able to:
See the offboarding details for an offboarding request on the left side
See the profile that the offboarding request is using on the left side
If this is a queued offboarding, confirm the offboarding configuration and update, start, or cancel the offboarding
If this is an offboarding that's already started, complete, update, or cancel the offboarding
If this is an offboarding that has been cancelled or completed, update the details
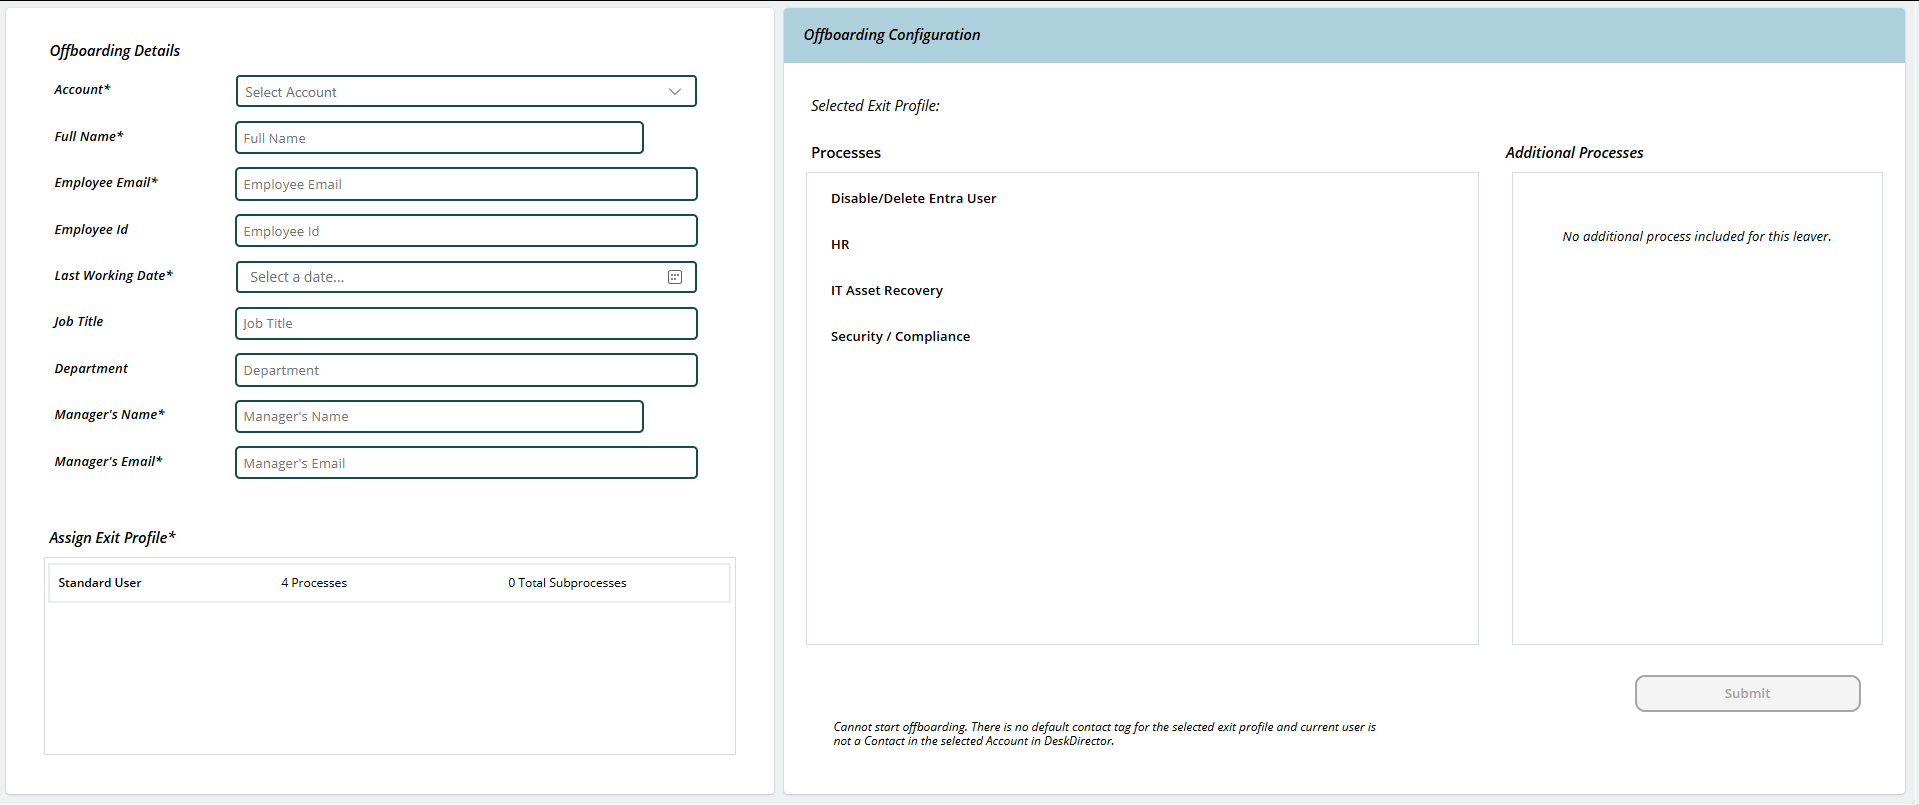
Add Leaver View
From the main dashboard, you can also create a new offboarding request directly. Select the New Leaver button, and you'll be able to fill in all the required details:
You'll be prompted for:
The user's details
The profile that will be used for the offboarding
To confirm the processes that will be done as part of the profile you selected, then submit
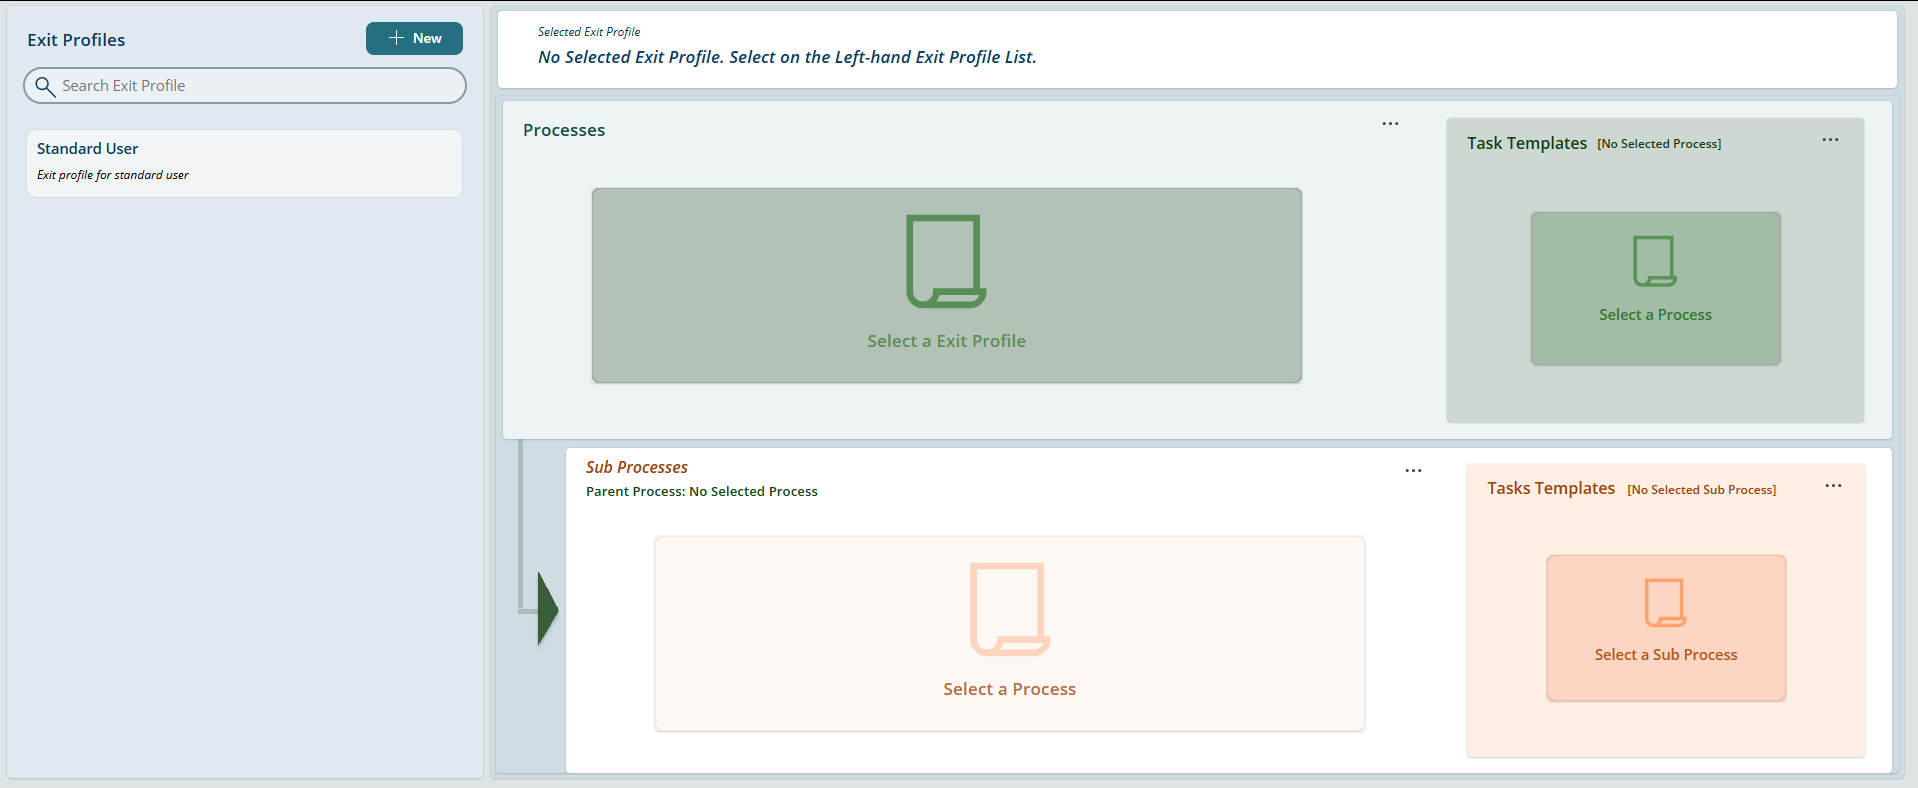
Service Orchestrator Configuration
As part of the deployment for the HR Leavers solution, you'll have configured an HR Leavers playbook in your Service Orchestrator. Within the Service Orchestrator, you can configure various aspects of the HR Leavers Playbook:
Open the Service Orchestrator app
Select HR Leavers
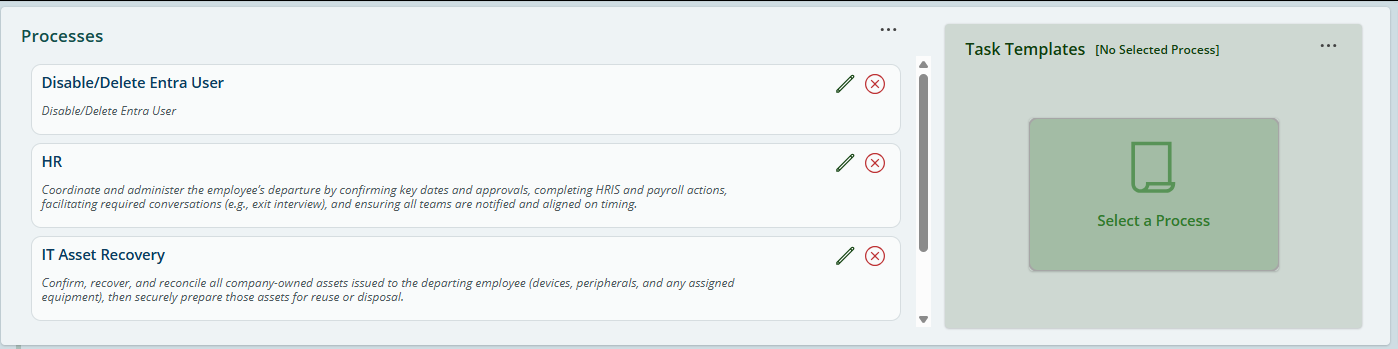
On the left side of the screen, you can create a new profile or select an existing one, then on the right side of the screen, you can go through and create or update the processes associated with that profile:
Processes relate to the fan-out tickets and task lists that get created for each offboarding request.
 Updated
by Niamh Ferns
Updated
by Niamh Ferns