Table of Contents
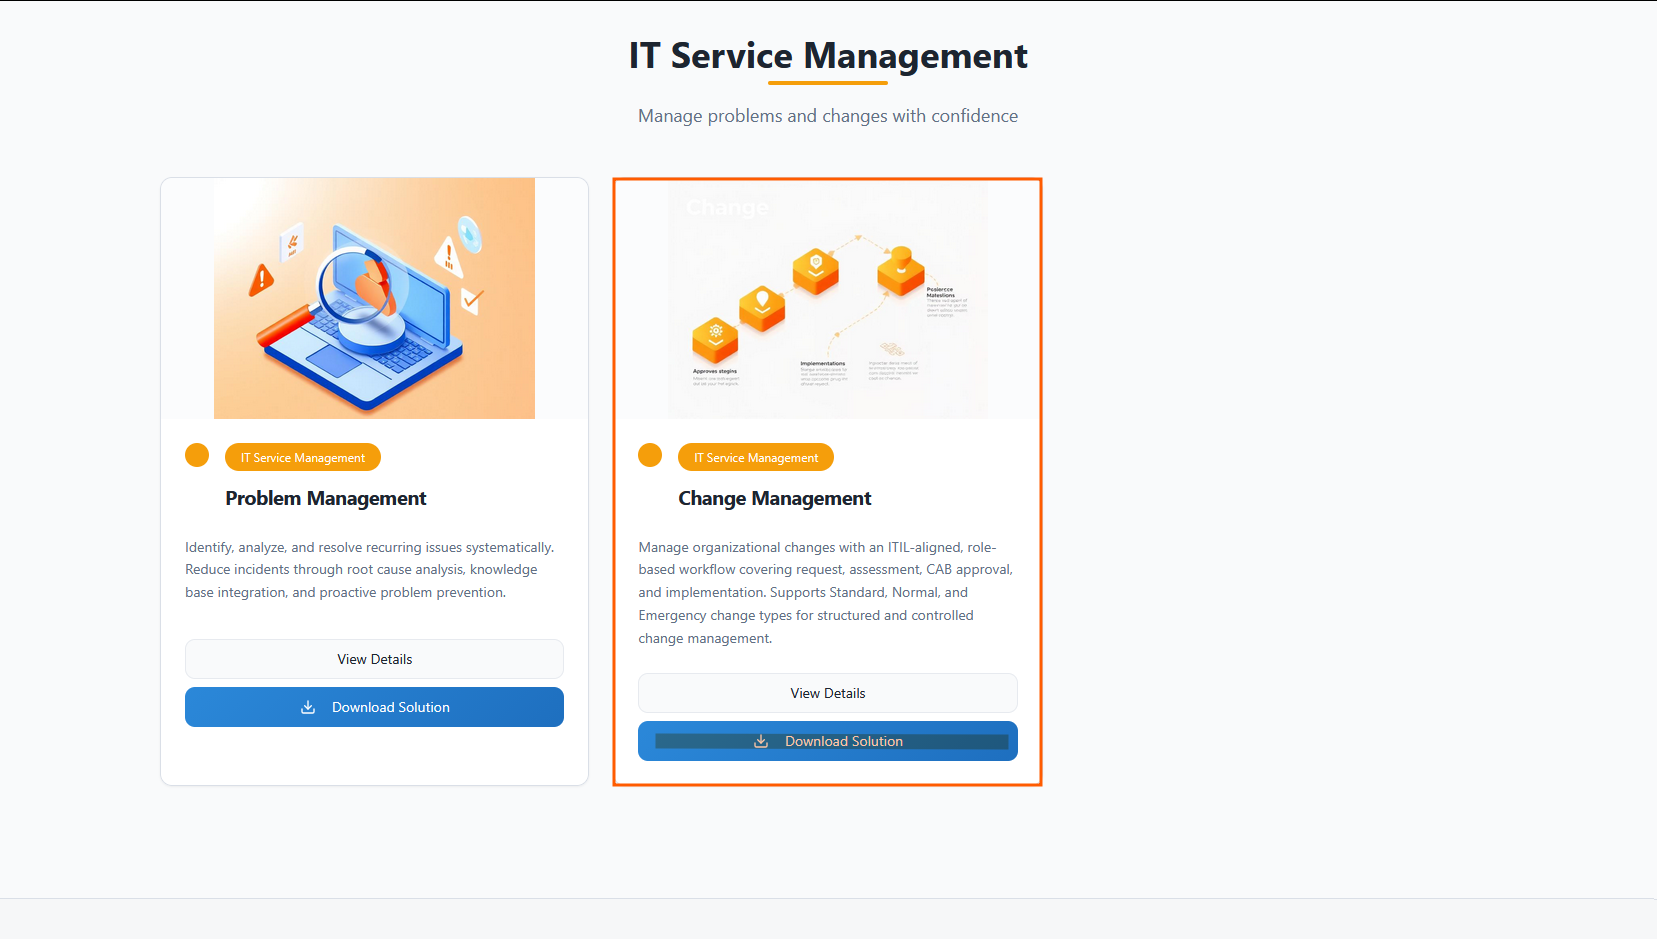
Change Management Solution
 Updated
by Niamh Ferns
Updated
by Niamh Ferns
Introduction
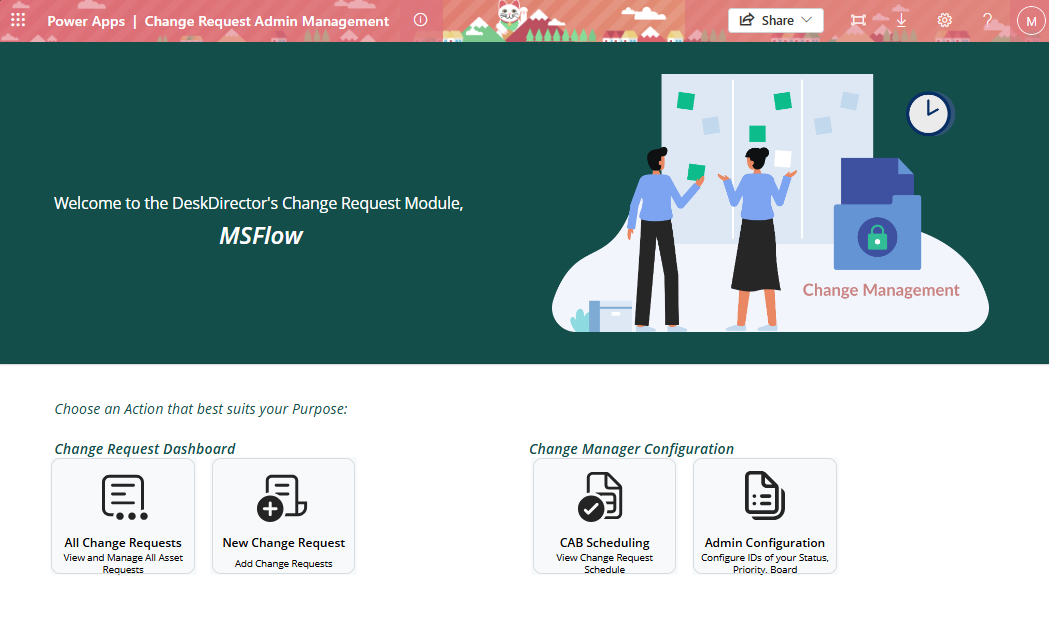
The Change Management PowerPlay solution provides an out-of-the-box solution for managing changes within your organisation.
Below, you'll find a demonstration of the Change Management Solution in action:
What does it do?
The Change Management solution provides a centralised Power App for assessing, approving, and tracking change requests end-to-end. Your internal teams will leverage DeskDirector forms to submit their change, complete with a calculated risk/impact score based on their answers.
The solution also includes an additional Change Advisory Board layer, integrated with Microsoft Teams for easy team scheduling to review changes.
Deployment
In this section, we'll cover how to go through the deployment process for the Change Management Solution.
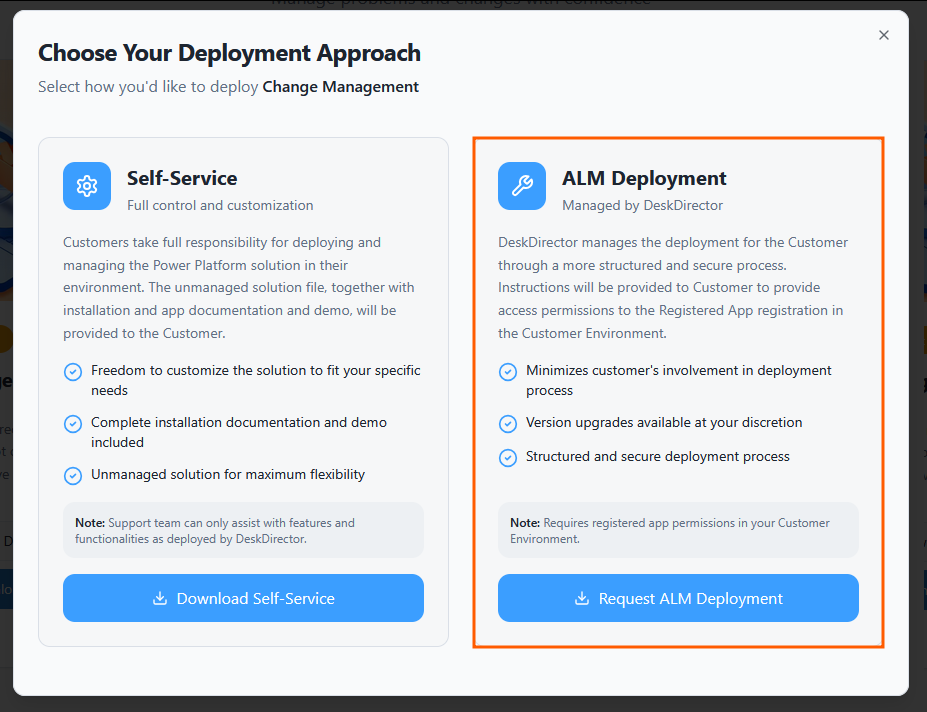
For the deployment to work, you will need to deploy the solution library, then deploy either the ALM or self-service solution.
Solution Library Deployment
- Open your Admin Portal and head to
Integrations>Solution Library. - Select the Managed Solutions tab and open the Change Management solution:
- Select Deploy:
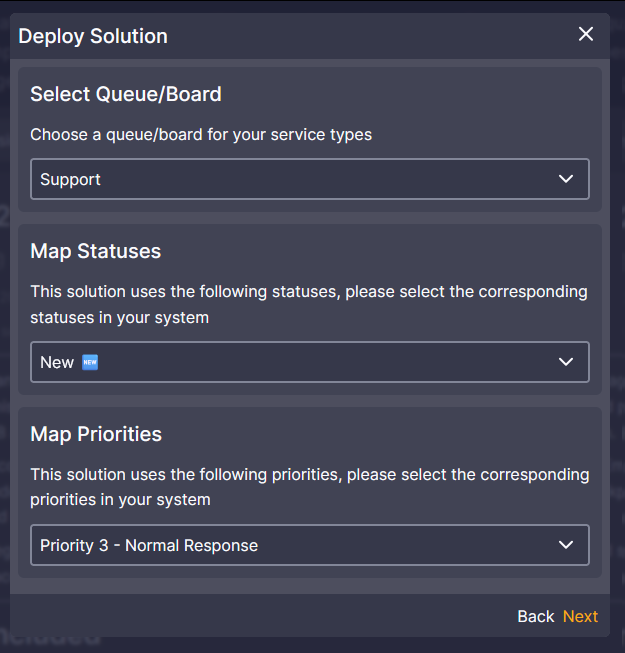
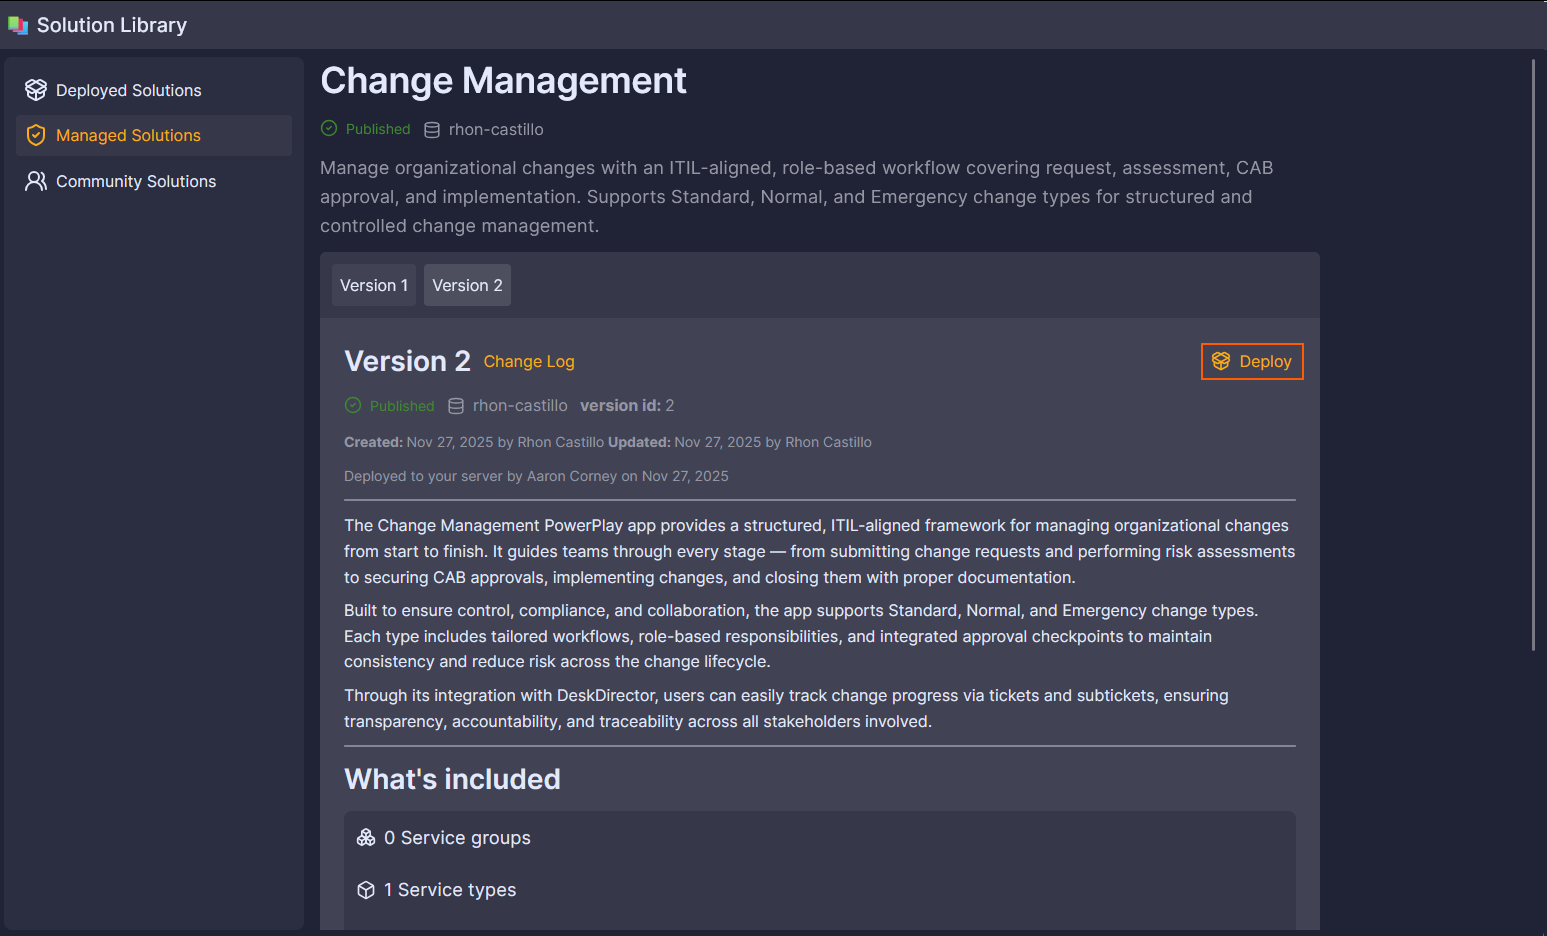 On this page, you can also see a version history as well as a list of features that will be deployed.
 - Follow the on-screen prompts to select a Queue/Board, Status, and Priority:
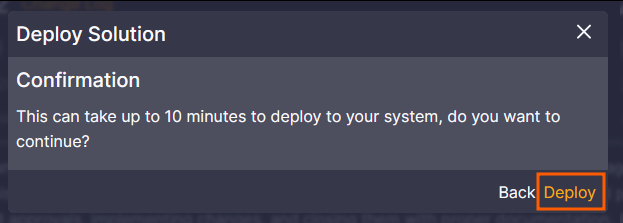
- Confirm by selecting Deploy. (This step can take some time to complete. Please do not close out of this page.)
- Confirm under
Advanced>Events,Client Portal>Service Types, andClient Portal>Formsto make sure your assets have deployed correctly: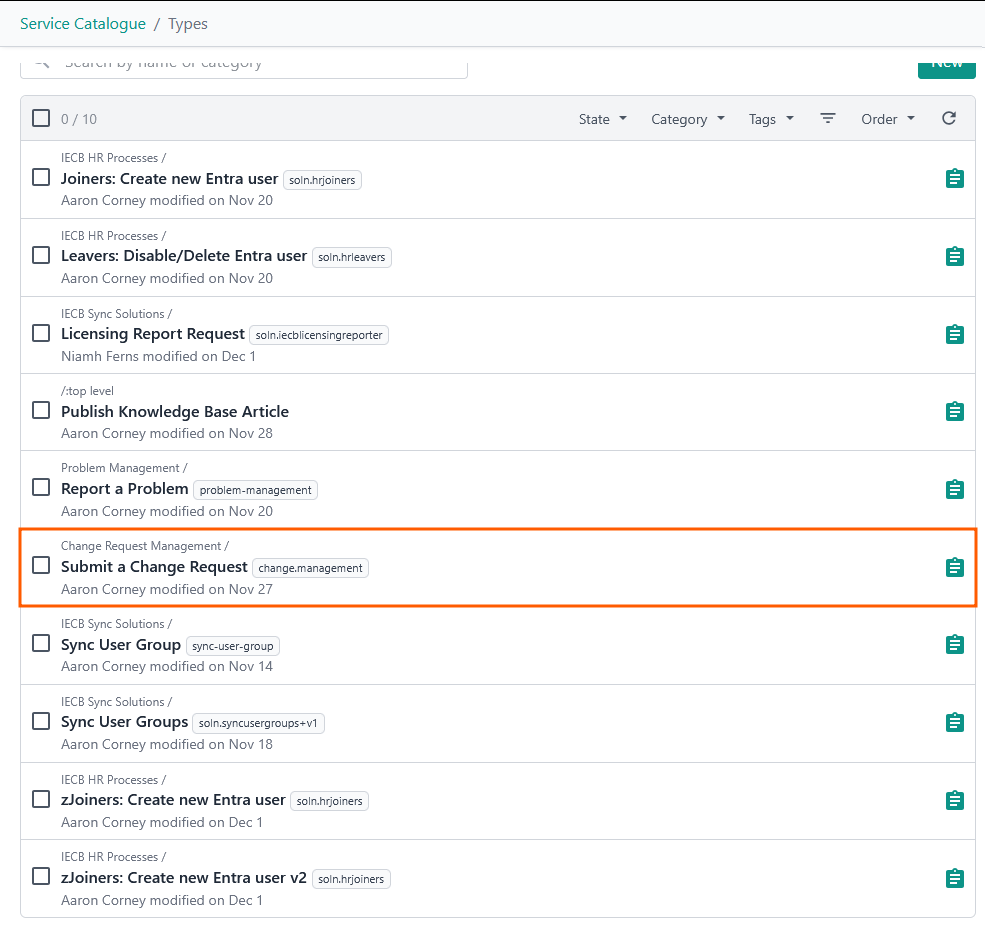
Solution Marketplace Deployment
- Head to the PowerPlay Marketplace and select Download Solution for the Change Management solution:
- Select Request ALM Deployment:
- Navigate to your open tickets on the DD4DD Support Portal, and you should see a ticket with a name similar to
PowerPlay App Deployment Request: Change Management: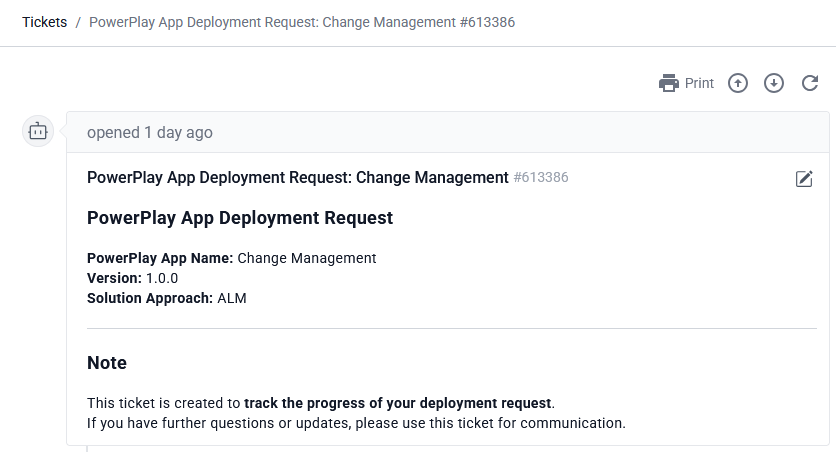
- Open the ticket and scroll down to the automated system comment. You should see that it has started the deployment for you:
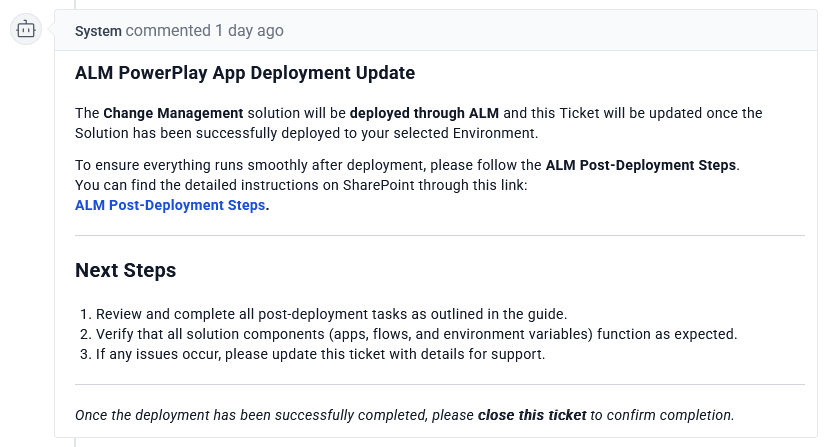
- Once the deployment is finished, you will see an update on the ticket reporting that the deployment was successful
- To confirm, open Power Apps and navigate to the Solutions tab. Under Managed, you should see a successful deployment for Change Management.
Post-Deployment
SharePoint Site Creation
- Navigate to your Active Sites in SharePoint under your tenant
- Click Create and Select a Team site, then use the standard template and fill out the Site's information:
- Name:
Change Management - Group email address:
ChangeManagement - Group owner: Admin for your tenant
- Privacy settings:
Private - only members can access this site
- Name:
- Add any members that should have access, and create the site as well as your service account
- In your SharePoint site, under Site contents, create a new blank list
- Name your list
Change Management Notes and Documentsand click Create - Rename the default title column to
Change Request ID,and create a new column with the nameNotesset to the Multiple lines of text type with rich text enabled. - Under the column settings, ensure that the Attachments column is enabled
Connection References & Environment Variables
When you set your environment variables, please instead add a custom value and do not edit the default.
- If you don't already have one, create a SharePoint Connection in the Connections tab for your ServOrg environment
- Under your ServOrg environment, navigate to the Default Solution and open the Connection references tab in the Objects panel
- Search for
CMand then update the following connection references:These will all reference the connections you configured in your ServOrg post-deployment.- CM - Dataverse
- CM - DD Custom Connector
- CM - DeskDirector
- CM - Microsoft Teams
- Now, under the Environment variables tab in the Objects panel, update the following variables:If you are unsure what these variables should be set to, please reference the video above.
- Change Manager - Notes and Documents
- Change Manager SP Site
- CM - Change Management Request Form ID
- CM - Change Request Intake Queue ID
- CM - DD Change Admin ID
- CM - DeskDirector URL
- CM - Implemented Change Request Event ID
- CM - New Status ID
- CM - Priorities
- CM - Queues and Statuses
- CM - Risk Assessment Scores
- CM - Start Review Process Form ID
- CM - Submit a Change Request Service Type ID
Enabling Flows
- Under your ServOrg environment's Managed Solutions, navigate to the Change Management solution and open the Cloud flows tab in the Objects panel
- Enable the CM - [DD Event] - Status Change flow
- Enable the CM - [DD Event] - Start Change Review flow
- Enable the CM - [DD Forms] - Record Change Request Details flow
- Enable the CM - [Powerapps] - Change Manager Updates flow
- Enable the CM - [Powerapps] - Get DD Agents flow
- Enable the CM - [Powerapps] - Schedule CAB Change Request Discussion flow
- Enable the CM - [Powerapps] - Update Ticket Queue and Status flow
- Enable the Change Management - Cancel Request (Child) and Change Management - Create Ticket Fan-out (Child) flow
- Enable the [Dataverse] Change Management - Create Main Tickets flow
- Lastly, enable the [PowerApps] Change Management - Cancel Request flow
Running Manual Flows
- Navigate back to your Change Management Solution under your ServOrg's Managed Solutions, and then open the Cloud flows tab under the Objects panel
- Perform a manual run of the following flows in order:
- CM [Manual] - Queues and Statuses in DD
- CM [Manual] - Setup Priorities and Risk Score Mappings
- Under the Tables tab in the Objects panel, open the ITSM Config IDs table and copy the ID for the New ↔️ priority
- Under the Environment variables tab in the Objects panel, update the CM - New Status ID variable to the status ID you just copied
- Load back into your ITSM Config IDs table and validate that your priorities show a high, low, and medium priority. You will need to map these to the desired priorities in your Tokity instance. (See the video above if you're unsure how to do this.)
Service Orchestrator App Registration
- Navigate back to your Managed Solutions in your ServOrg and open the Change Management Solution, then open the Apps tab in the object Panel. From here, you can share the Change Management Portal app with the users who will need access
- Under the Details tab, copy the app's weblink and then play the Change Management app
- Load in the Admin Configuration pane and confirm that your board, status, and priority configurations show as expected.
- Back in your ServOrg's Managed Solutions, open the Service-Orchestrator-Library and play the Service Orchestrator app
- Open the Configuration Details and paste your web link into the Change Management Playbook URL field
Service Catalogue
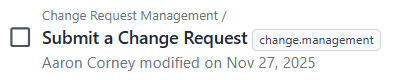
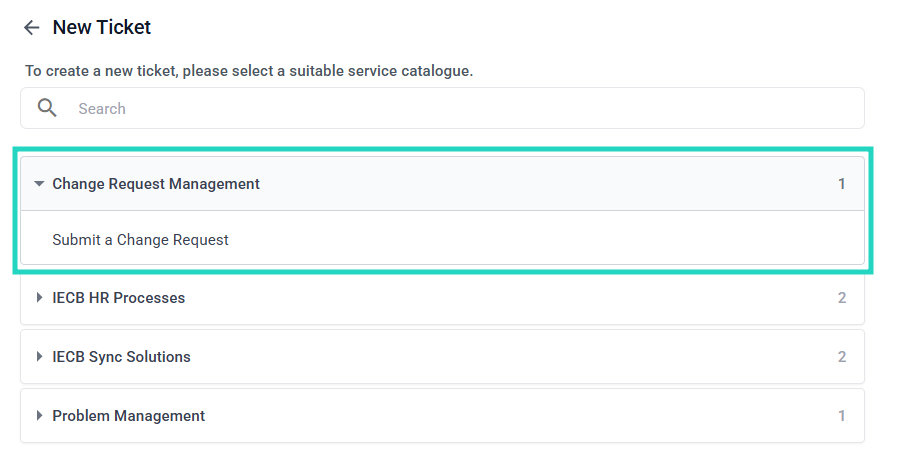
As part of our Solution Library deployment, a Submit a Change Request form was made available:
To provide your team access, you can:
- Create a new Service Group or update an existing Service Group to include the Submit a Change Request form
- Assign the Service Group to an Account or Contact
Once assigned, you can impersonate a contact to confirm the form's availability:
Quick Start
The end-to-end process of DeskDirector's Change Management solution includes:
Intake
- Submitting a Change Request using the Submit a Change Request form

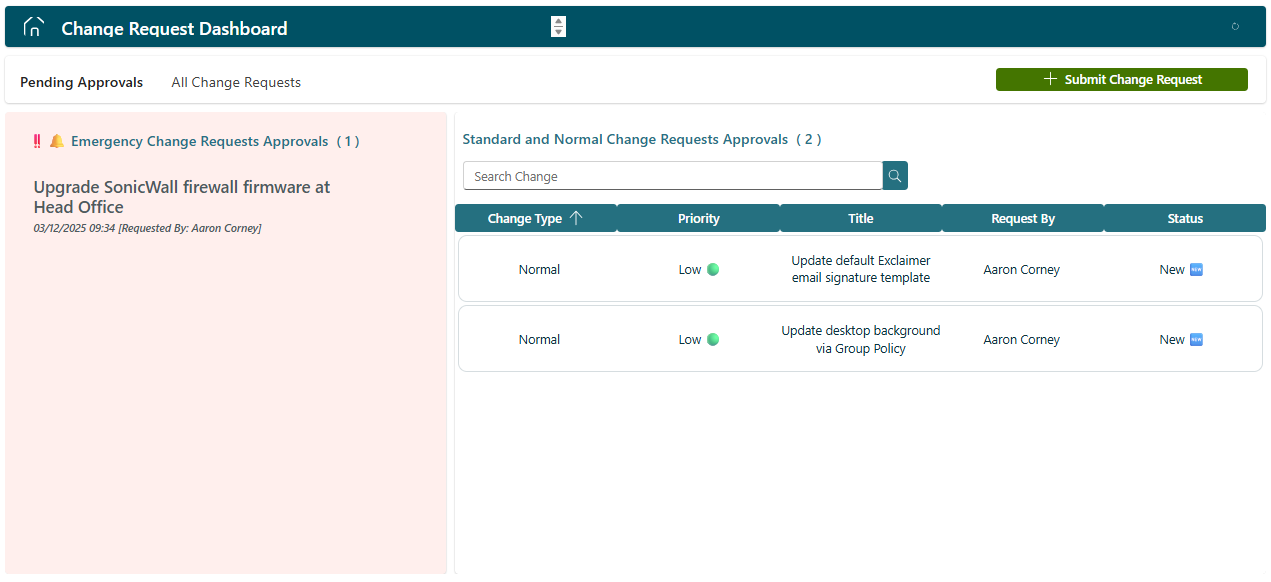
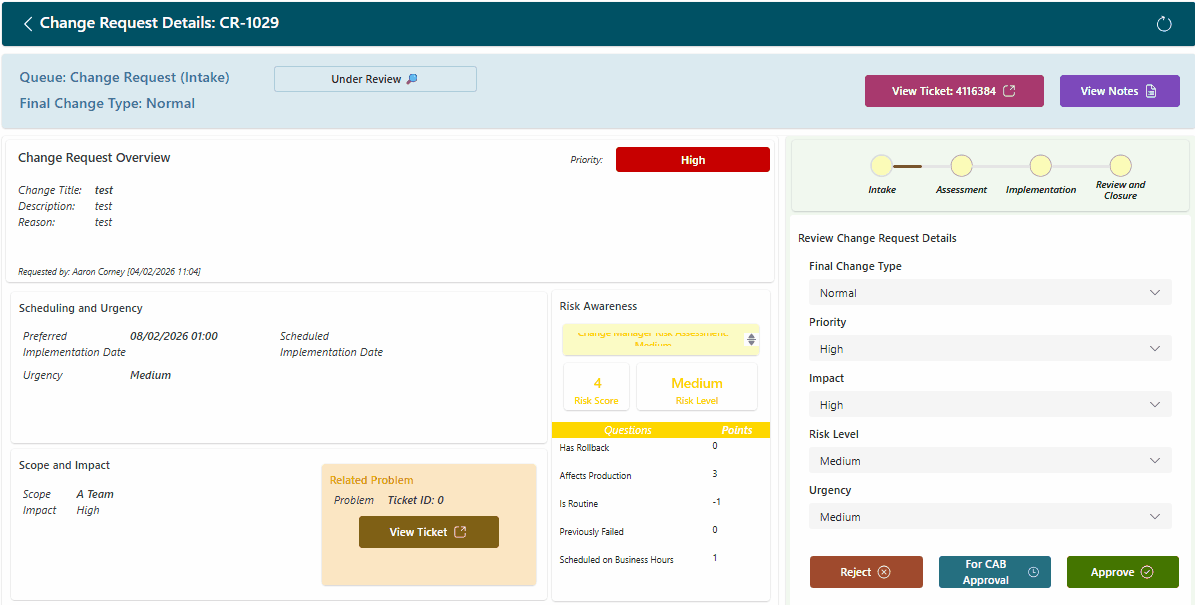
- With access to the Change Request Dashboard Power App, reviewing Pending Approvals from the All Change Requests menu
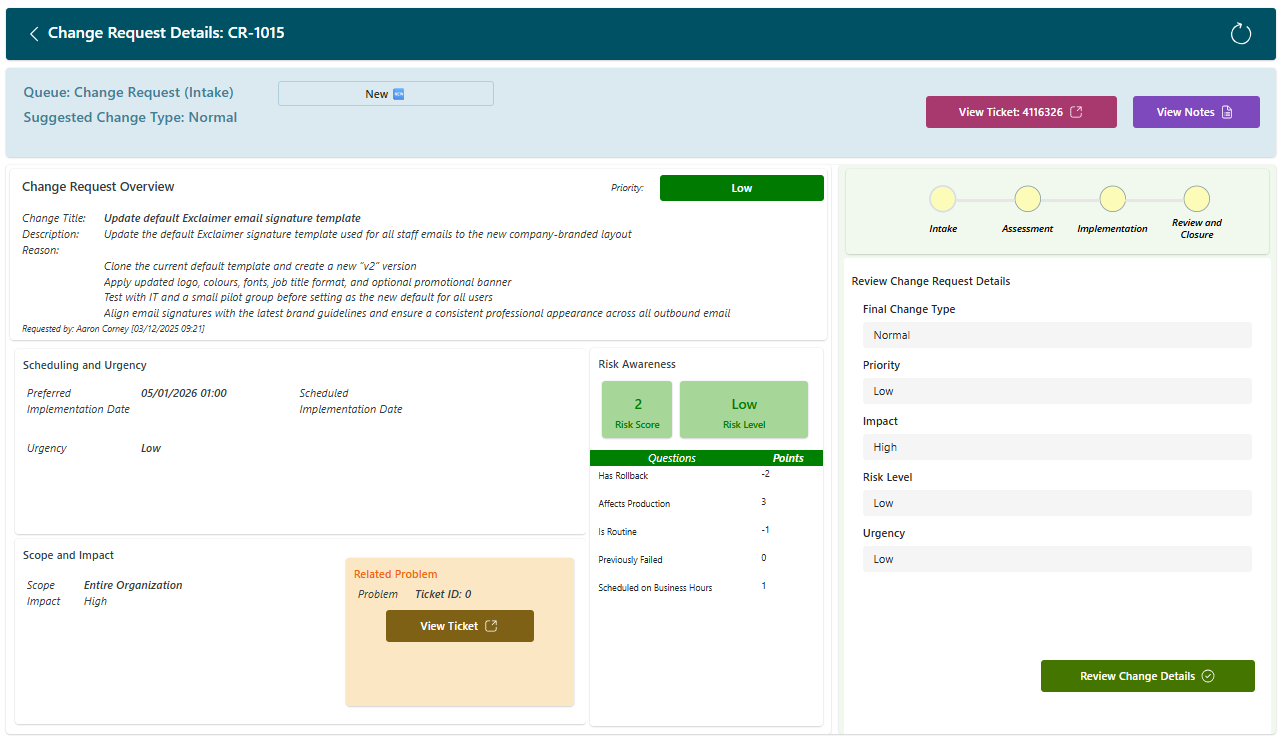
- Selecting a Change Request, and progressing the Intake phase by selecting Review Change Details

- While the change is Under Review, review and update as needed:
- Final Change Type
- Priority
- Impact
- Risk Level
- Urgency
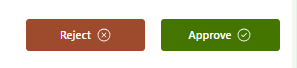
- Based on the information within the Change Request, one of three actions will progress the change:
- Reject: The change does not contain sufficient supporting information to progress the change any further
- For CAB Approval: The change is sufficiently detailed, but due to factors like risk and impact, it must be reviewed and authorised by a Change Advisory Board before progressing
- Approve: The change contains sufficient supporting information, and has an acceptable level of risk to progress into the Assessment phase without being reviewed by the Change Advisory Board
- In our example, we will Approve the change, and enter the Assessment phase
Change Advisory Board Approval
- Selecting For CAB Approval will prompt with an option to Schedule a CAB Meeting

- Your CAB Members will automatically populate based on the Members of your Change Advisory Board Team Channel

- While in the Scheduled CAB Review status, the option to Reject or Approve the change will be available:
- Your CAB Members will automatically populate based on the Members of your Change Advisory Board Team Channel
Assessment
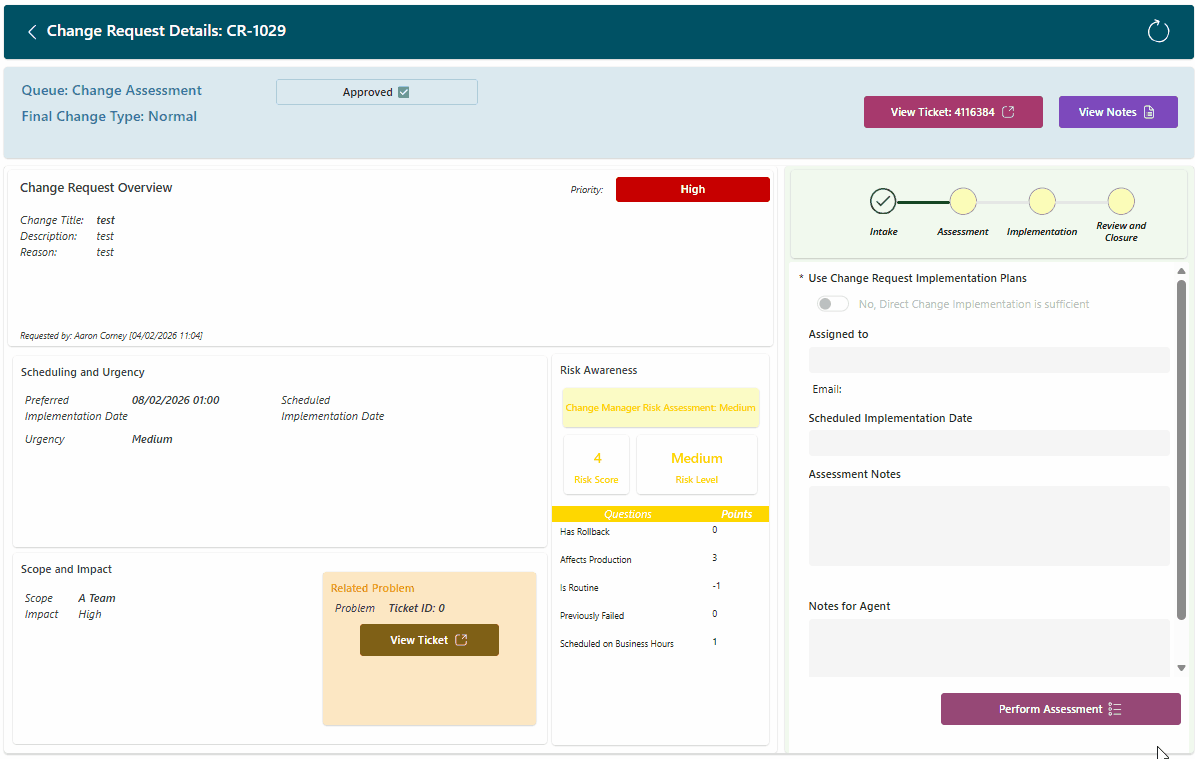
- Selecting Perform Assessment from the Change Request Dashboard will allow us to:
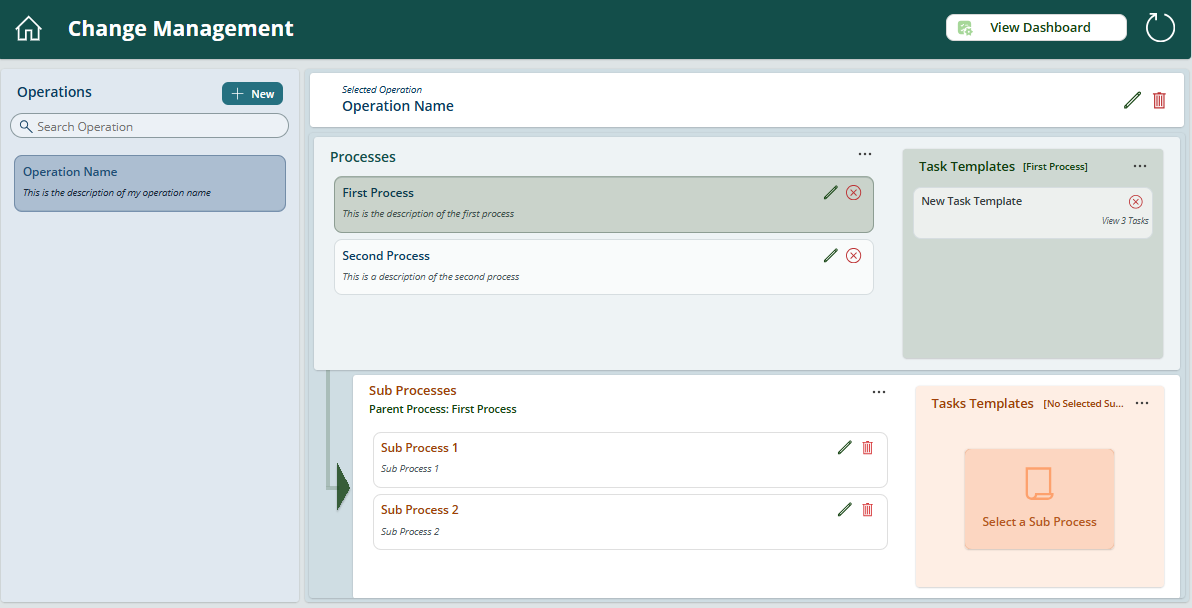
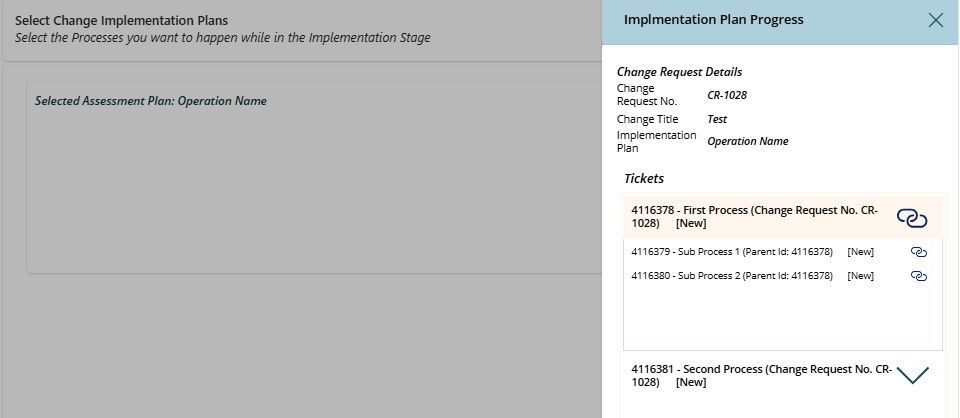
- (Optional) Use Change Request Implementation Plans: Leverage an Operation from your Service Orchestrator, creating child Tickets, Tasks, and Subtasks for the change, with central visibility of each ticket's status:
- Assigned To: Select a resource to action the change, who will be assigned to the ticket
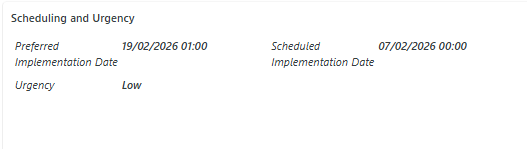
- Scheduled Implementation Date: Updates the Scheduling and Urgency module with the selected date/time value
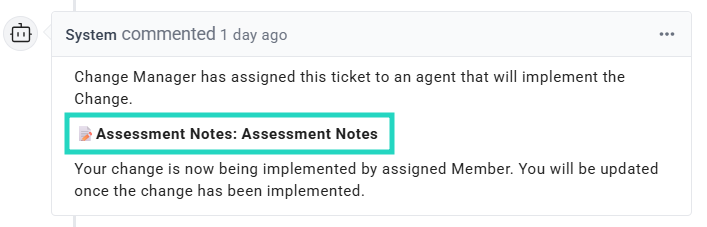
- Assessment Notes: Added to the ticket as public notes, notifying the change requester (ticket contact) accordingly
- Notes for Agent: Any considerations for your assigned resource, added to the ticket as internal notes

- (Optional) Use Change Request Implementation Plans: Leverage an Operation from your Service Orchestrator, creating child Tickets, Tasks, and Subtasks for the change, with central visibility of each ticket's status:
- Select Proceed to Implementation to complete the Assessment phase
Implementation
The Implementation phase is actioned outside of Change Request Dashboard, and will be progressed using the Ticket Status of the Change Request Ticket: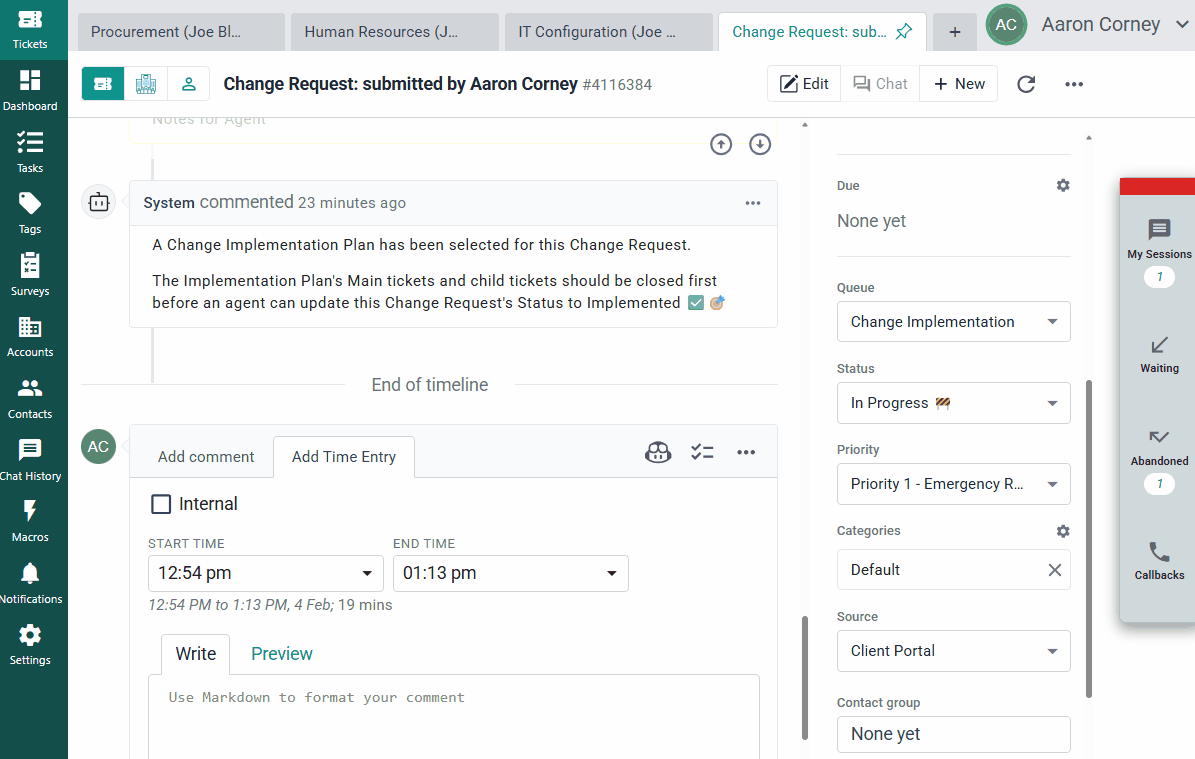
- As the assigned resource on the ticket, I will enter my supporting notes and time entry as per usual internal processes
- Based on the outcome of the change, I will update the status of the ticket to:
- Backed Out: The change request was started, and was not complete due to an unexpected factor
- On Hold: The change request was placed on hold before the scheduled implementation date
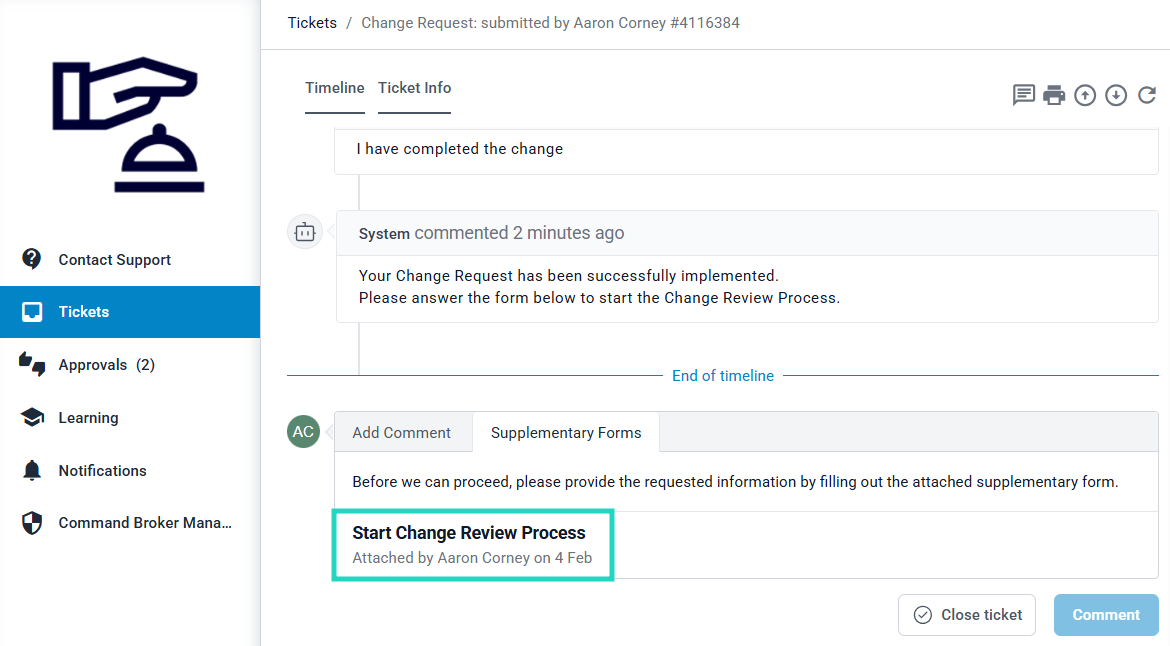
- Implemented: I have successfully implemented the change as per the request's details
- Updating a ticket to Implemented will complete the phase, and progress to Review and Closure
Review and Closure
When this phase starts, a supplementary Start Change Review Process form is attached to the original change request. The change requestor will complete this form through the Client Portal, and additionally mark the ticket as closed to complete the phase:
The out-of-the-box form captures outcomes, incidents/impact, documentation and monitoring updates, lessons learned, and any open actions to support governed closure. As this is a DeskDirector form deployed using the Solution Library, the content of the form can be easily tailored to your requirements within the Admin Console:
