The Problem Management solution centralises problem reporting, investigation, and resolution. It is also fully integrated into your DeskDirector instance so that problems can be raised directly from the Client Portal, and it is tied into our Change Management solution.
Problem Stages
When going through problem management, your problem records will be in one of 3 stages. Once they move from one stage to another, they cannot move back.
Intake
The intake stage consists of initial reporting and review. In this stage, you handle the immediate review and triage of problems, decide whether they're associated with known errors, or whether they need to go through for root cause analysis (RCA).
In this status, you will be interacting with your problem records directly.
Investigation
The investigation stage consists of diagnosis and troubleshooting of a problem. In this stage, you handle the RCA for an issue, and then, once found, create a known error for that problem. Finally, you send your problem off for resolution via a change control request.
In this status, you will be interacting with your problem records directly until you have created a change request.
Resolution
The resolution stage is where you fix the issue and review to ensure there are no follow-on issues that arise after your fix. In this stage, you monitor the status of a problem from the problem management app and action the resolution via a change request via the Change Management solution.
In this status, you will not be interacting with your problem records directly.
Submitting a Problem
As part of the deployment for your change management solution, a service type will have been created in your DeskDirector instance that can be used to submit change requests.
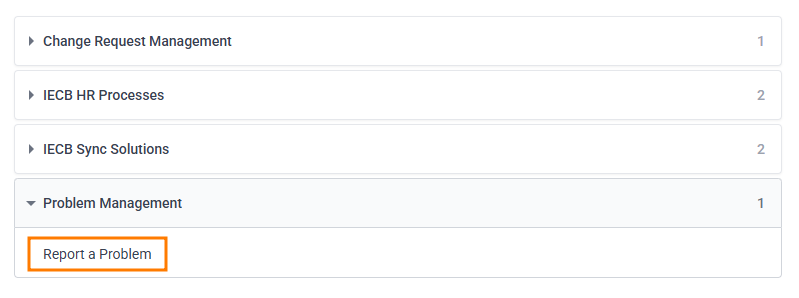
Open the DeskDirector Client Portal, and then open the Report a Problem service type:
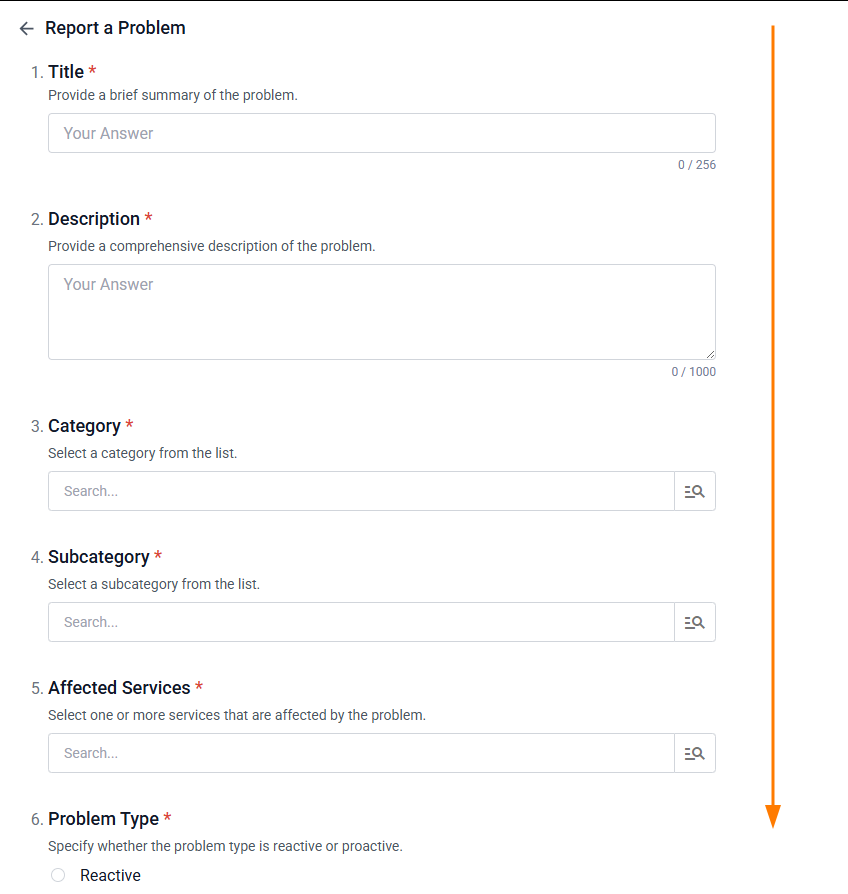
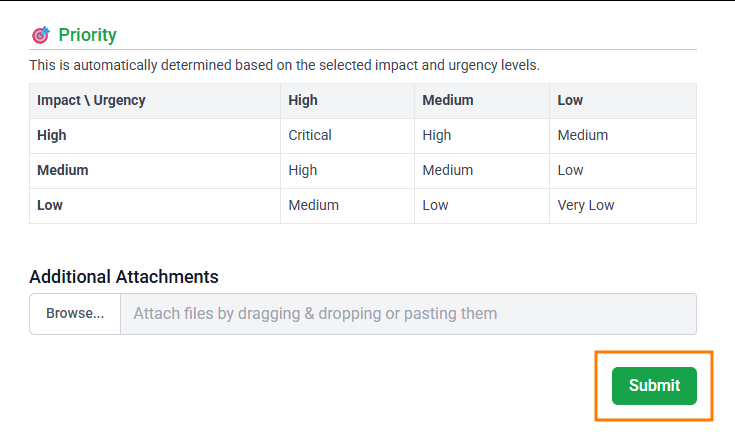
Fill in details for your problem and categorise it as needed:
Review the automatic priority of your request and select Submit:
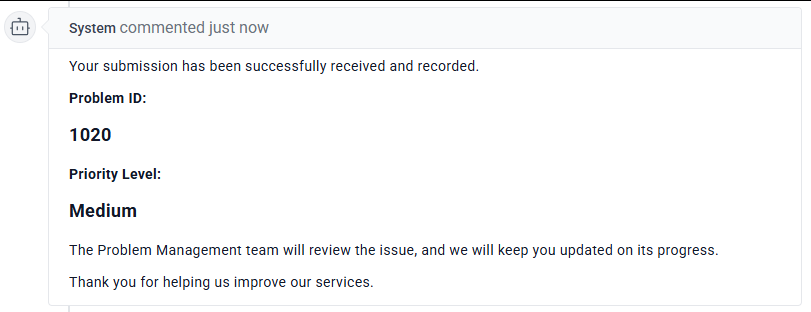
A ticket will be created for your problem, and then a system comment will be added to your ticket with further details:
This service type can be renamed and moved if desired.
Problem Management App
The Problem Management app is a centralised dashboard where you can view and action your reported problems. You'll also have access to several configuration options for your problem intake and actioning process.
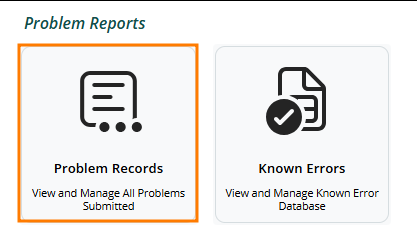
Problem Records
To access your problem records, select Problem Records on the main landing page for your problem management app:
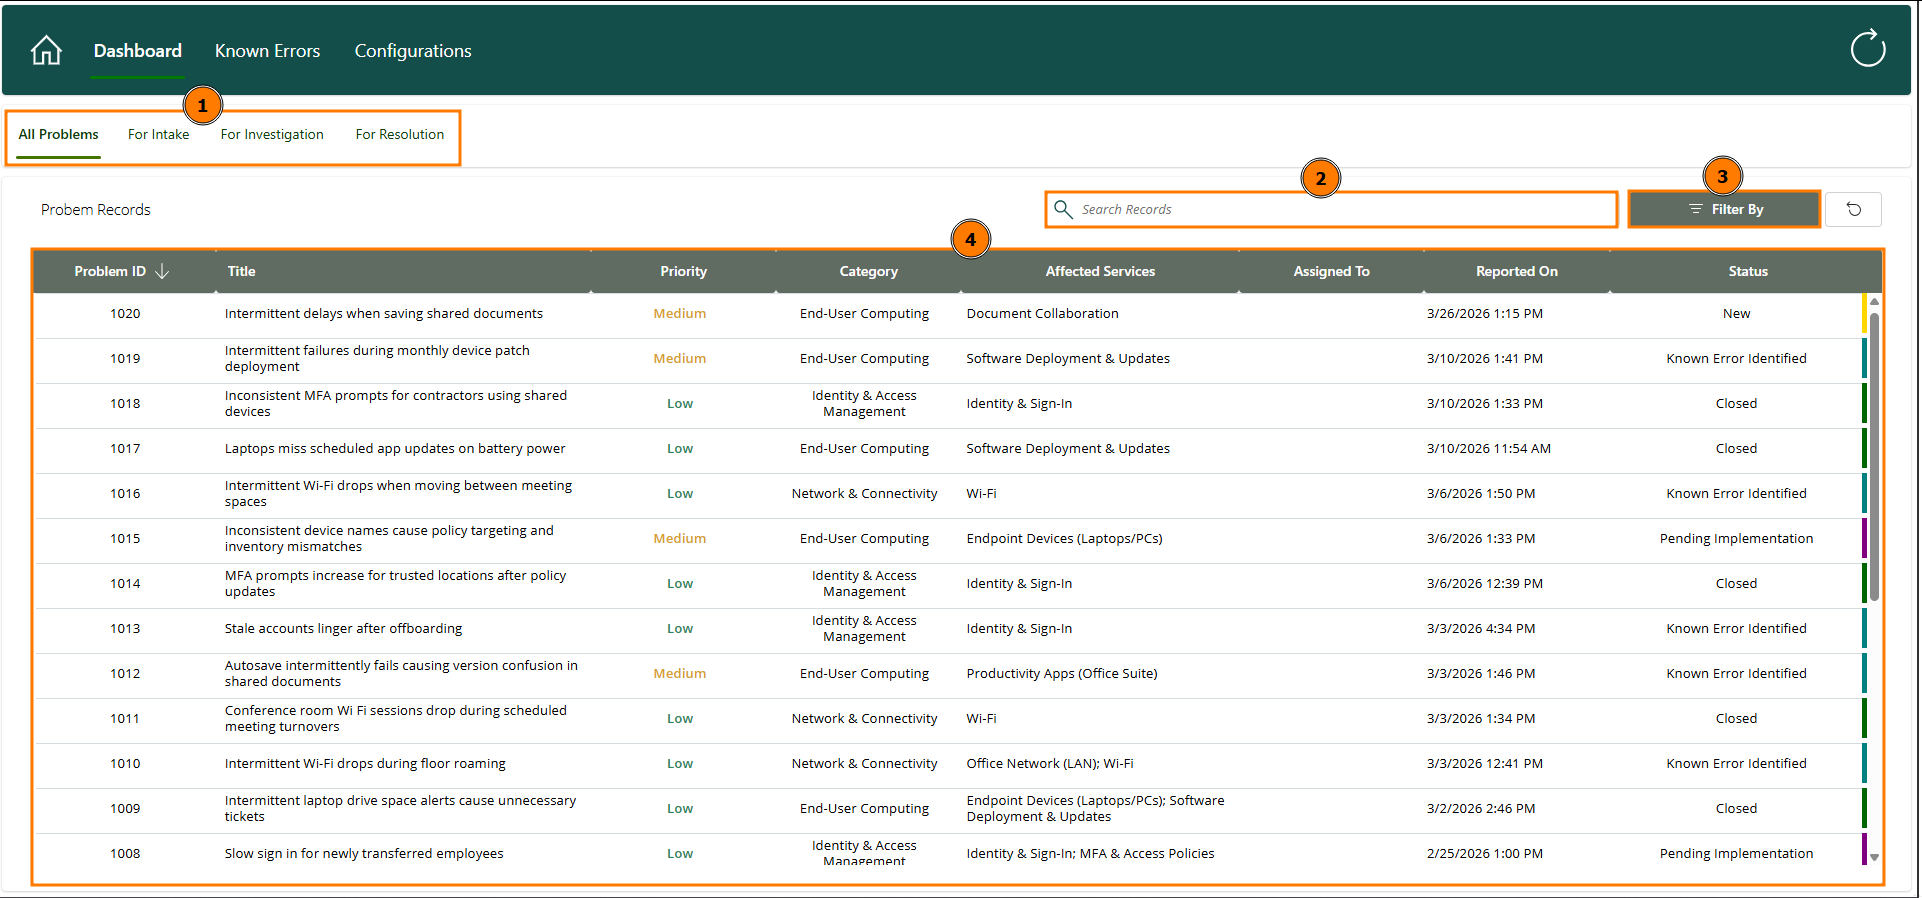
Problem Records Dashboard
Within the Problem Records tab, you'll have a few options for viewing and interacting with your existing problem reports:
Problem Stage: You can select whether you want to see all problems or only problems at the intake, investigation, or resolution stage.
Search: You can search for specific problems by their name.
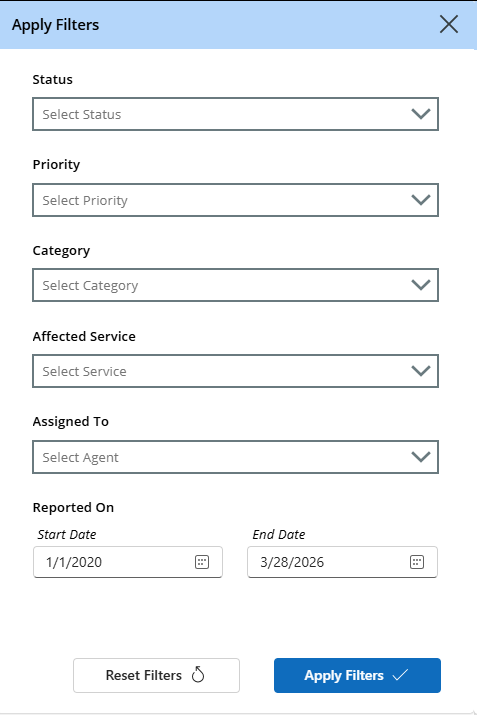
Filter By: You can filter for problems by their status, priority, category, affected service, assignee, and date:
Problem List: You can see a full list of the problems you have submitted historically (filtered based on sections 1, 2, and 3 mentioned above).
Problem View
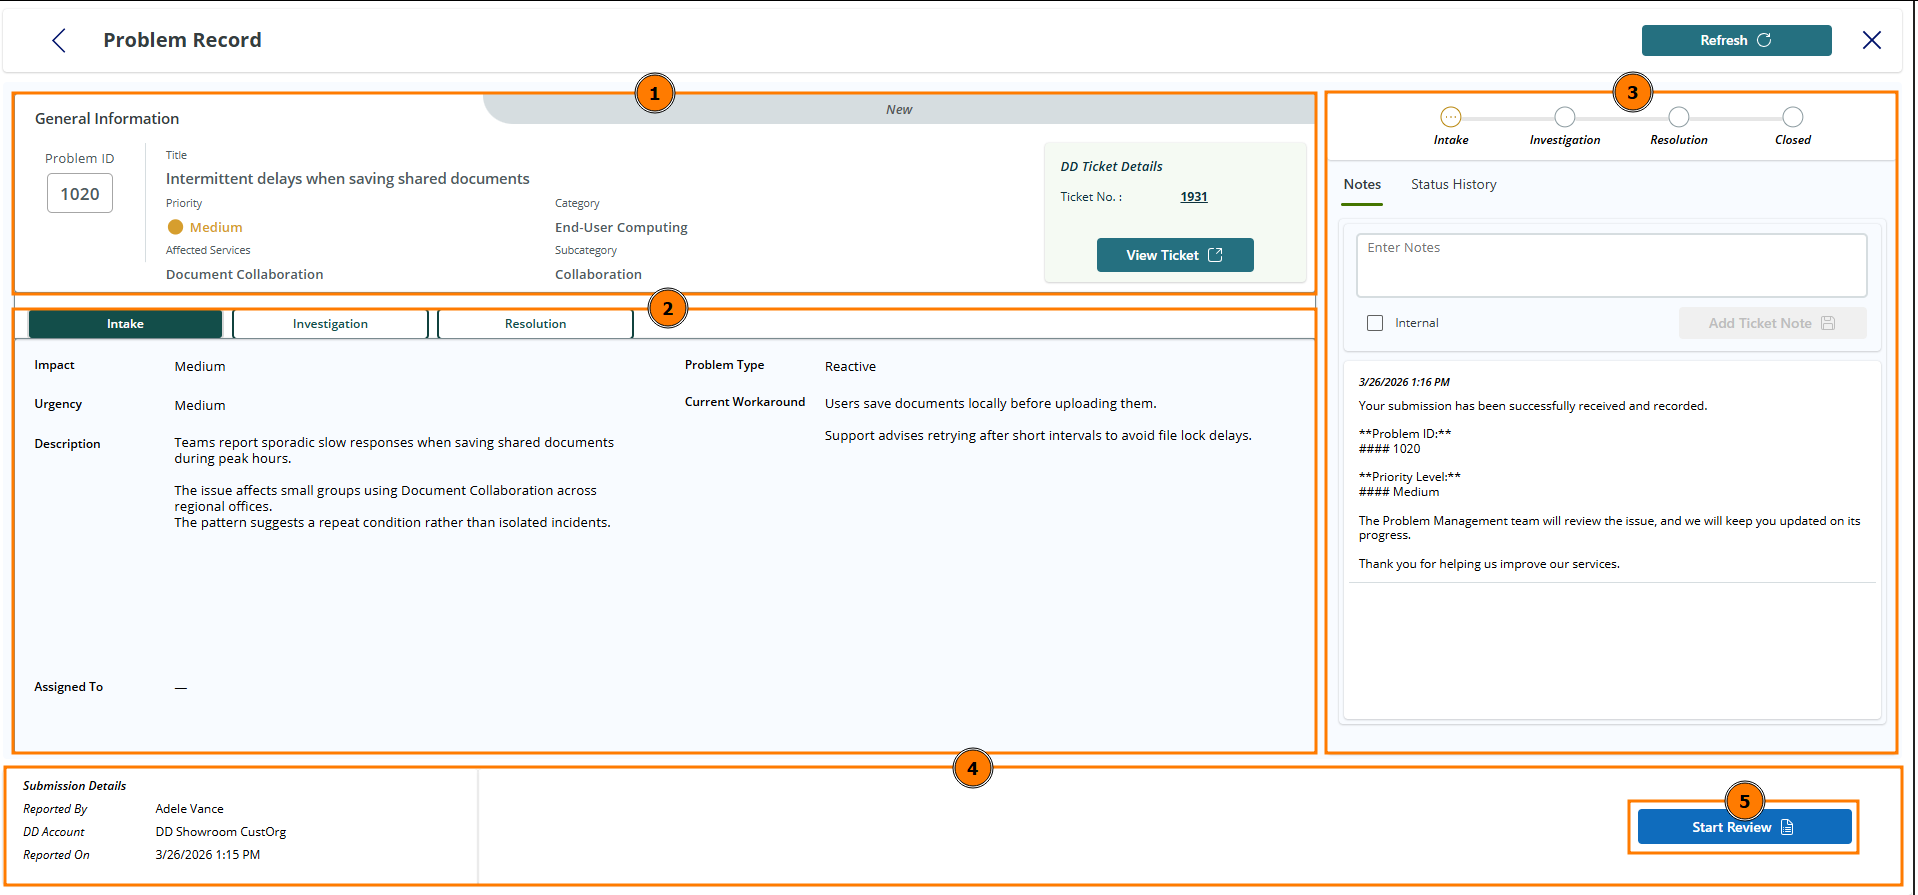
Once you've found a problem that you'd like to action or view, select it from the problem list. You'll be presented with an overview of the problem:
General Information: You can view the overall details of your reported problem, including the title, priority, and categorical information. If needed, you can navigate directly to the ticket in DeskDirector as well.
Problem Stages: You can view the details and status for the stage your problem is in, and can switch between each stage.
Within the intake stage, you can see details when the problem was initially submitted.
Within the investigation stage, you can review the root cause analysis and findings.
Within the resolution stage, you can review and navigate to the related change request where the problem is being solved.
Problem Notes: You can view the current notes on the problem ticket in DeskDirector directly within the Problem Management app. If needed, you can also add notes directly from the Problem Management app and view the status history for this problem report.
Submission Details: You can view the metadata for your problem record and start or continue with your review.
Problem Investigation
To begin reviewing a problem:
Open the problem from the problems list and select Start Review
After a brief time, you should see the status for your problem update, and you'll be presented with 3 options: Known Error: This means that the issue is a known error. Reject: You can deny the problem report (in case it was user error or similar). Investigate: You can continue with your investigation of the problem.
If this is already a known error, you can jump to the Known Errors section. If you need to investigate further, select Investigate and continue with the steps here.
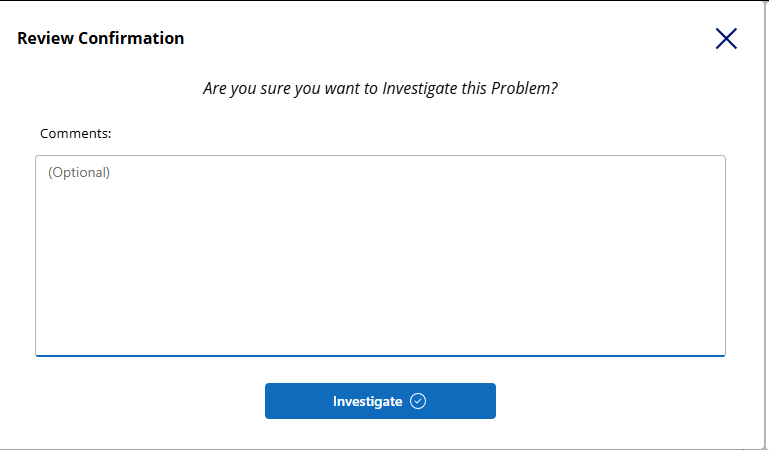
Provide a comment if needed and select Investigate:
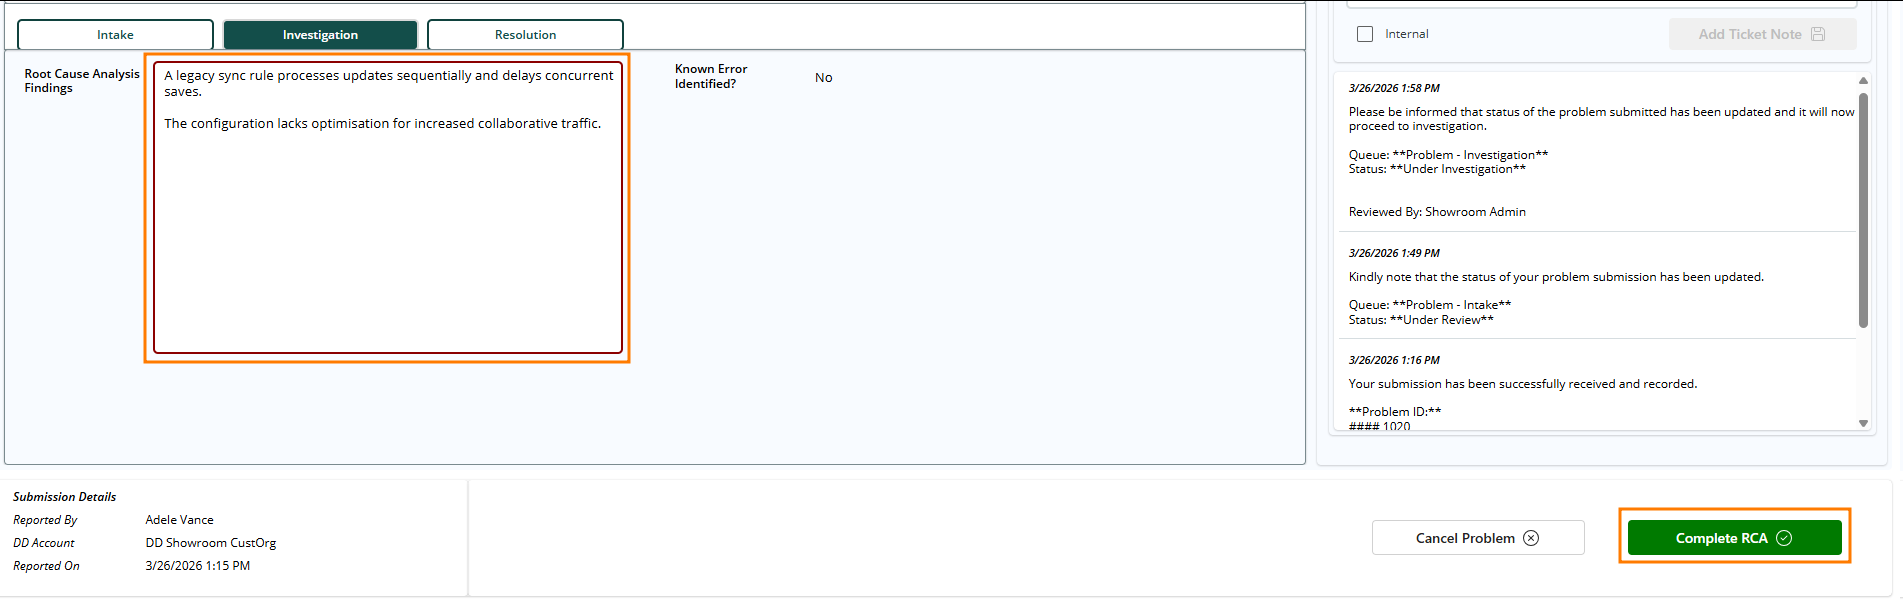
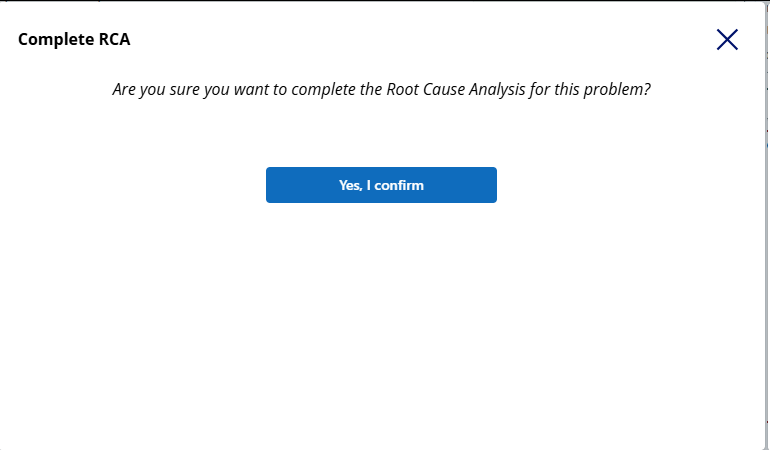
Once your investigation has begun, you can switch to the Investigation tab for your problem record and perform an RCA (root cause analysis). Once you've finished this, add any findings to the RCA text box and select Complete RCA to continue:
Select Yes, I confirm:
Once you've finished with the RCA, you can continue to the Known Error section below
Known Errors
Once a problem has been investigated and an RCA has been submitted, you can create a Known Error. Known errors are then used to track the underlying causes for your reported problems so you can address them via change requests. You can raise a known error either once you have finished an RCA, or immediately before investigation if a problem is reported for a known issue that has already been created.
If you do not have a known issue for a problem report, you'll have to go through the full investigation and RCA prior to creating a known issue. Known issues cannot be created without at least one problem report being created prior.
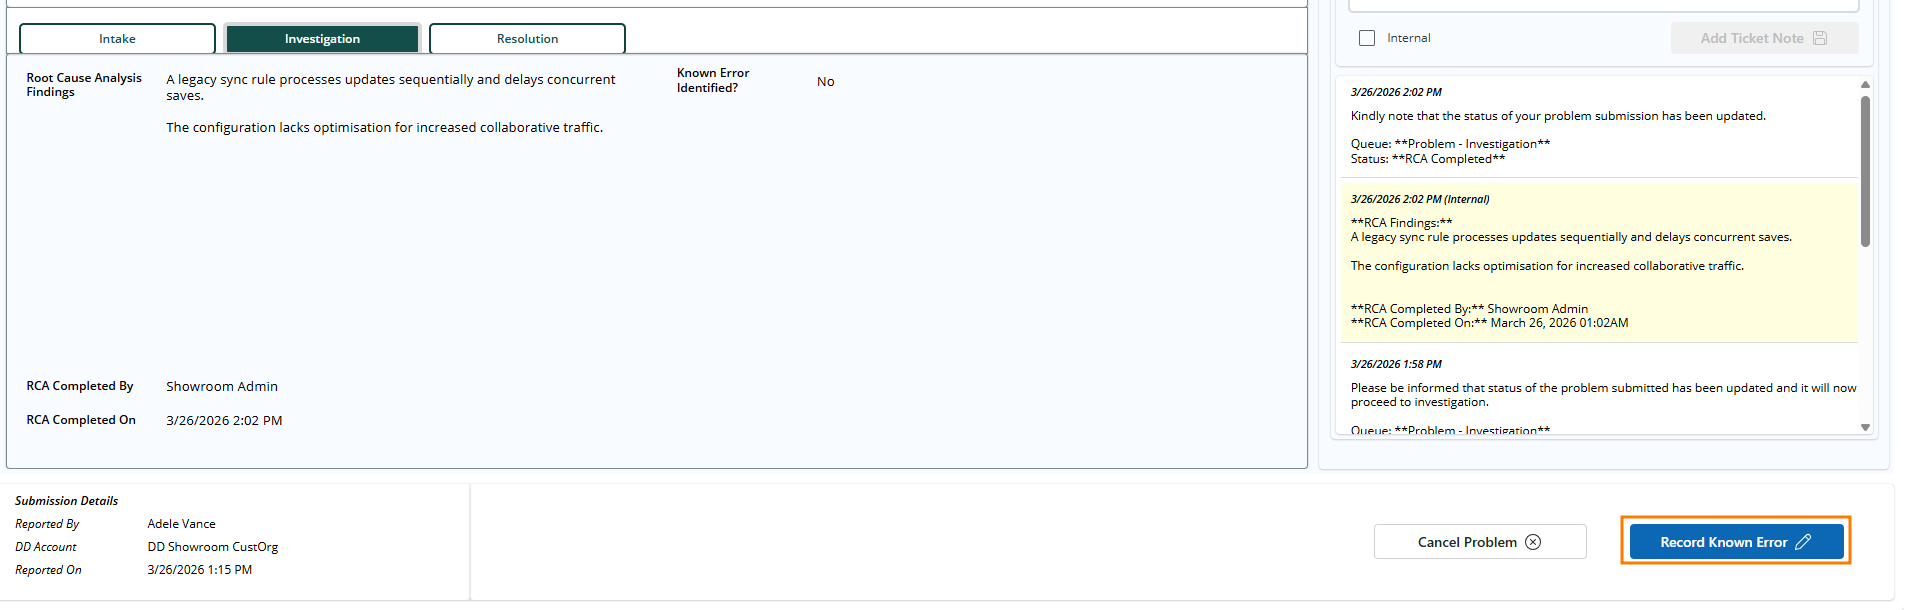
To attach a problem to a known error, you can either A) create a new known error if the underlying issue is not already a known one (after you've finished the RCA process) or B) attach your additional problems to an already created known error:
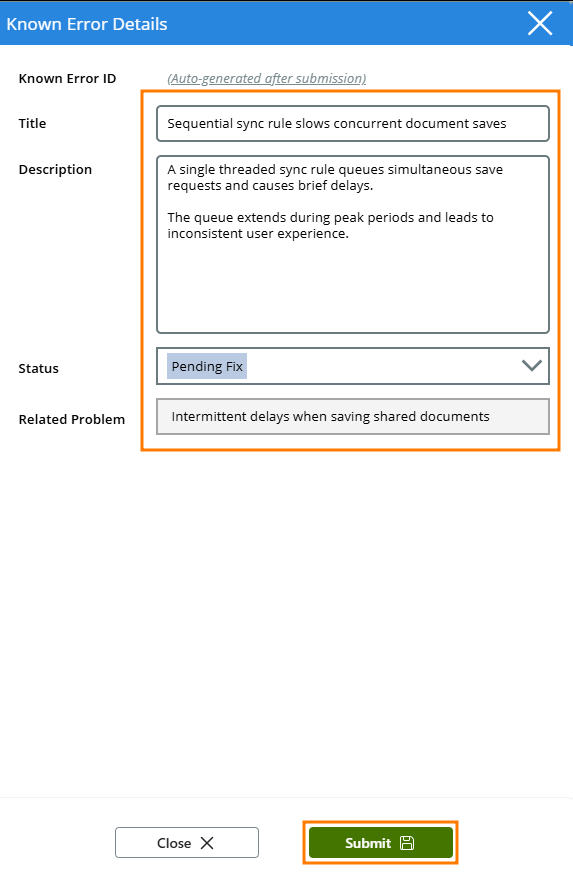
Once your RCA is done, and when ready, you can continue on to record a known error. Select Record Known Error:You can then fill in the details for your known Error and then select Submit:
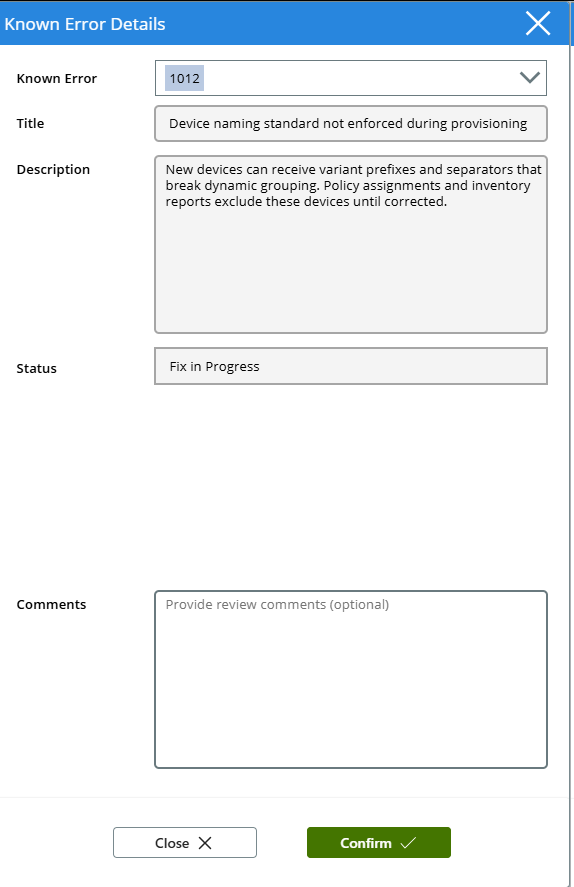
From the decision fork you're presented when a problem is under review, select "Known Error":You can then fill in the details and select Confirm:
When ready, you can start the process for actioning a fix for a known issue.
This goes hand in hand with the Change Management solution, so make sure you have this working fully!
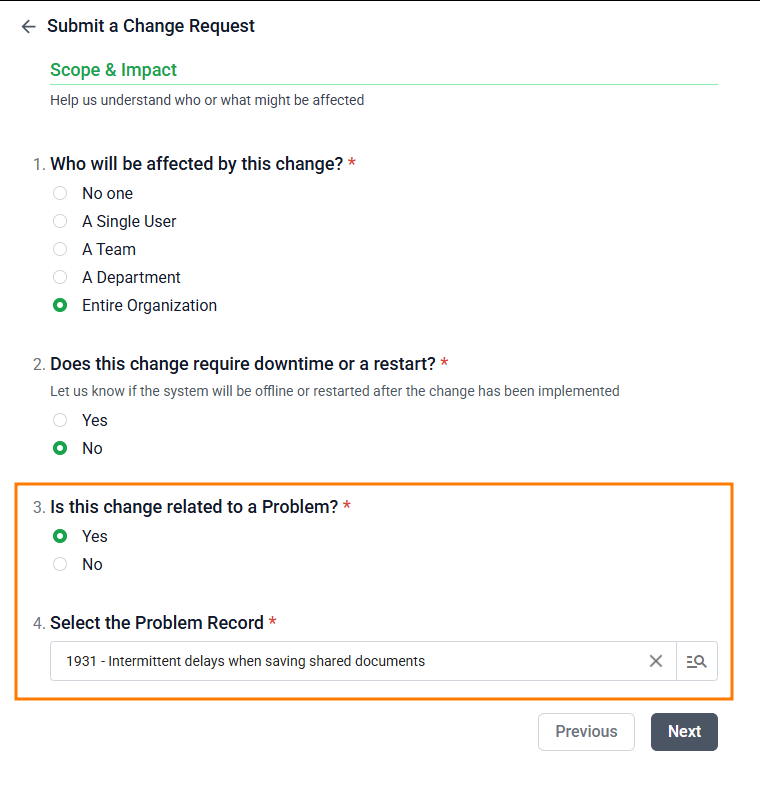
Navigate back to the Client Portal and raise a new Change Request. When it comes time to select whether you have a problem for this request, select Yes and then select the problem from the dynamic field.
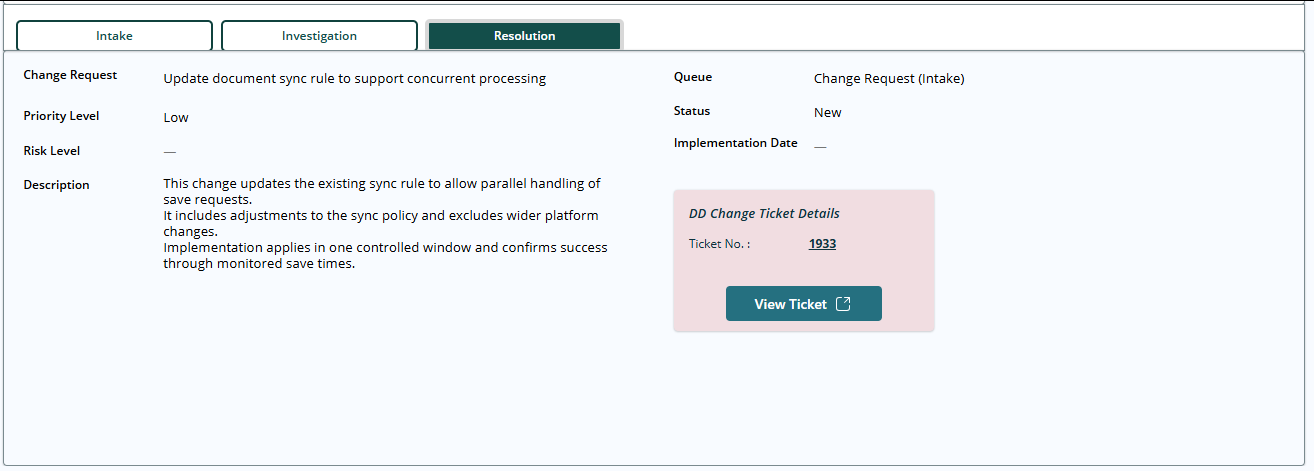
Once you've raised the change request, you can monitor the change request's status from the resolution tab:
This will be visible on all problem records that share the same underlying known error.
After this point, any further updates to the problem status are reliant on the change request you've submitted. Once the change request has been actioned, it will automatically close out the problem record in the problem management app.
Configuring Categories & Services
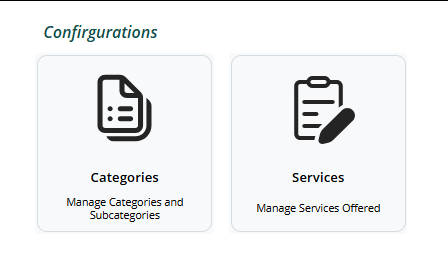
In addition to tracking your problems, you can configure the categories and services available for selection when submitting a problem. Both can be accessed from the main landing page:
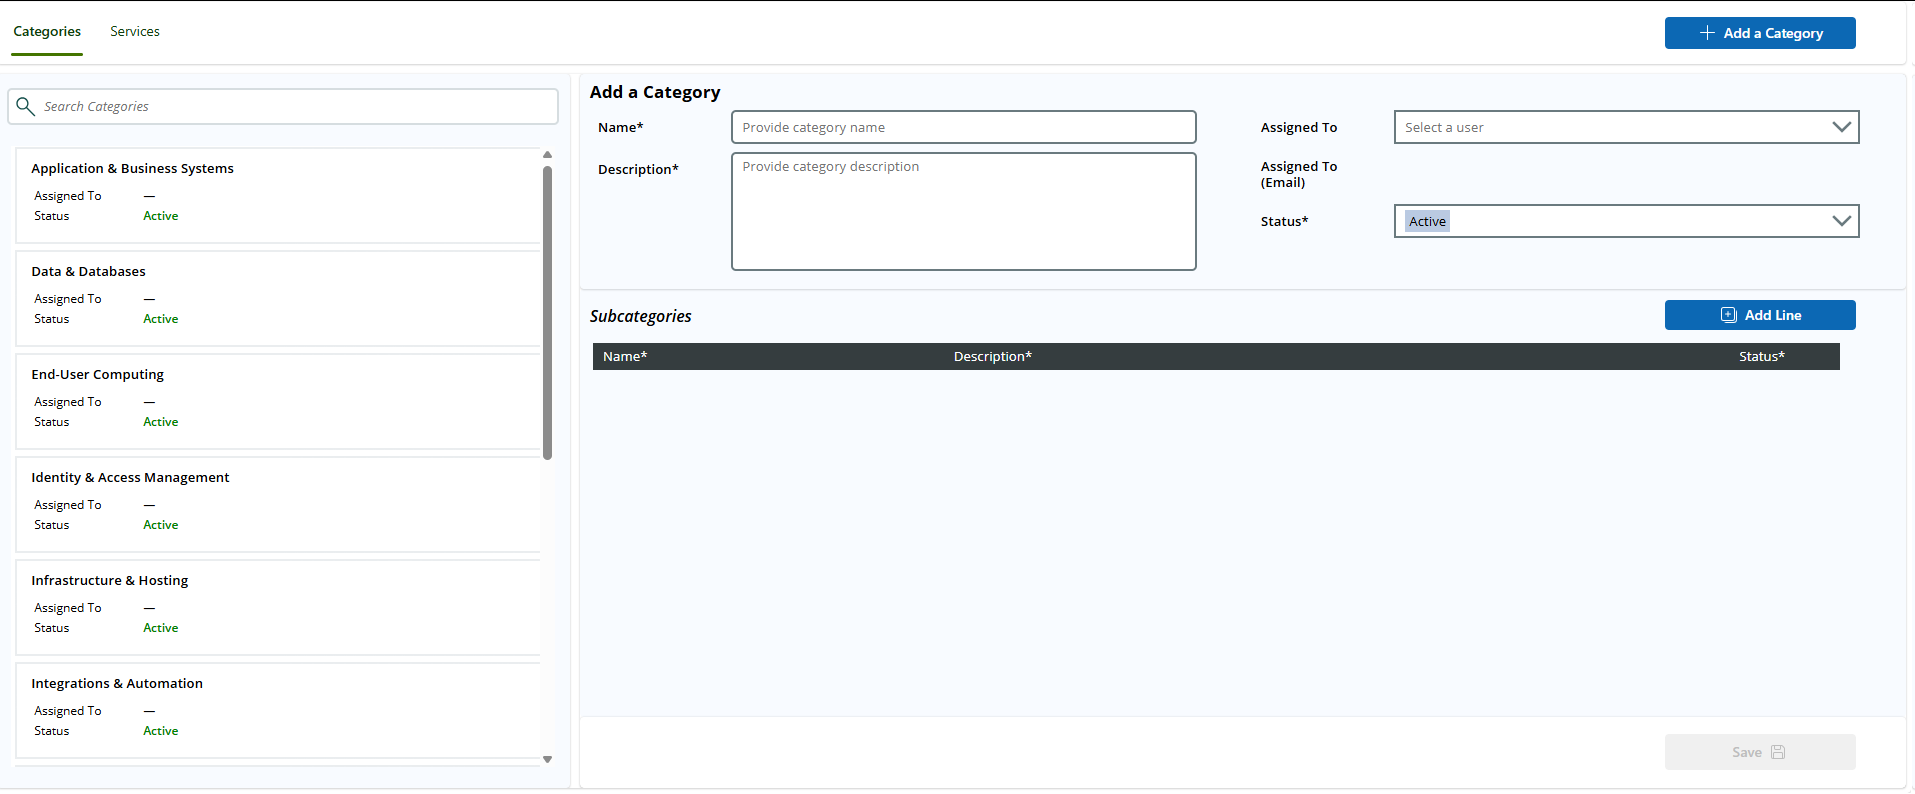
You can create new categories by providing a name, description, assignee, and status:
You can create new services by providing a name, description, and status:
 Updated
by Niamh Ferns
Updated
by Niamh Ferns


 This will be visible on all problem records that share the same underlying known error.After this point, any further updates to the problem status are reliant on the change request you've submitted. Once the change request has been actioned, it will automatically close out the problem record in the problem management app.